Should anyone have any experience and suggestions strengthening, reinforcing, and/or repairing weakened/torn and deformed fiber board for those shelves beneath the dash etc. I’d genuinely appreciate it.
Can’t think of anything really off the top of my head…
Thank you!
Hi Demian - To straighten them I made kind of a press out of plywood. It’s basically a rectangular piece of 3/4" ply on the bottom and then a piece of the same ply cut so that it fits into the shelf. Then I’d get the hard board wet, set it on the base board, put the shelf-shape board on and just drill and screw a couple 1-1/4" screws directly through the top board, into the shelf and then into the base board. Then leave them for a while.
Before you do any of this, remove the foam and vinyl edge rolls. If you don’t want to put holes in the shelf you can use clamps obviously. Mine were really bad on one of the cars so I had to recover too - the holes didn’t matter.
To reinforce you could contact cement another piece of hard-board under the shelf when they’re straight. Nobody would see that unless they got under there. There’s also a product that’s expanded PVC - comes in multiple colors (black) and thicknesses that works a treat for this kind of stuff too - Sintra is a brand name but there are others.
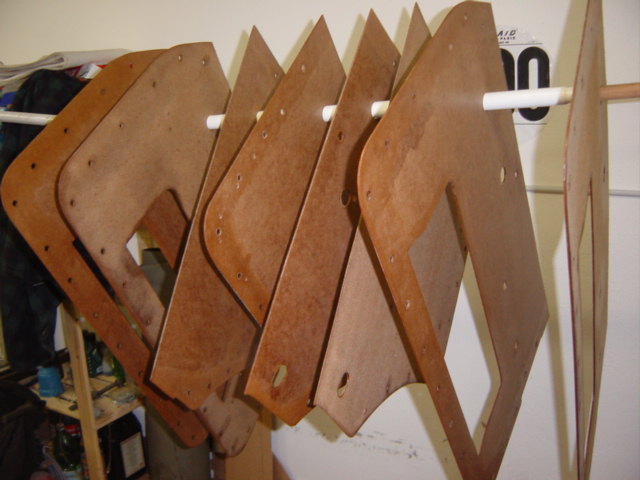
I often make new door cards out of Masonite. I rough cut two pieces to size and lay the rough faces together, then lay the original on top and clamp them together temporarily, then drill 4x locating holes using original locations on the original, then clamp all 3 together with bolts and large washers. Now the temporary clamps can come out and you can drill all the rest of the holes using the original as a template.
Next I trace the outline and any openings around/through the original, rectifying any damaged edges with a straightedge or compass. Then I take the datum bolts out, remove the original, and reassemble the new pieces with the bolts and washers, and cut the openings/edges with a jig or circular saw (A fence helps with straight edges).
Once they’re cut I take the bolts out, quickly sand off any fuzz, blow off, then coat them with polyurethane varnish - I start with 50/50 thinned, and keep adding straight varnish to make up the pot after I do each coat (I wait for longer than normal between coats to allow the thinners to evaporate) . Overthinning the finish ensures that it soaks deep into the material. After 4-5 coats and a week curing time the Masonite is impregnated with polyurethane and completely waterproof - you can final sand/bevel edges and it won’t expose unimpregnated core.
Do you mean the landscape felt? It’s an all synthetic felt, a bit like filter cloth, but a bit softer. The stuff I use is about 1.5mm thick, but you can add multiple layers if needed. It’s sold here as a permeable weed barrier for under patios and flagstones and such.