The IRS is out and I am wanting to replace the seal on the fwd part of the pumpkin. The original intent was to “refresh” easy stuff, and inspect for additional items. I already have all four dampers and springs replaced. Sway bar bushings and link bushings. Also replacing all other rubber sub frame mounts and trailing arm bushings bushings.
I have heard it is important NOT to over tighten the nut (which is kinda obvious anyway) that holds the flange on because it could “crush” the spacer in between the inner and outer bearings, if it has that type of spacer. I have also heard that there is a solid type of spacer between those bearings. The exploded diagram on the SNG website does not show this spacer…at least I could not ID it.
My gameplay would first be to check the manual for instructions of course, and then mark the positioning of the nut on the shaft as well as the flange. Count the “number” of rotations as the nut comes off. I assume the flange will then come off, perhaps with a bit of coaxing from a puller. Then the seals look to be behind that flange.
Any tips on replacing those seals appreciated; tricks, short cuts, Diff Oil preferences etc etc.
Jaguar fitted several types of diff during the lifetime of the E-Type. They are often referred to as the “1st type”, “2nd type”, and “3rd type”. Early Series 2 cars were fitted with the “2nd type”, and later Series 2s (and Series 3s) were fitted with the “3rd type”. The 3rd type, has the crush sleeve between the bearings on the pinion shaft. The exploded diagram on the SNG web site for the “3rd type” does show the sleeve, but it does not have an item number - maybe they don’t stock it. It is between items #13 and #14 in their diagram. XKs does stock it - P/N 13-12456. Your post describes pretty accurately the procedure for changing the pinion seal without damaging the crush sleeve. There are a few photos in the IRS section of my web site that may help a little, though I note that it doesn’t show any of the pinion oil seal and it’s removal, though it does show how I marked the parts to ensure the pinion bearings were returned to their original setup. https://sites.google.com/site/1969etypephotos/
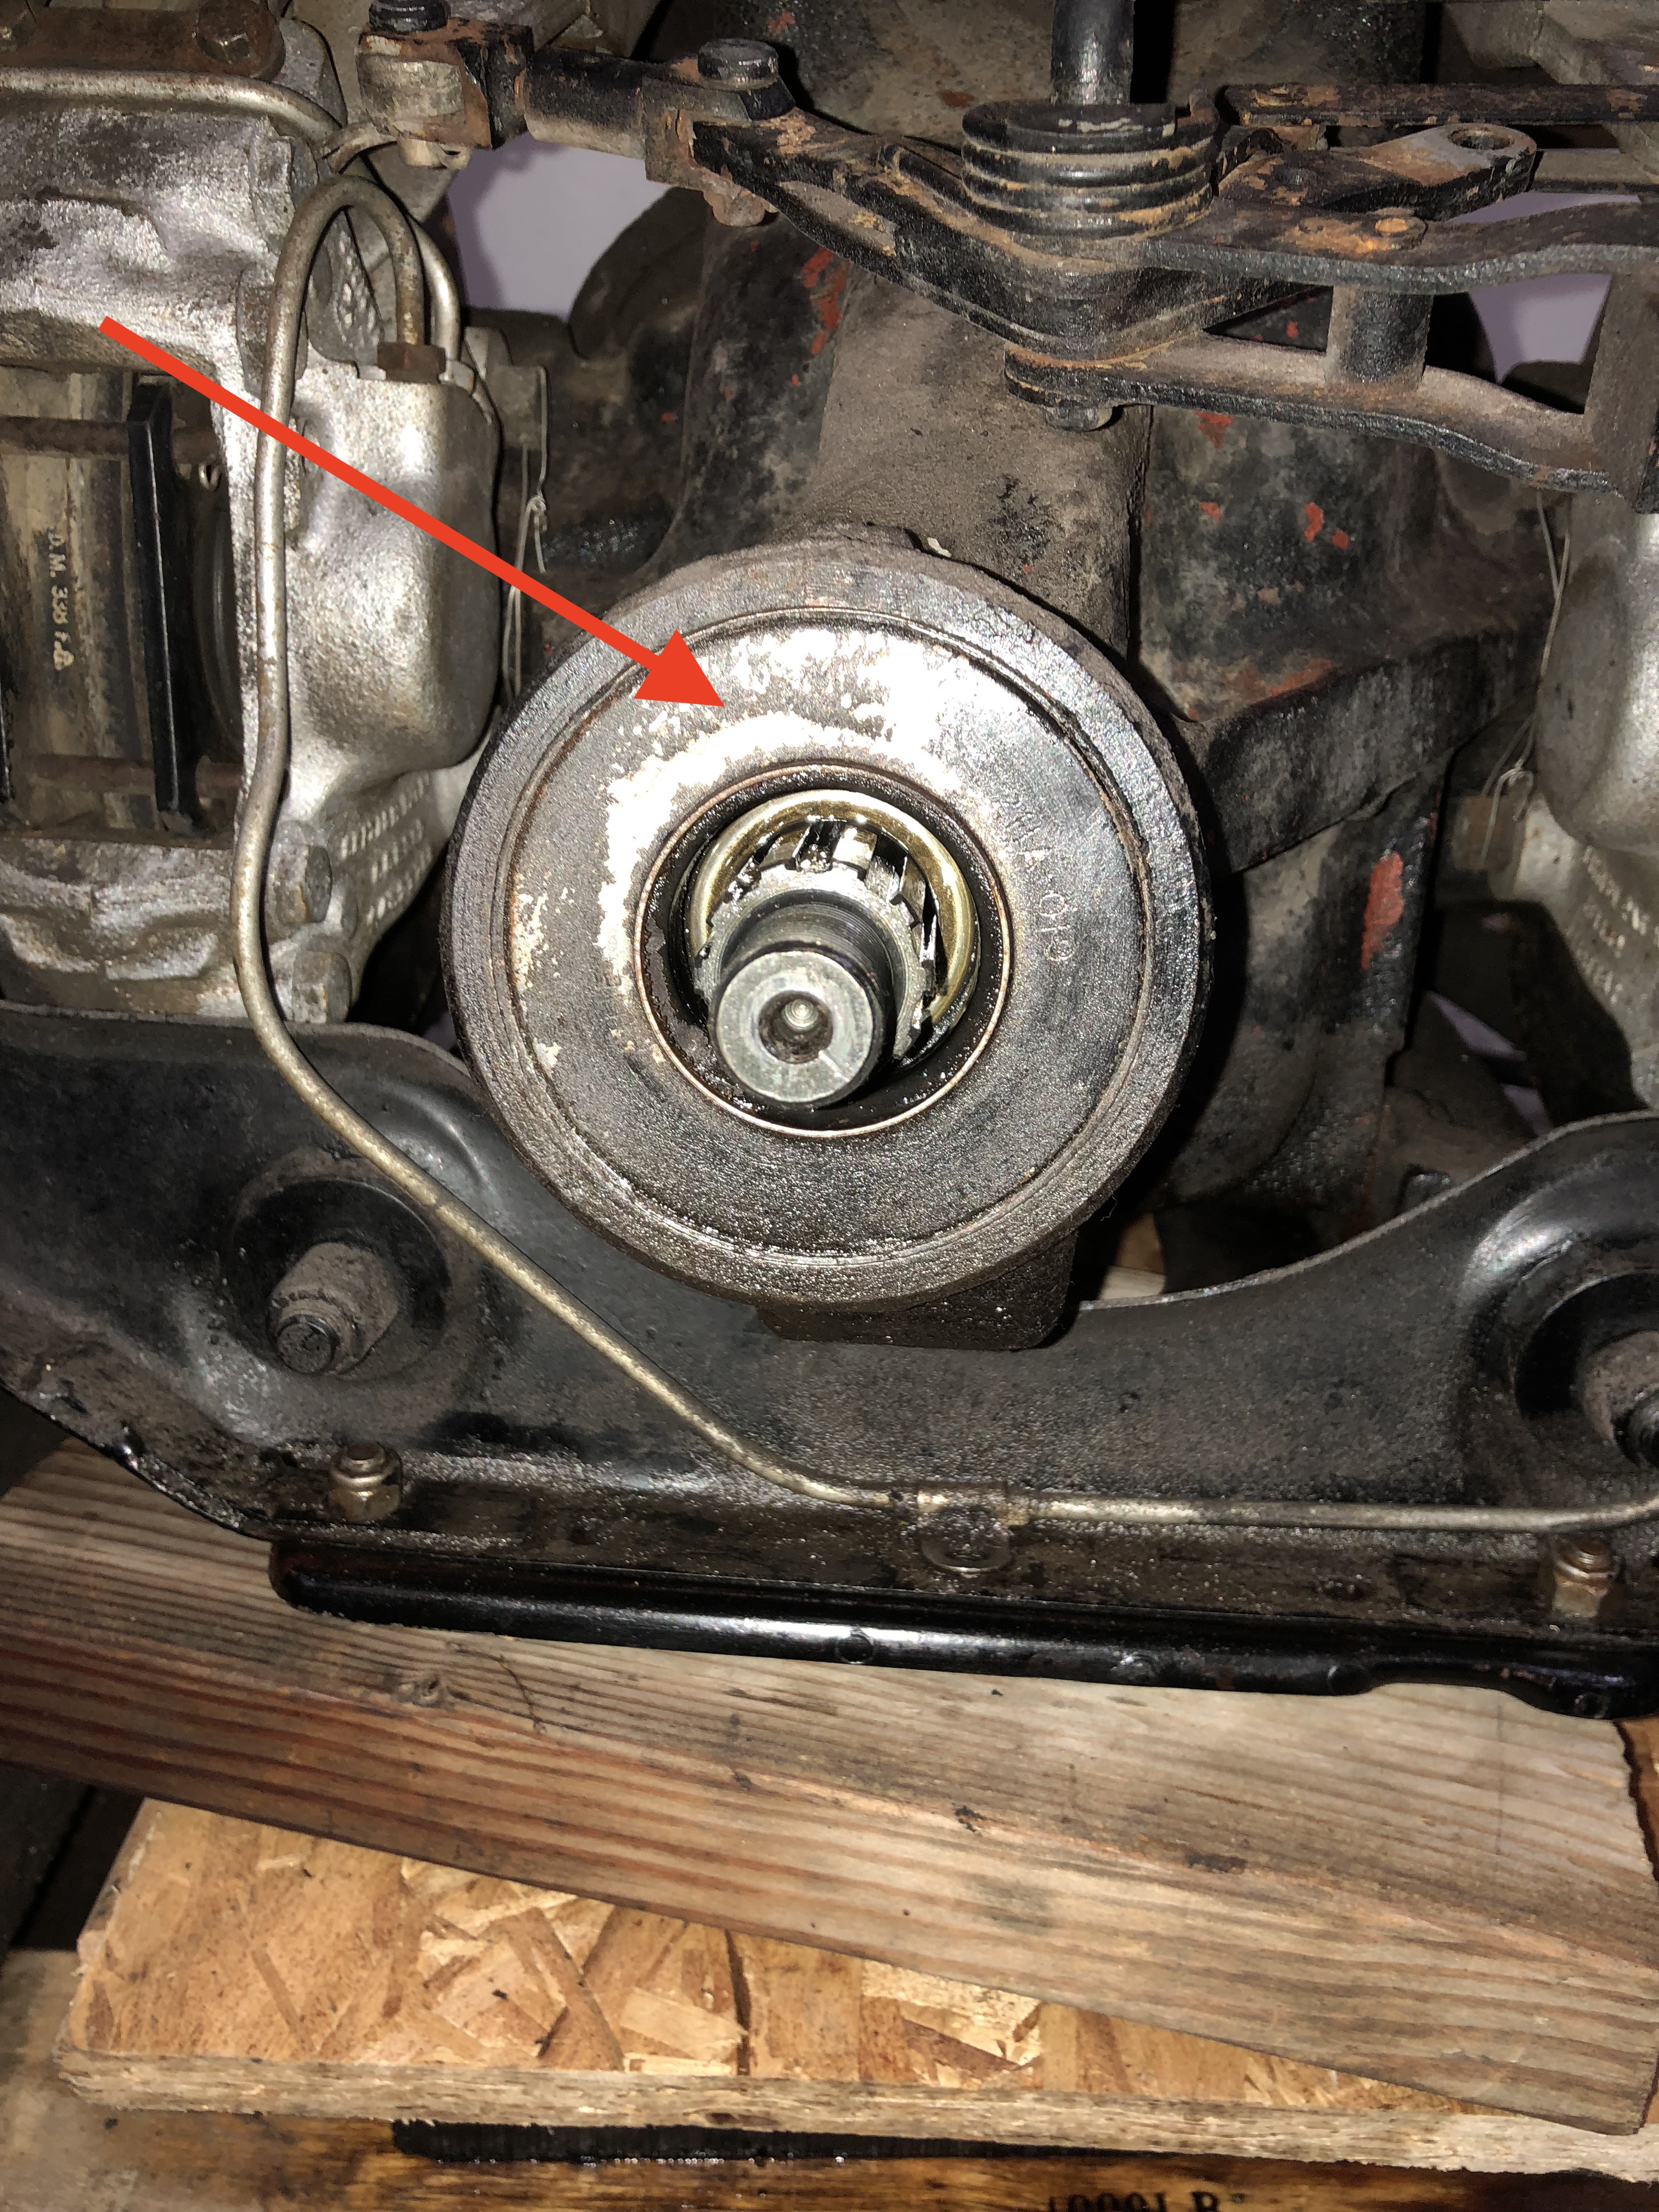
I have marked and removed the nut, washer, and the companion flange to the pinion shaft. Now I am stumped on how to remove what appears to be a flat metal oil sling? plate that is in “hiding” the oil seal. Please see that attached pics. I attempted to remove by gently “prying” it out, then “pulling” it out using a home made “hook” type of tool. No success. Is it "pressed in? Is this a piece that is "automatically replaced because you can’t get it out easily?
Also looking at the SNG parts diagram for all types of diffs, it is obvious to me that I am not understanding how things come apart or go back together. This “ten minute job” has turned in to the longest ten minutes of my life!!
Help! How do I get that outer metal piece off? Looks to me like the seal goes directly behind that.
How much “movement” should there be in the pinion shaft as you hold it from the “business” end? I can feel a very small amount of movement as I wiggle it back and forth with the companion flange off? I would guess that there may be a very small amount present with it off, which is what I have.
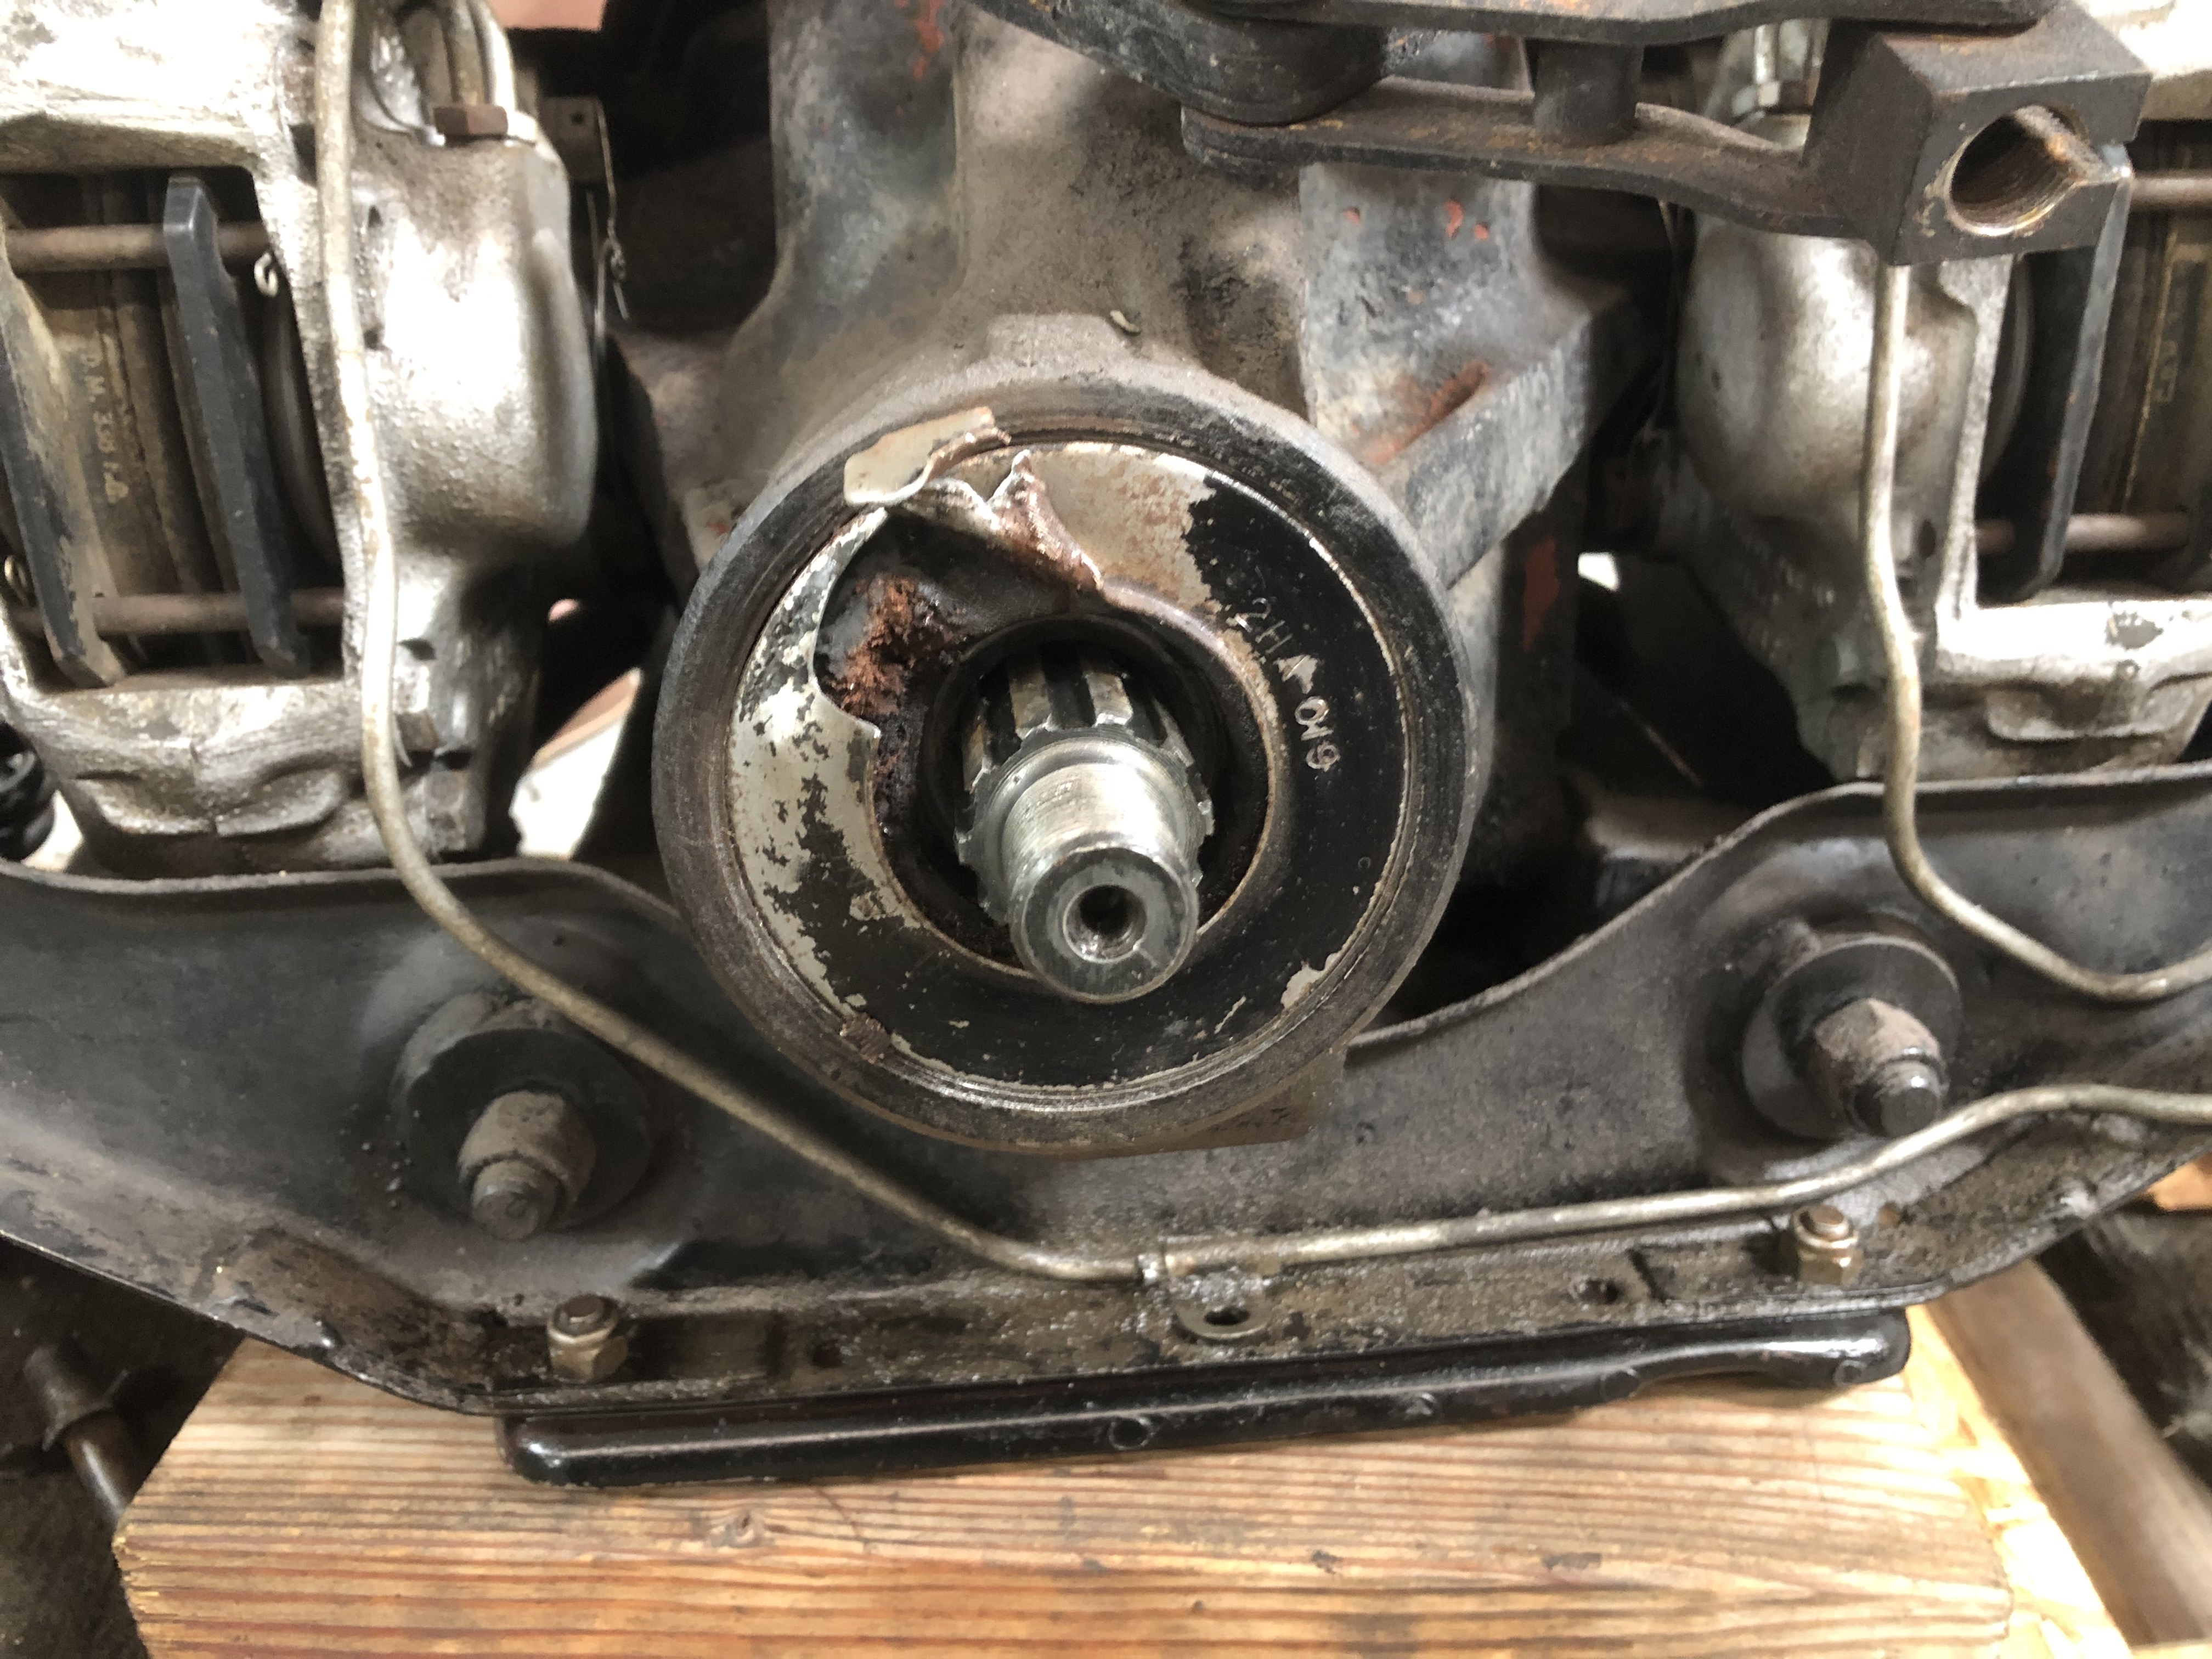
That looks like the oil seal itself, although I’ve not seen one quite like it before, from working on a few diff types 2 and 3. Any oil sling will be behind the seal, not in front. I got my last seal out by using an awl, and punched a couple of small holes each side, then screwed a couple of sheet metal screws into the holes and used those to pry the seal out. Check your flange seal face carefully to ensure it’s not worn - if it is consider installing a speedy sleeve - available from any auto jobber. I use these as a matter of practice now, just having had to fix a leak in what appeared to be an ok flange.
P.S. The movement in the pinon at this stage is meaningless as you will “unseat” the front bearing enough to have random free play.
As Terry says, that’s the oil seal, not the slinger. To get the oil seal out you will have to destroy it, so make sure you have the replacement in hand. I think I just punched a couple of holes in it with a flat-blade screwdriver, and levered it out. The oil slinger will be behind it.
Thanks Guys. I have the new one in hand and of course it looks much different than the original. I really appreciate this forum and the patience you all have for my questions!!
Hopefully when I get home tomorrow I can sneak away for “10 mins” to the shop and wrestle the old one out and install the new one!! Update to follow!
New seal installed. It was a very tight fit. I used the pinion shaft nut and washer to slowly press it in. The seal came from SNG an appeared “sturdy” enough to not deform when I used this method to install. The nut was re-installed to just shy of “ten revolutions”, which was exactly how many turns it took to get it off.
The oil for the diff needs to have a limited-slip additive (assuming you have the limited slip diff). Some oils already contain it. I use Redline75W90. The archives will contain other suggestions nodoubt. Do NOT use Redline 75W90NS in the diff (it has no LSD additive).
If you have a dial indicator, or can borrow one, it would be good to check for any end play on the pinion. You clamp the dial indicator to the case and indicate the end of the shaft. Then pry and push on the pinion. Any movement (like .001" or above) indicates a lack of bearing preload. Putting the nut back in the same place may work, but the better way is to watch the free play diminish as you tighten the nut. I went for none and then tightened the nut a couple degrees more, maybe 5 degrees. You can’t set used bearings by the rotational torque method as it will be too much preload. You also can’t do it with the ring gear installed. The only way is with an indicator.