Hi I have found two new rubber gaiters that stop debris getting in the rear of the front spring supports where they are filled with Grease, I have had these for some time however and just realised what they are for, the old ones are shot, can somebody tell me how to go about installing them, hopefully not a spring out job!
Yes, spring out. I have to do that to mine sometime this year along with the list of stuff. The trunnion boxes are riveted to the chassis, not bolted unfortunately. This is why later owners avoided replacing them. The Lyons gang probably thought that they would last ten years and the car would be scrapped.
I have an idea but don’t know if it would work easily until I dive into it, and I think this replicates the method on the assembly line. Support the chassis behind the springs, place two trolley jacks under the axle, remove the wheels, disconnect the brake rod, remove the two front spring pins…then you are ready to go - if I haven’t overlooked anything. Lower the axle out of the dumb irons and draw the axle assembly forward enough to slide the gaiters on, then reverse the procedure. The care and safety bit is to have blocks under the springs fore and aft of the axle so that it won’t rotate far or tip.
This avoids the issue of removing and replacing each spring individually. There will be a bit of brute force and ignorance required as the assembly is probably up near eighty plus kgs.
It is an ideal opportunity to remove the trunnion rollers and the side shims, etc. and clean them up and correct any misfortune. Generously pack some grease in before reassembly and check that grease will go through with future greasing.
Thanks Pete
That sounds like a good plan, however I am on my own, so probably not an option for me.
I think I will look at the possibility of splitting these Gaiters horizontally and gluing them back together once in, there used to be track rod end and drive shaft boots that were made split this way back in the day and once on you glued them together thus minimising the work ( ministry of Transport yearly checks on your vehicle would issue a test fail if you had a gaiter split or damaged in the UK) I realise this is not addressing any wear or damage in the spring housing so I will have to make a decision based on what I find in there,
I have replaced axles weighing 600KG on steel Mafi trailers by myself plenty of times using intuitive means and methods so I could give it a go if needs be
thanks for the Input
Mike
I see Worcester Classic Spares lists them under Suspension parts.
S4 1348 Gaiter for Rear Bracket on Front Road Spring L15.00
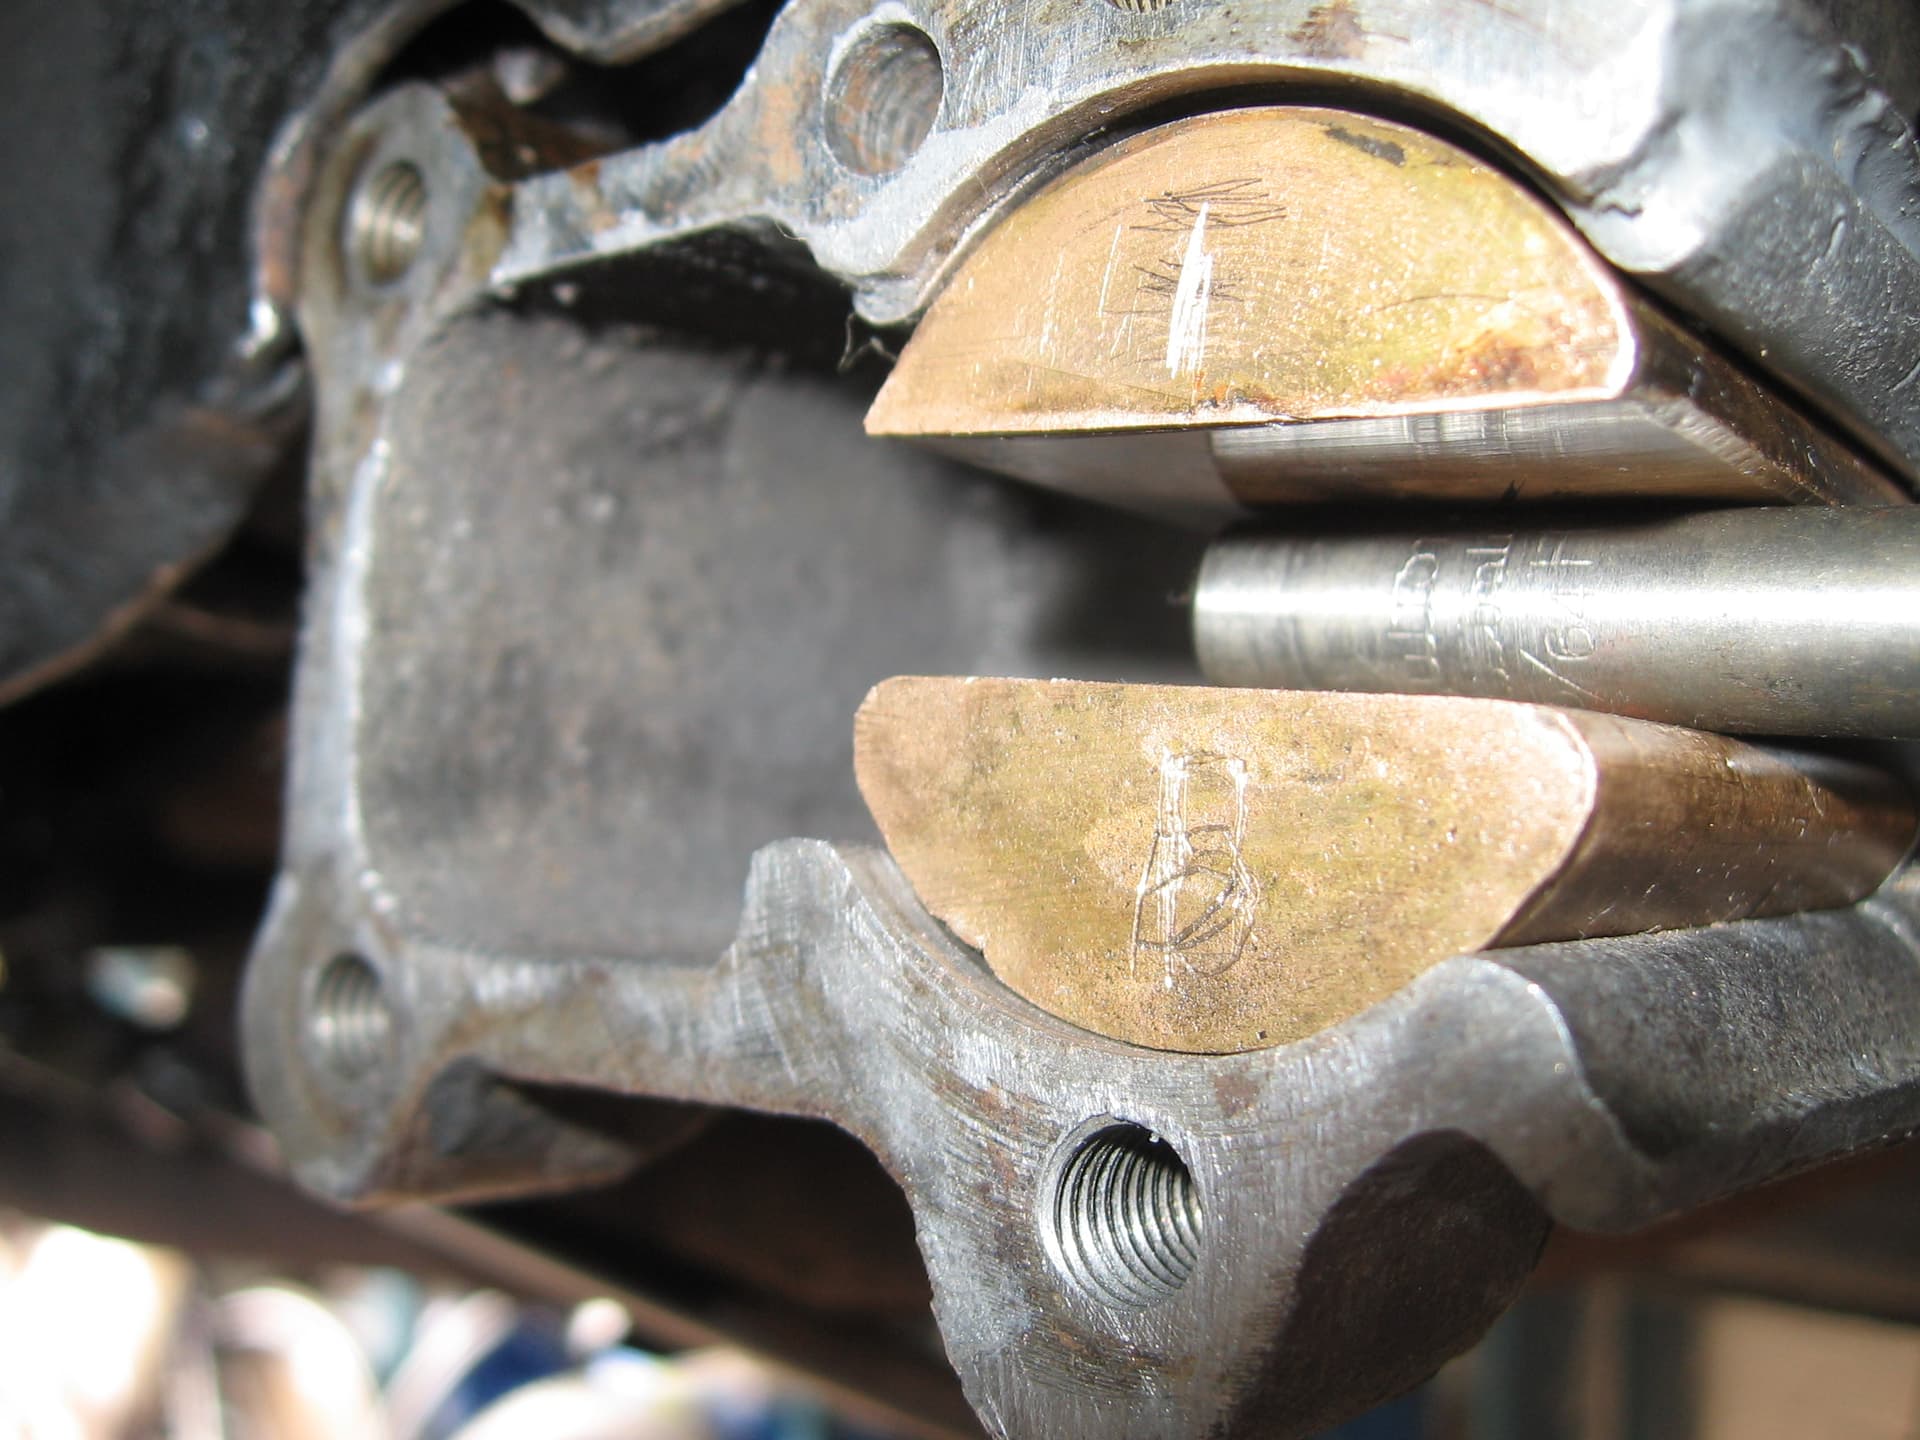
Here is one on my 1937 MG.
BTW there is a half-round bronze bearing in there that tries to slide out if you let the axle dangle from the springs. Mine are probably worn. I don’t see them in Worcester. I wonder who sells them?
Yes, cutting them and rejoining is a simple option, especially with the magic glue options. I remember my old VW Kombi swing axles had rubber dust boots at the gearbox end and replacements were a split type stitched together with screws in the horizontal plane.
The MG trunnion bushes are a simple item made from 1" bronze stock bar with milled slots to match the leaf thickness and are in two halves. They are called ‘rollers’.
The Jaguar ones are a part circle top and bottom and full spring width. They are not too difficult to have milled up by a good machine shop if you can get the round stock. They are called colloquially ‘half moons’, albeit they are more like a third.
The top bush wears extensively because it takes the weight of the car. In turn, the upper bore of the housing and the top face of the spring also wear. If allowed to wear without replacement, the spring starts to wear the flange at the top of the entry slot. I’d heard that owners often reversed the bushes to have the relatively unworn one earn its keep, and let the flogged one rest on the bottom and I would certainly do this in absence of replacements.
We MG afficianados have numerous suppliers of these and a choice of thicknesses but I’m not aware of any source of ‘half moons’ for the Jags. I purchased a set from Wally Vorlaufer in Johannesburg about a decade ago, but he has since closed the business and retired.
I will examine the bushes in the next few days and along with fitting the gaiters, and will report back, I have purchased some rubber glue used for puncture repairs to see if that will hold them together, I will do a trail beforehand on some rubber hanging around the workshop
I have used a 3M product named 5200 to join rubber mounts in the past. It comes in various colors with black being one of them. If you were to rough up the joining surfaces, clean real well with alcohol, the product will join the edges permanently.
Mike
Please be aware that the inside of the trunnion housing where it fits on the chassis has been known on many occasions to to be “worn through” to the chassis.
It would be a good time to check this if the rubber boots have to be replaced.
It can be quite a job - I know, both our MK4’s have been done.
Regards
David
Without taking mine apart and seeing it, my first thought would be to make half-round inserts out of steel pipe and weld them in there. The pipe ID would have to be close to the OD of the brass pieces.
I ordered gaiters from Worcester a couple of weeks ago, but have not heard from them, and they have not charged my credit card. Does anyone know, are they still operating?
Dear All
Repairs can be made if caught early.
Rob is correct, although welding would be difficult as the housing is cast iron.
Alternative is to manufacture a metal insert ( 1.5 mm stainless steel pipe or sheet preferred) and cement in with high quality epoxy E-Metal / JB Weld to minimise any space between the insert and the housing (thorough cleaning and degreasing essential). Also - don’t forget to put in the holes in the insert for the grease before fitting the insert.
New brass pieces and a clean-up of the springs ensures a good result.
If the wear goes through the housing and into the chassis, weakens the chassis at that point and is a major job to rectify the chassis after removing the riveted housing.
Regards
David
I have now had the chance to open the front spring cover plates and found everything in very good condition, however one of the bronze half rounds had slipped away from its housing probably due to jacking the car up on the front axle and road spring, whereby the spring has no weight on it causing the end of the spring in the housing to lift, something to watch out for !
I levered the spring down so the half round could be put back to where it should be
found out there are composite metal gaskets for the cover plates also
You are doing something I need to do sometime so I’ll follow your story with interest.
Just a few details that I checked in the spares manual which details all the parts.
The steel gasket you mentioned is actually a shim. A conventional gasket is not necessary. The reason this is a shim with a circular hole is because there should be a washer on each side of the assembly, probably brass/bronze. It is called a ‘rubbing plate’ but acts as a side bearing.
When you corner hard, the springs want to move into the sides of the housing. These plates, or discs, or washers, are there to take the wear and not the housing or cover. They will be relatively thin and you can check by measuring the depth to the back of the housing after you remove the bronze trunnion block, then measure the block - (which should equal the spring leaf or be a fraction wider). The difference, when halved will tell you what the nominal thickness of each side plate should be.
When all parts are installed, the outer washer might be fractionally proud of the housing and this amount is the thickness of shim required, plus a bit. The end result should be that the assembly should not be tight, to allow the spring and blocks to slide and roll freely.
Well, I took mine apart to check their condition. Glad I did. One lower bearing was slid back into the rear chamber and damaged by the end of the spring hitting it. On the other side the top bearing was almost ready to slide out forwards, though it would only do that if the weight was off the spring.
I see the housing is attached to the frame by rivets. So I guess if you wanted to repair them off the car you could grind off the rivet heads. Then figure out some way to reattach them later. Perhaps nuts welded into the frame and use regular hex bolts.
Here are some dimensions in case someone wants to make the parts.
round steel side shim OD 1.487" - 1.490", thickness .128" - .133", inboard edge chamfered 45 deg x .100"
steel cover shim .008" thick shaped like the cover with holes for the bolts, grease fitting and side shim disc
bronze bearings radius about .75" , length 1.975" - 1.980"
height probably subtract spring leaf thickness from the radius (.75" - .160" = .590")
The heights on my four varied:
.465"
.491"
.560"
.590"
I will probably make new ones, unless someone knows a source.
McMaster-Carr has 15 different bronzes in 1.5" diameter round stock, various Rockwell hardnesses and yield strengths, 10 of which have good machinability.
I wonder which they used, or failing that, which would be best.