Looking for some information about the configuration of the inside, center, trim piece for my XK120FHC windshield.
This is an early car, 1952, which has a windshield with the three piece trim set on the outside, and a five piece trim set on the inside. I’ve got everything but the center piece on the inside. I bought one from Moss and just received it, but no way can what they sent me be right. What I got was just a 5/8" by 14" piece of 16 ga aluminum.(And cost $54). Pretty sure this is not what is suppose to go there, but they can’t tell me anything. I’m pretty sure I can build one if I know what it looks like. Dimensions would be nice, but I can probably do with a good picture of what the piece looks like.
Interestingly enough just now I am making up one of the exterior pieces for my 52 FHC, just ordered the brass from McMaster. The one on my car was overtightened and bent. It is made from brass bar stock 5/16" high by 1/4" wide and 15 3/4" long.
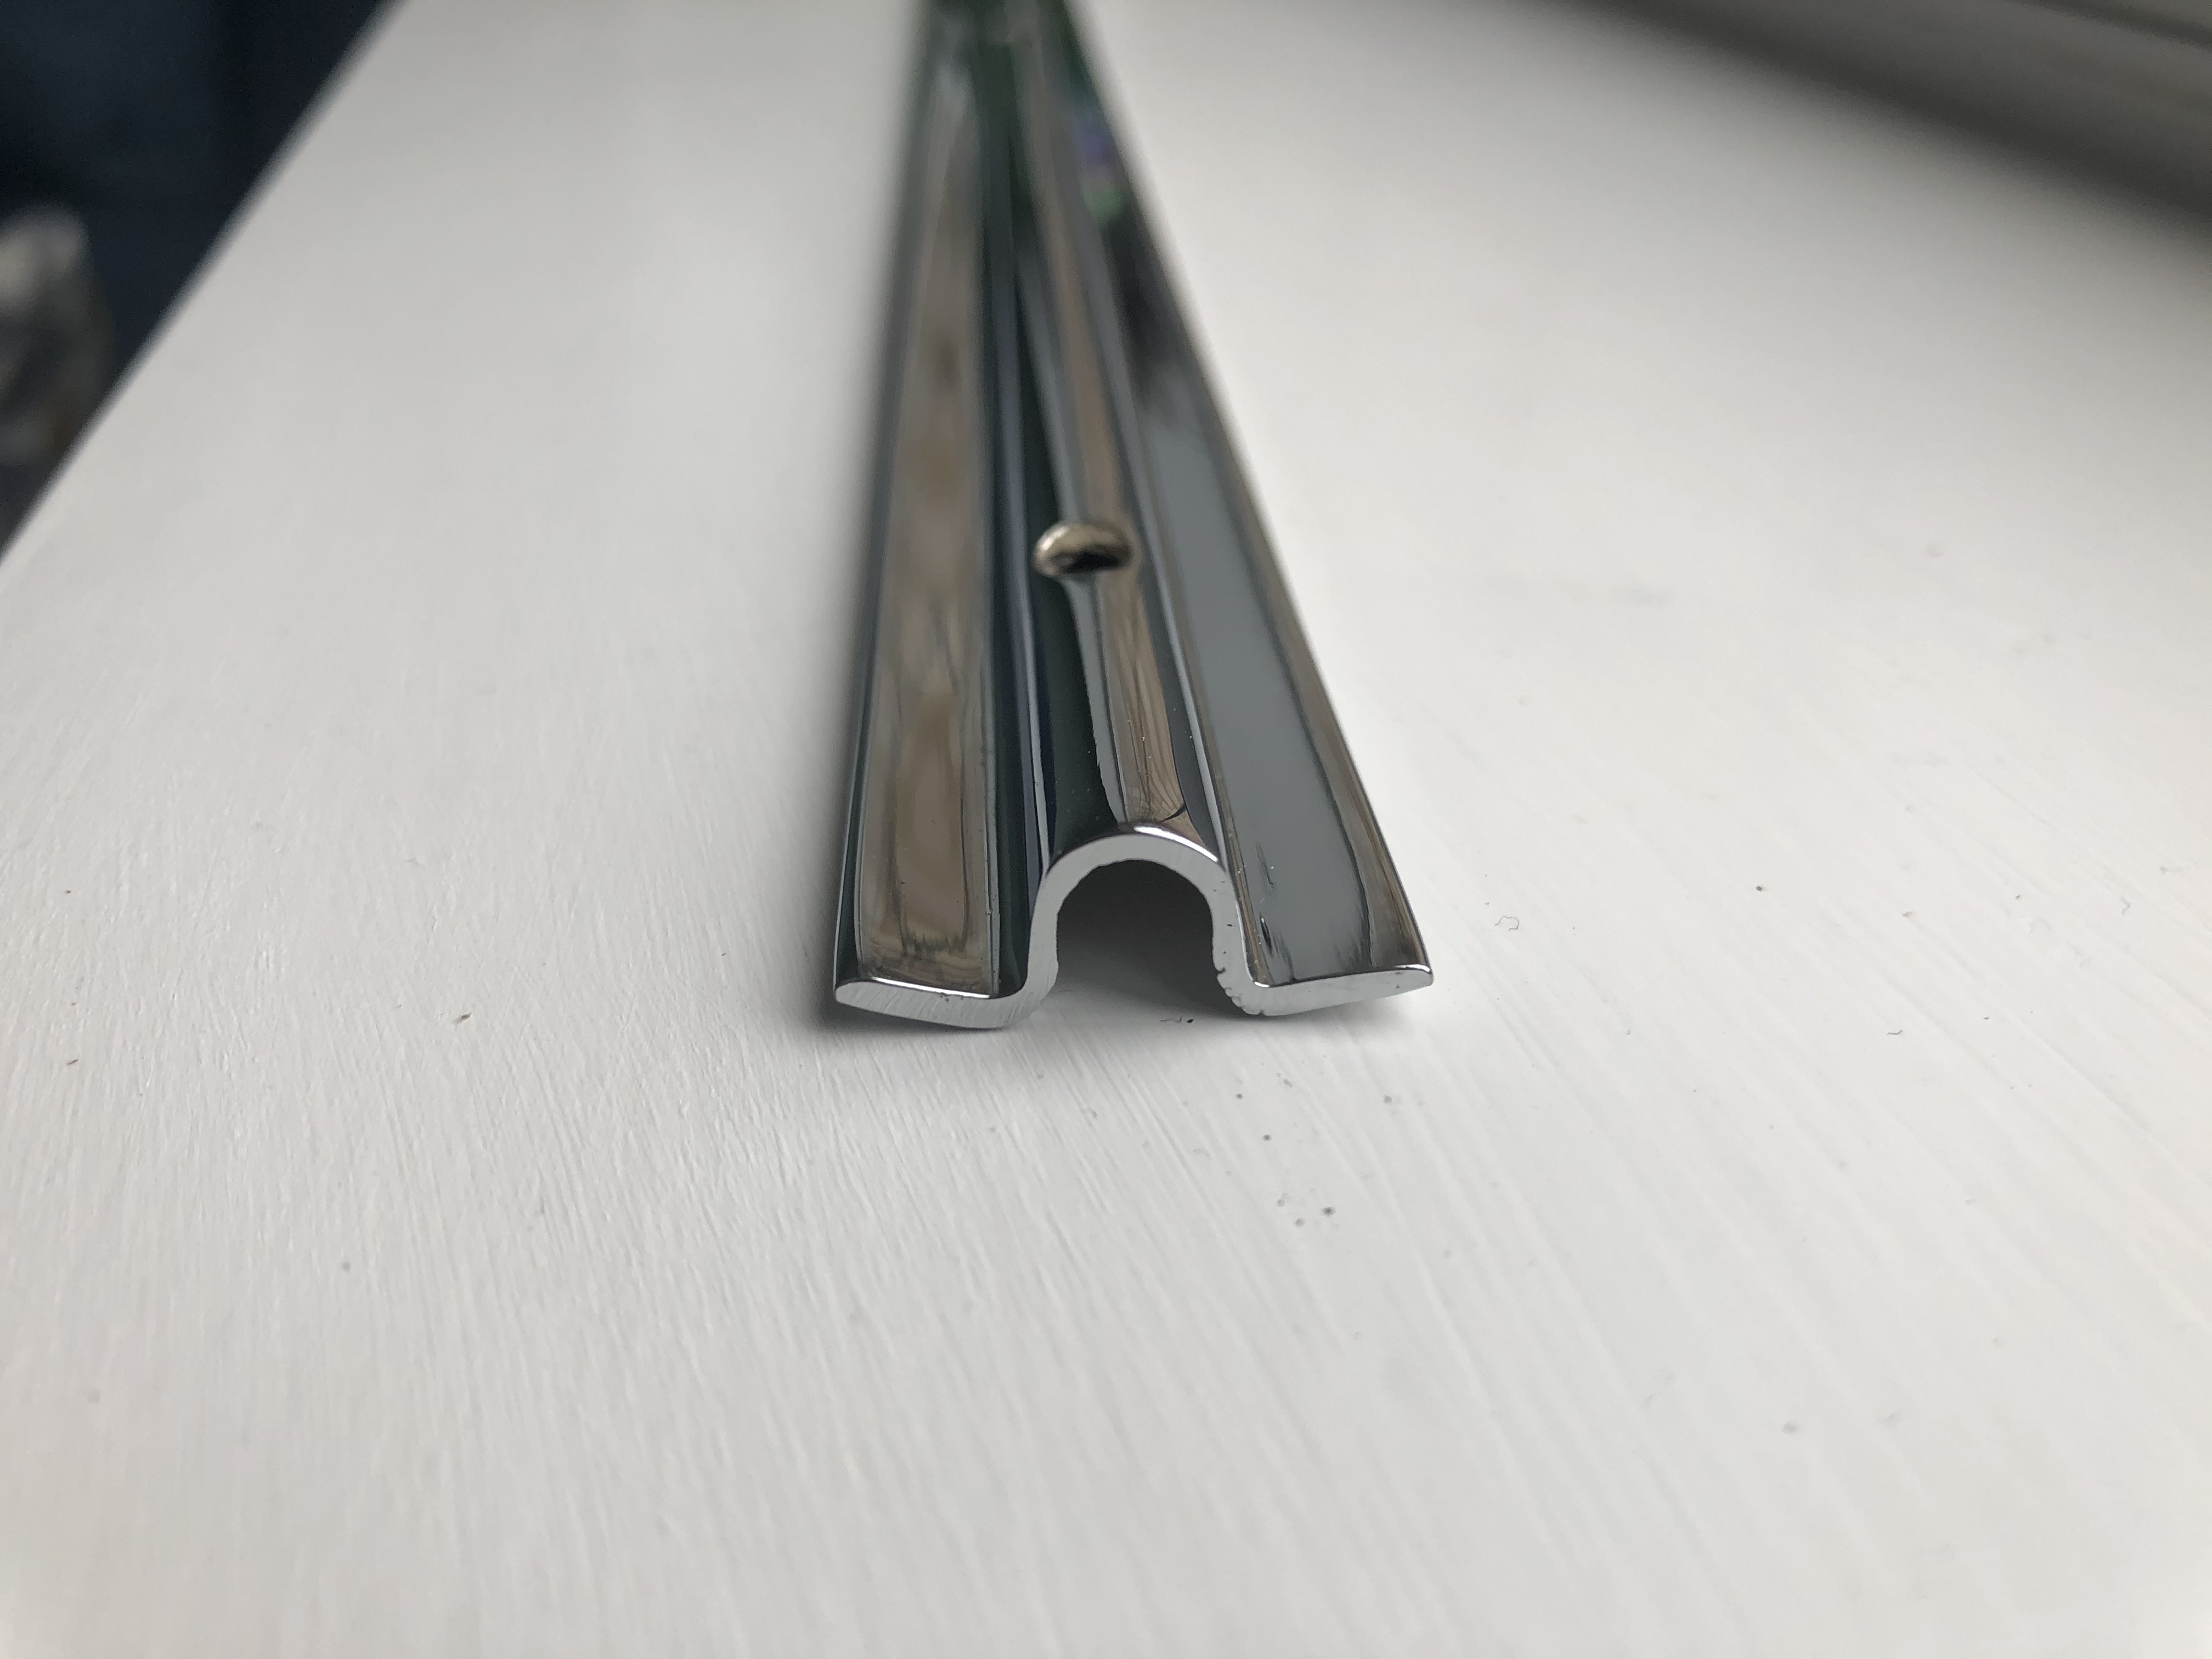
The inside steel piece is omega shaped with two long flats and closes up the space between the windscreen glasses. That will be a little more challenging to replicate as mine is being chromed right now so not available to measure. I should have it back in a couple weeks if nobody else comes up with the details.
Thanks for the info. I think I should be able to fabricate a replacement. If you could, when you get the the piece back from chrome, could you give me the dimensions of the piece? Primarily the overall width and the radius of the center rib.
Hi Jim, this is from my car (Feb 1952 FHC), nicely rechromed waiting to go back together. It is 403mm long, width 25mm. The radius of the centre rib is 8.8mm external and 6.0mm internal (a little tolerance is needed here as due to the shape it isn’t that easy to measure), wall width 1.4mm.
Hopefully the photo illustrates that the “flat” pieces aren’t actually flat but match the angle of the windscreens each side.
The 3 mounting holes match up to the slots in the central pillar, which I assume you have. If not I can provide the measurements.
Thanks so much… That’s exactly what I need. I was just on the phone with Moss describing what the part looked like to make sure they didn’t have it. Would really prefer to pay for the thing than spend the time it’s going to take to make one, but doesn’t look like they do. My luck generally is that they’ll find one just about the time I get it built.
I’ve created the tooling to form this piece and was wondering if it would be possible to send you a sample to check against the original you have. I see you’re in England so it might take a few days, but I’d like to verify what I have is close.
If you’re agreeable, you can post your information here, or contact me at jearsley@aol.com.
I have my dash cover off for another reason, and decided to take out this trim piece to measure it.
overall length 15-27/32"
width 1-3/64"
height 5/16"
width of hump 23/64"
material thickness .063"
hole diameter 11/64"
hole spacing 1-1/8" from end, 6-3/4", 6-3/4", 1-1/4" from other end
holes are a little bit oval like they may have been filed out to fit, and are countersunk for a slotted oval head screw
Mine is slightly different from David’s in that it is flat.
Thanks for the details. Makes me pretty confident in the part I’ve fabricated.
Is interesting that yours is flat. It would look like David’s would fit the windshield a little better as there is an angle between them, but you’d probably have to have a really good eye to ever notice it. It also looks like his has some slight dimensional differences also, but fairly minor.
Possibly they improved it after mine was made in steel, as I believe David’s and Tom’s cars are later, and I see Tom’s is made of brass, wish mine had been.
Had another question about mounting the trim pieces. I know the outside trim is attached with 6-40 flathead screws, but not sure about the inside trim. Can anyone tell me if it uses machine or sheet metal flat head screws, and what size?
Hi Jim,
The threads in the three outside brass trim pieces, including the center strip, are actually 4BA threads. 6-40 machine screws can be forced into place but I opted to buy correct stainless screws from British Fasteners. I also bought a tap to clear the threads after I had the trim pieces plated. Rob, all my interior pieces are steel, like yours and Jim’s. I am having them chrome plated now, they were rusted and pitted so I’m having them filled and copper nickel chrome plated at great expense. They are hard to find since they rust so badly. Wray Schelin has made a few sets out of brass for a couple people I know, and offered to make me a set for $1000, not including the omega shaped center strip. Mine looked salvageable after that.
My center outside chrome strip was overtightened and bent and cracked at the lower screw hole so I am making a new one from 360 brass that I ordered from McMaster, just arrived on Friday. originals are scarce as hen’s teeth.
Moving on to the dash panel and have another question. I’m not sure how the panel is suppose to fit between the windshield trim and the instrument panel. It appears there is room for the panel to slip under the trim, or at least butt up against it,except when it gets to the outside where the trim dips down below the line of the dash panel. Would appreciate any instructions, and pictures, of the shape of the panel and how it fits against the windshield trim.
Hi Jim,
That is a beautiful job on the center piece! Are you in the metal bending business? I know of at least one other FHC owner in search of that part.
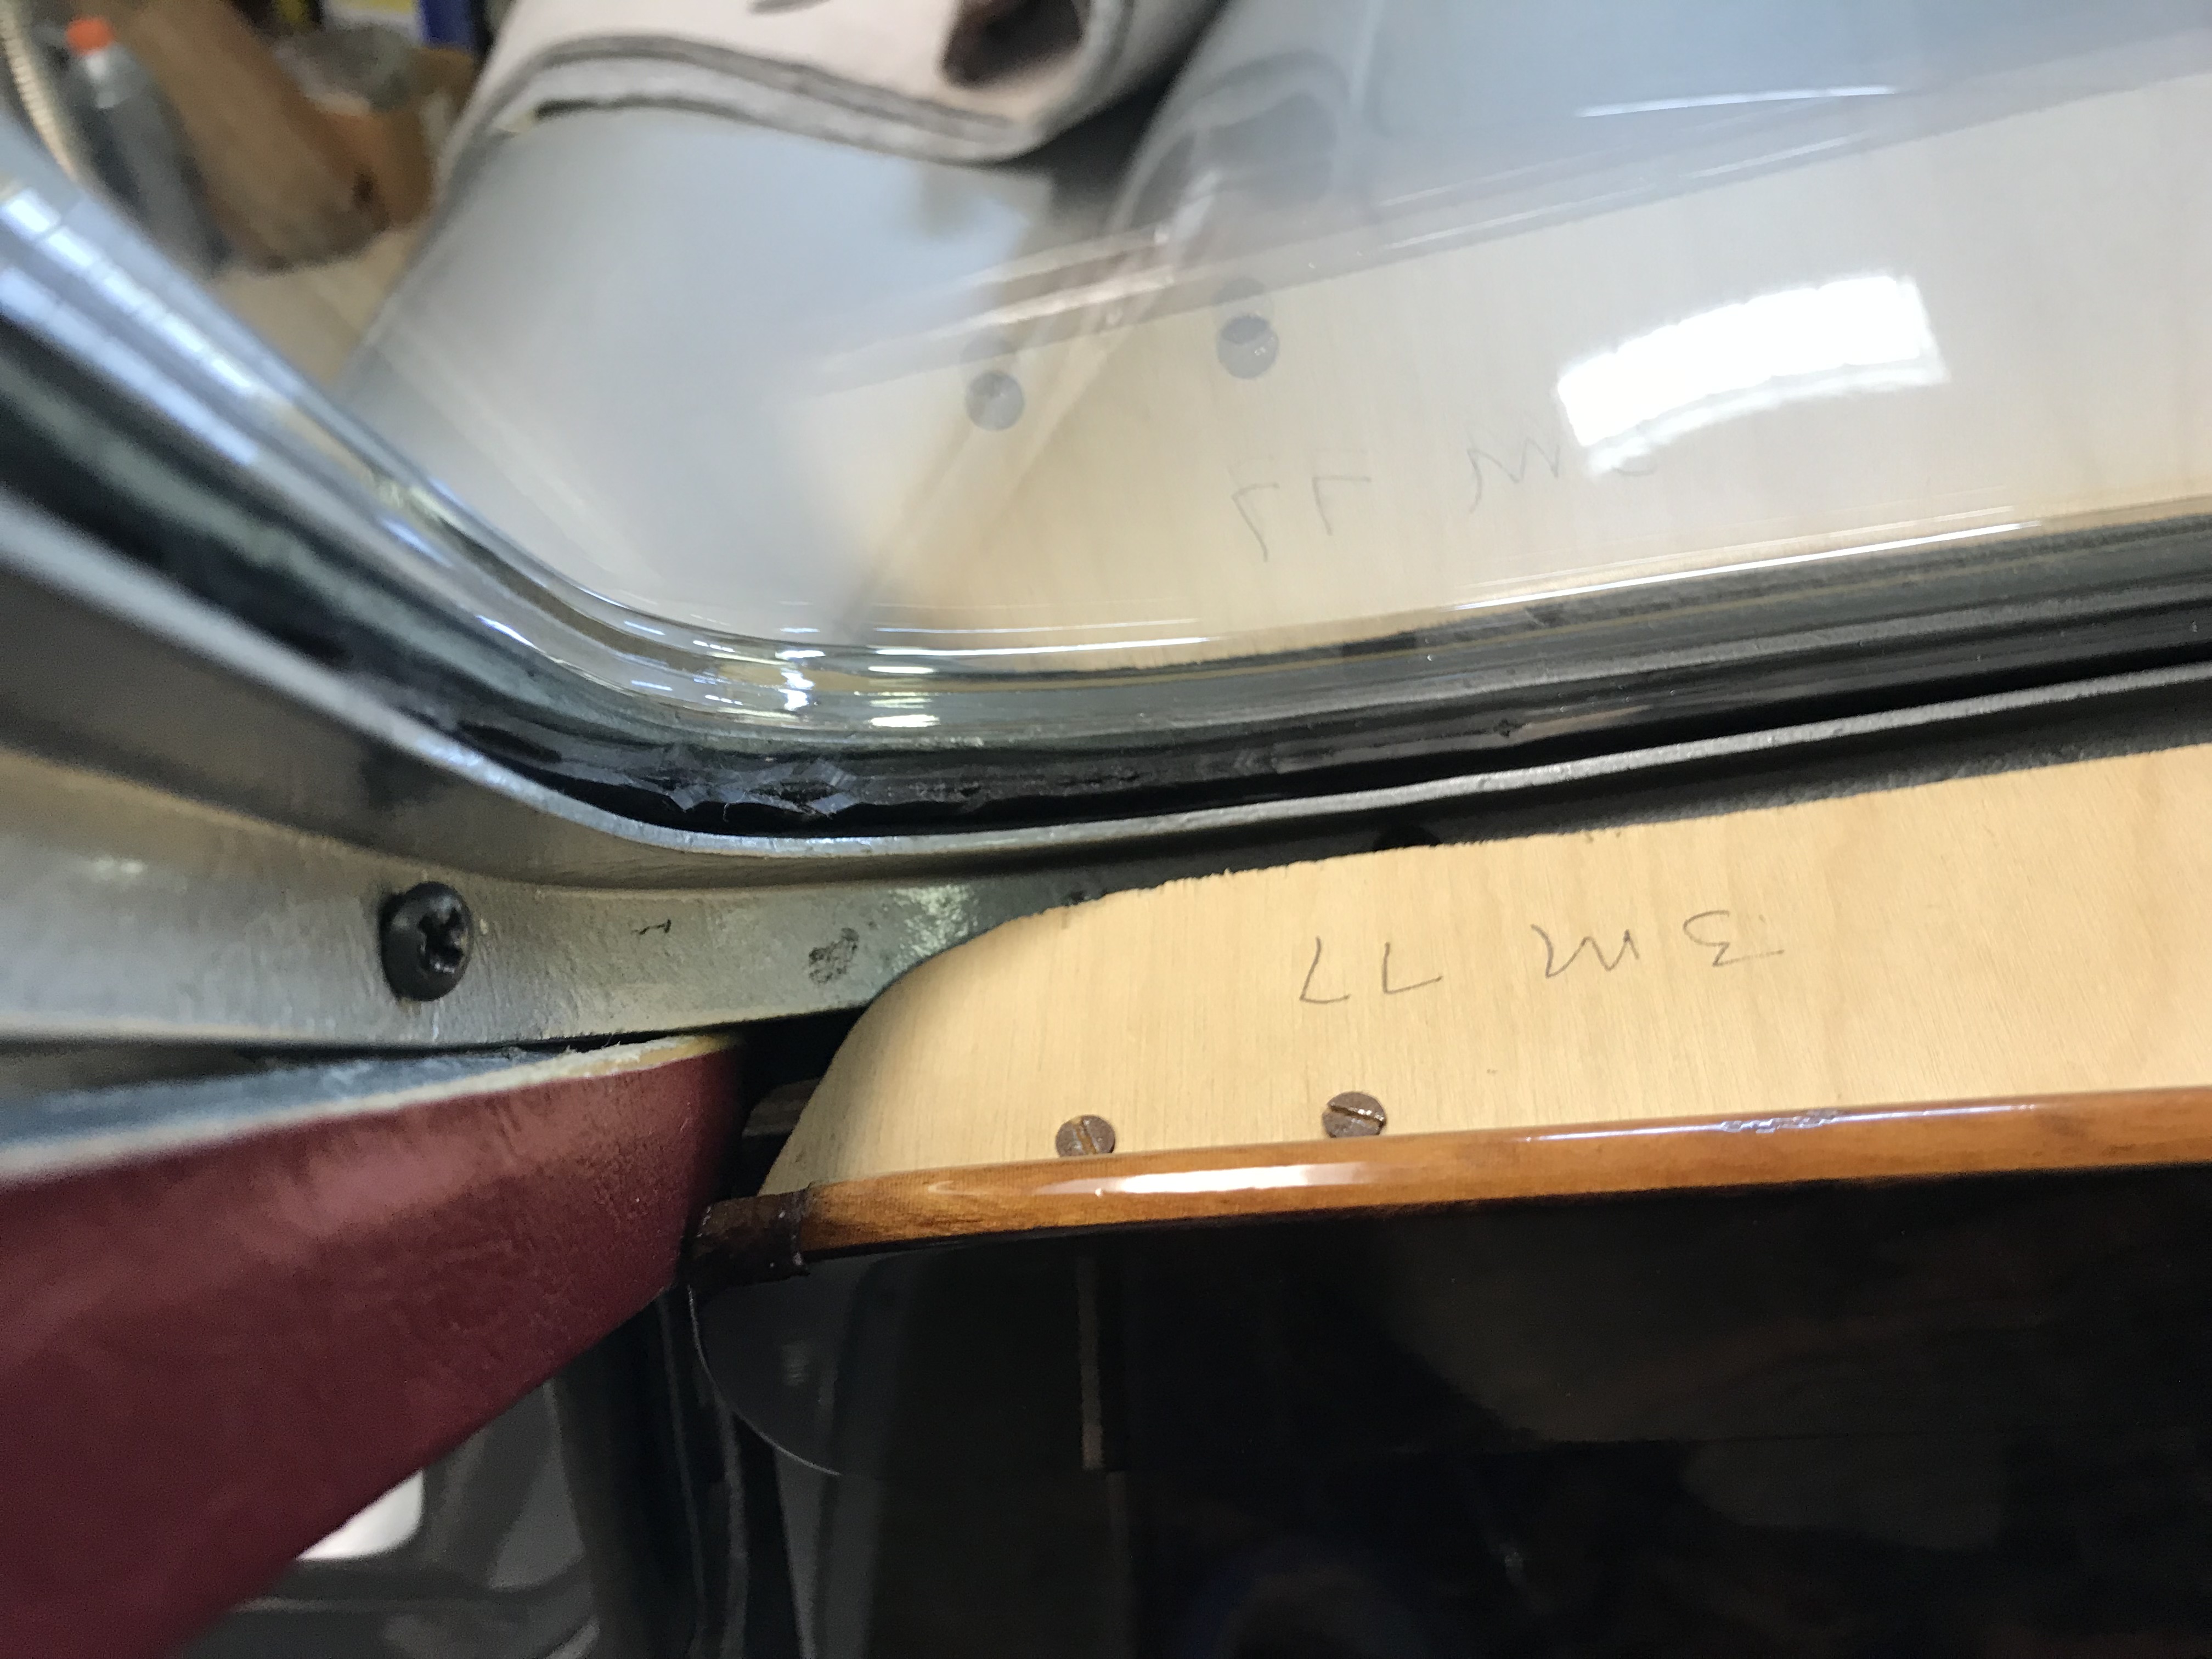
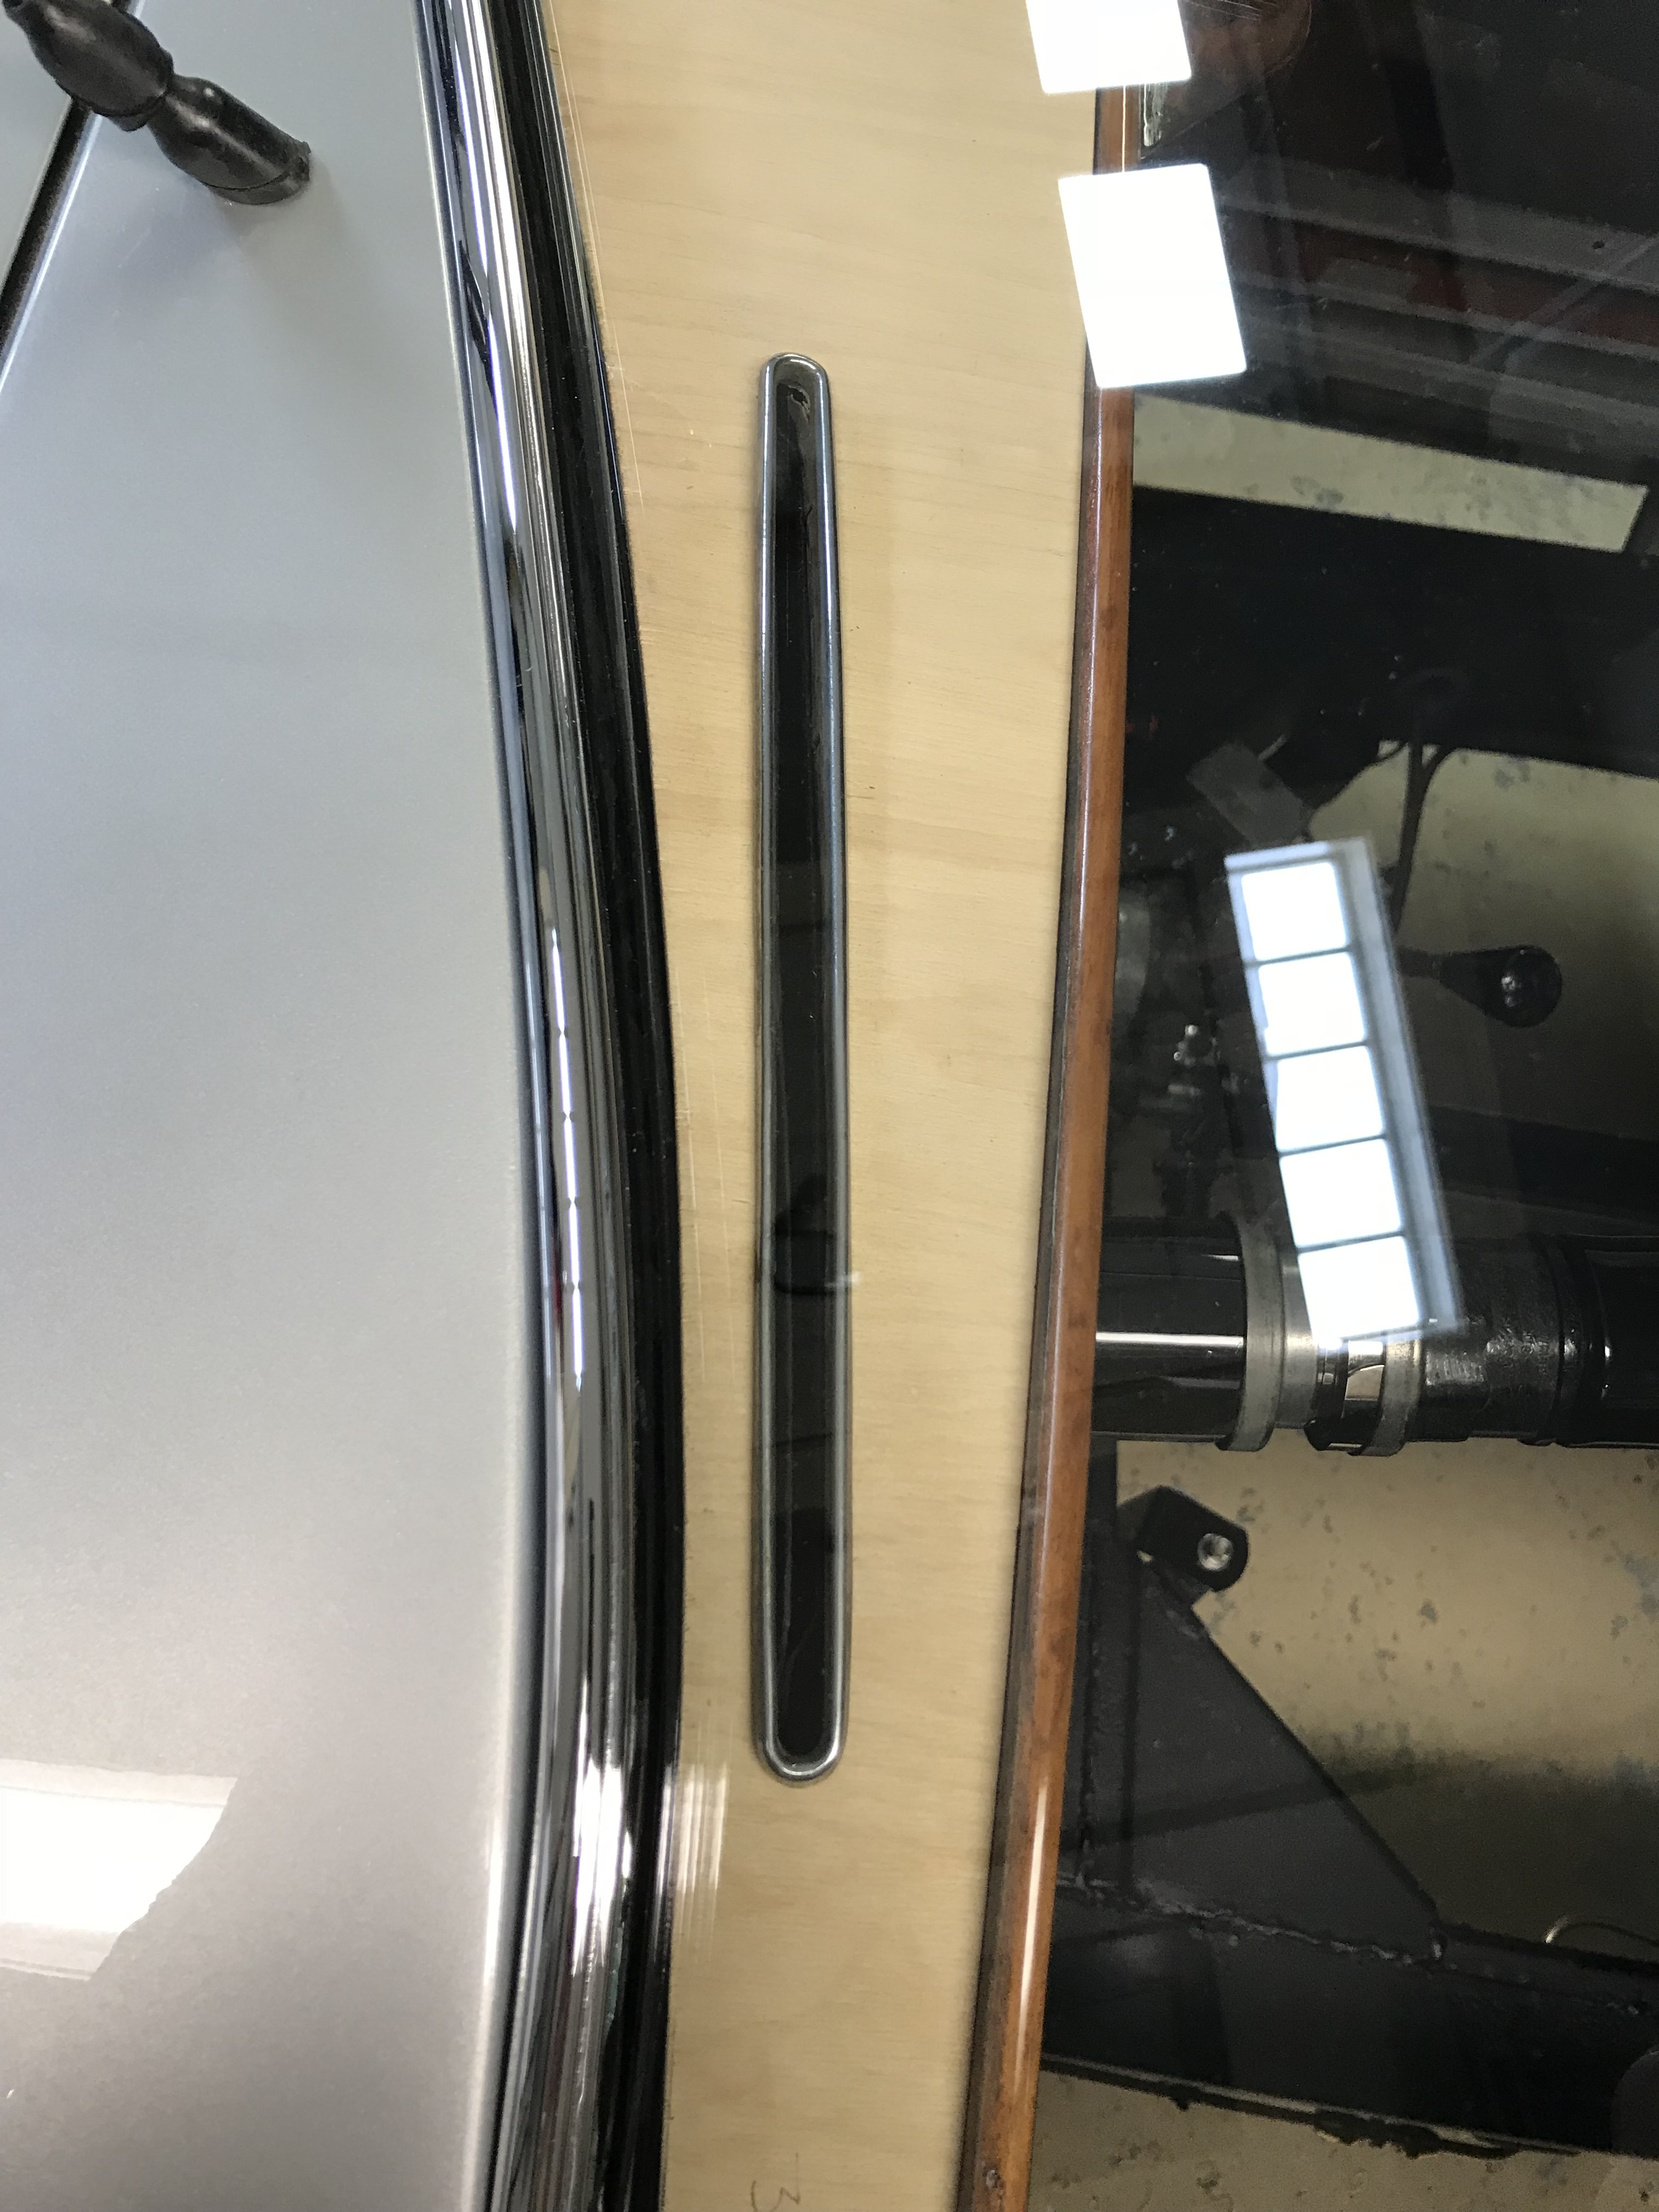
Regarding the dash top, see below. It lays nicely into the bottom angles that hold the windshield in place, and is held in place by two screws (one on each end) that screw into blocks mounted on the underside of each end of the top panel, accessible from the underside of the top facia piece that arches across the top of the dash.
The vinyl covering (not shown in the pictures), extends past the ends and folds upward to cover the open ends of the dash top, and folds under the wood cappings that go from the dash to the top of the windshield. My dash is still apart awaiting the rechromed angles so I don’t have details to show right now. Hopefully someone else will.
My car, chassis 679187, body J1187, with original unrestored dash cover, has the remains of those same hardwood corner blocks and screws. There is also a single screw in the center, under and hidden by the mirror mount.
My covering is leather, not rexine vinyl. I also see that the screw heads are covered by the leather, suggesting to me that the line workers first made up the cover with the corner blocks, and attached the corner blocks to the dash last from the bottom. Then offered up the assembled dash into the car.
On the underside is written in pencil “86 green” in large cursive, which I interpret to mean that body J1186 the car before mine also had suede green interior and somebody mixed up the dash covers. One of my four seat upholstery pieces also had the wrong body number on it, 1191 I think it was, so they must have done a batch of green ones together.
That makes a lot more sense than the direction I was going. I was trying to make it slip between the body and the trim, and that is a really tight space. Laying it on top of the trim will be a whole lot easier.
As far as the center trim piece, I wasn’t in the metal bending business, but did have a background in manufacturing. You may have seen an earlier project I did where I made the ribs for my grill. I was able to modify that tooling to fabricate this piece. It’s not quite true to the original as I had to use slightly thinner gauge steel in order to form it. If I had used brass I probably could have duplicated the original, but I didn’t want to buy a whole sheet of brass just to make this part. Don’t think anyone will be able to tell the difference when assembled.
I wasn’t planning on going into production on the part, but always willing to help others out if I can.