Plan to cut it when all the seams are welded. I trialed fitted the grill before I made the final patch. Just as well I did as the ‘dip’ at the bottom of the valance had just enough clearance. I had to adjust slightly extending it down to ensure there was enough room for paint!
Could I get some advice on the final prep. I have protected the bare metal with etch primer.and or a high quality rust converter. Gives a good base for paint. I plan to use a two pack epoxy paint on the underside. My question is about application of the filler. Should I continue the epoxy over the top of the valance - max protection - but all the instructions for filler suggest it go onto bare metal?
There are lots of fillers on the market , your need to rub down the primer to get a good key , most stick like sh-t to a blanket !
This one says ok to add to paint !
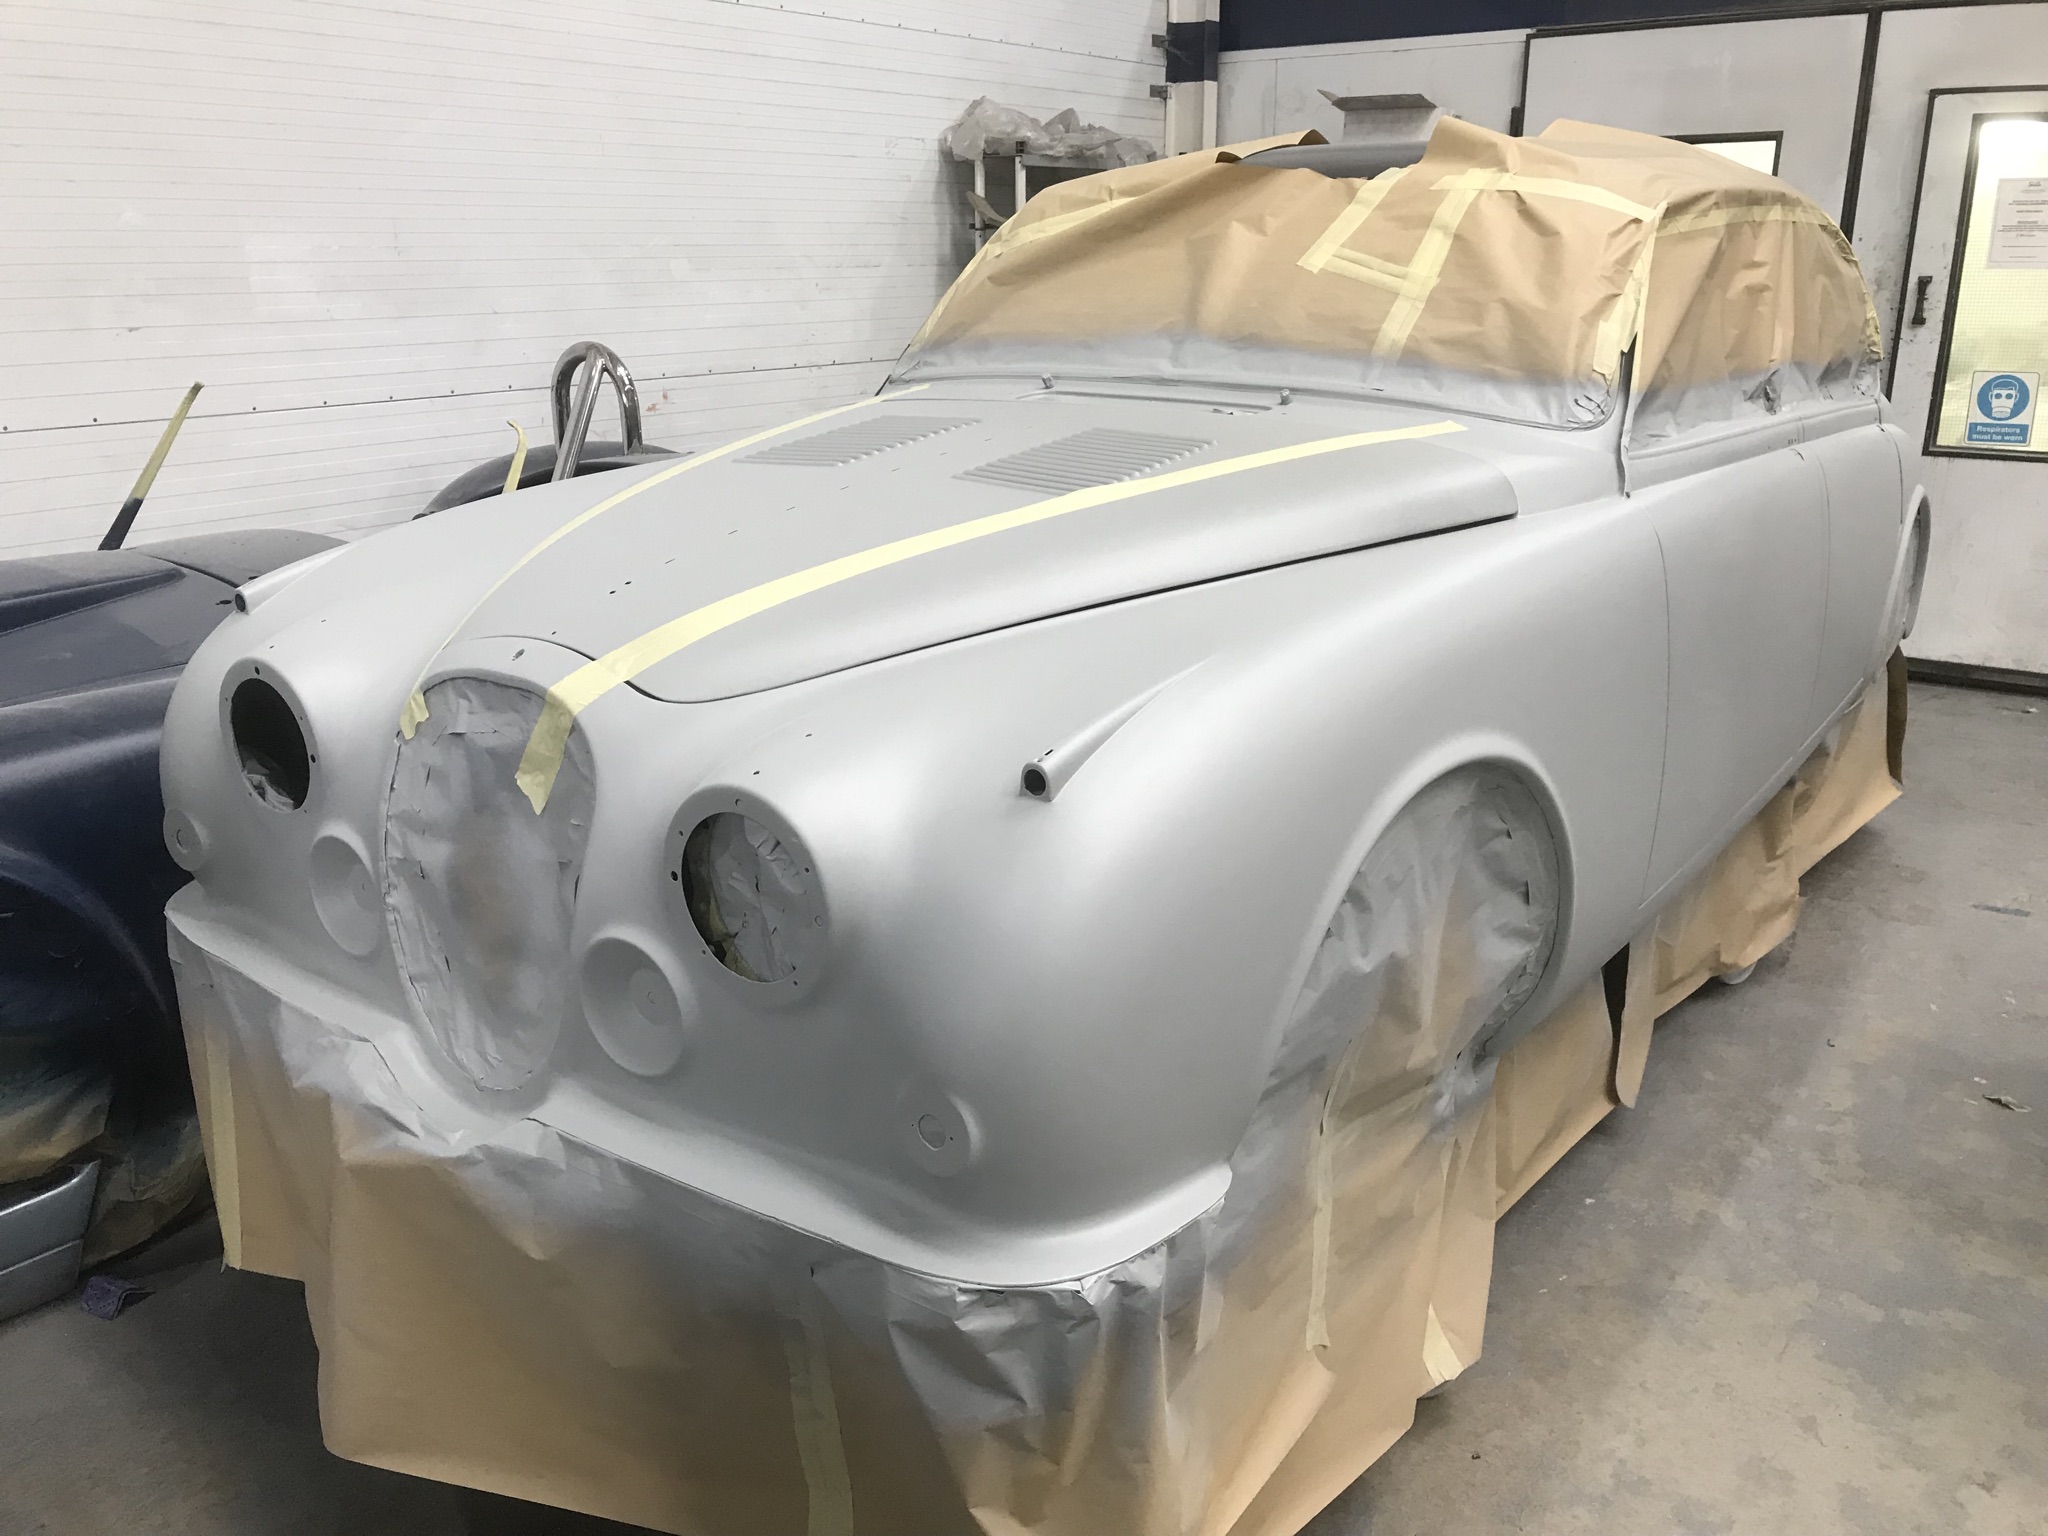
Love the louvers! How did you do them? I’ve been told “hot rod guys have louver presses”… but my car is already painted so I feel like it will have to wait.
Great question on the Louvres. I wanted etype (14) but none of the body guys I spoke to were prepared to Louvre the bonnet so I bought an available part in Ali.
The body shop put a swage on the cut out and bonded the Louvre in from the top. I’m really pleased with the result as you get the full height of the Louvre. The other item I’m pleased with is the rear spats. These are metal a welded.
Got my O2 sensor in and found both carbs running way rich at idle and then leaning out under load. Seems backwards. Pulled the needles and found they are UVU (from a V8 Rolls). No wonder. Also one was set 1mm lower than the other, so the carbs were not in sync, either. Ordered UM’s. The O2 sensor is really a cool tool for fine tuning and I’m hoping I can really dial in the carbs.
This is interesting! I might be interested in doing something similar. Expect that you could go car to car if you could anti sieze and plug the holes? Paul
I put bungs in both pipes. There’s a plug in one and the sensor in the other. They’re right at the bottom of the downpipes just where the pipes bend, so accessible from above or from below without jacking it up. It’s only been a day but should probably investigate some kind of anti-seize for the plug so it doesn’t get stuck?
I have fitted bungs into my down pipes in the same pace as Theosoares. They are stainless as are the down pipes themselves. They were welded with steel filler , not stainless since the welder could not do that - I hope they will stay in place and not leak.
I was wondering which O2 sensor readout system Theosoares used.
I have provisionally selected one by:- https://www.ecotrons.com/accurate_lambda_meter/alm-inline/
but I would consider others as well.
 Plan to cut it when all the seams are welded. I trialed fitted the grill before I made the final patch. Just as well I did as the ‘dip’ at the bottom of the valance had just enough clearance. I had to adjust slightly extending it down to ensure there was enough room for paint!