Here’s some notes on replacing the Rear Engine/Transmission Mount Bushing on
a 94 XJ12 for the archives. The bushing is part number MMC7553AA and is also
listed for the XJR so these instructions may apply there too. The bushing is
made of rubber but when it deteriorates looks like foam and breaks into
small peices. The symptom for this shown on my car was a knocking under the
floor when pulling away from rest - thanks to list members for diagnosing
the fault!
As I got into this job it became clear that it could probably be done
without removing the mount itself but it was too late for me. Here’s the
procedure I think you could probably follow. If it couldn’t be done this way
then the second set of instructions gives information on removing the mount
as I did.
1/ Get a Torx T-55 socket
2/ Unscrew torx bolt that passes throught the center of the bushing
3/ With a screw driver remove what’s left of the old bushing
4/ Remove slide tube
5/ Insert slide tube in new bushing
6/ Push into place and reassemble
If you have to remove the mount then here’s what I did:
1/ Support front of car on axle stands and transmission with jack from trunk
2/ Split exhaust pipes at the front join, if the bolts are rusted cut
through them with a hack saw and make a note to get replacements. Remove
exhaust hanger behind centre box from bracket to allow exhaust to drop
3/ Remove 4 nuts holding mount to frame with 13mm spanner/socket. Note the
spring may make this jump when the last nut’s removed.
4/ Use the T-55 Torx socket to remove the center bolt. Note there will still
be some tension on the spring so be prepared for it to give way. Remove
mount.
5/ Assemble mount as above
6/ Position mount in place and use trolley jack compress spring enough to
get bolts started and then tighten
7/ Replace center bolt and tighten.
I don’t gaurrantee that this is the correct approach only that this is what
I did. All the usual dislaimers apply.
This is a job I was planning to do as I’ve read in other posts that the transmission bouncing excessively can cause the trans light to illuminate. I found this old post by Mike_Strickland which was a big help in completing the job, I also found a couple of things that were slightly different on my car and I thought I’d add a few pictures to illustrate this task.
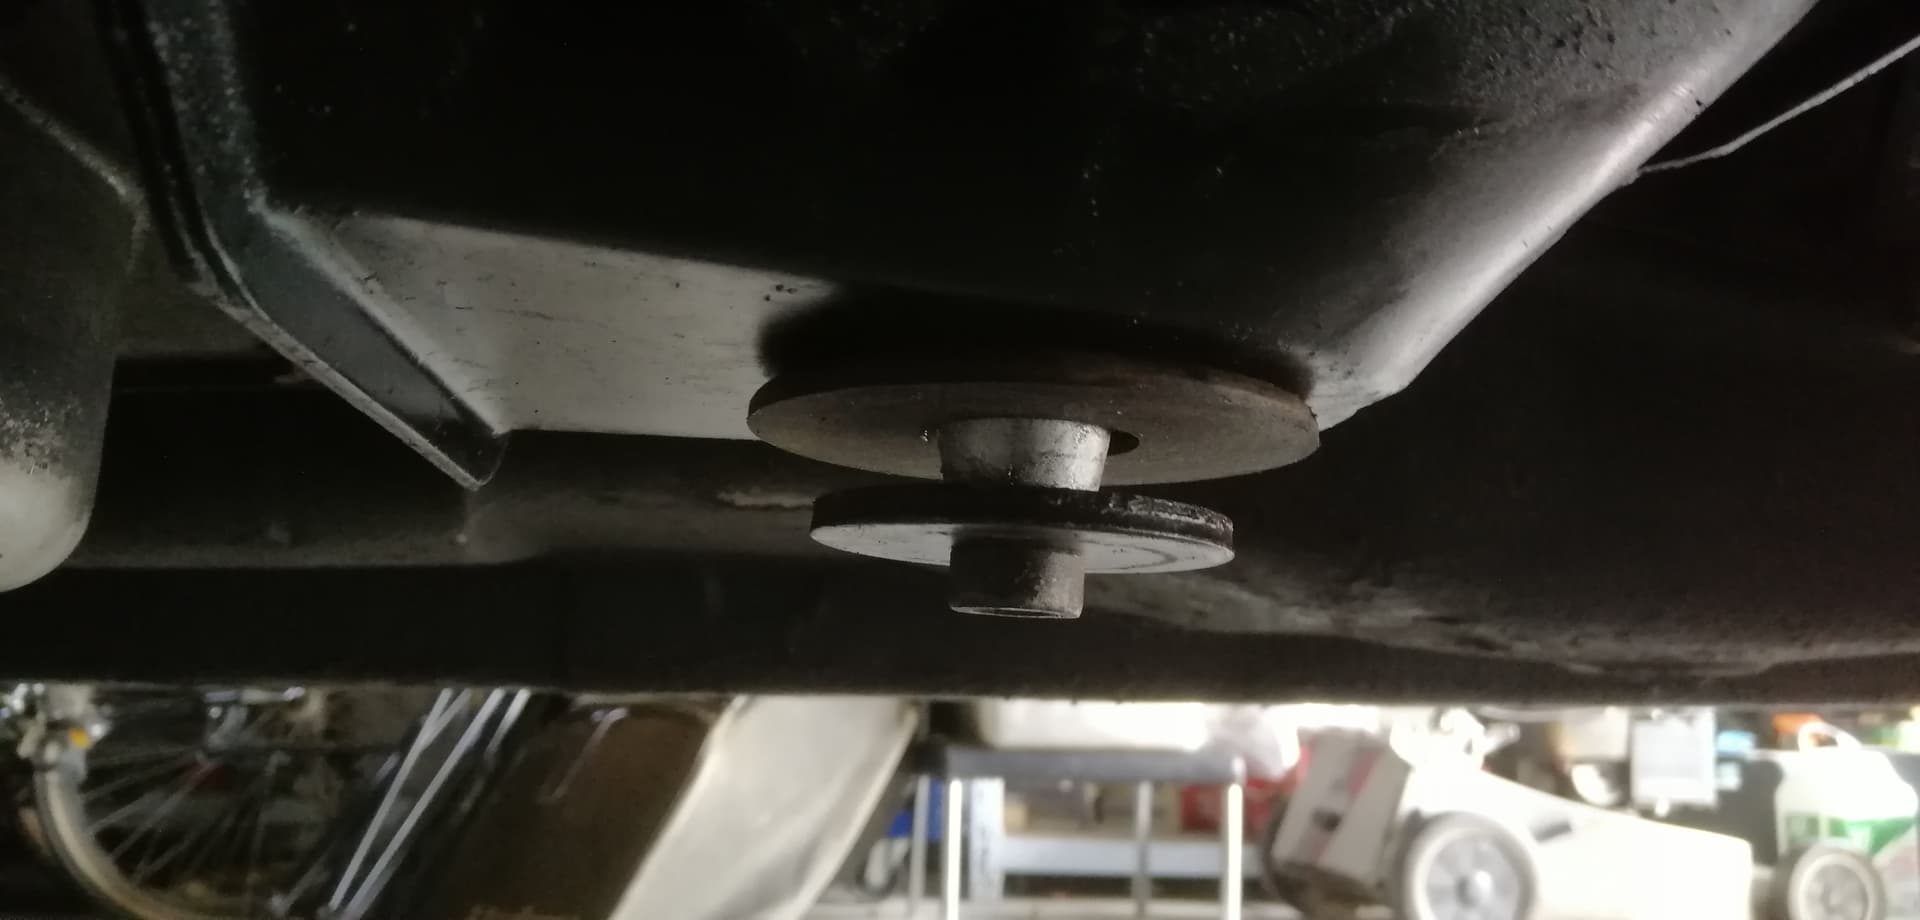
On my 94 XJ81 the central bush had been replaced with a generic plastic sleeve which didn’t really prevent the transmission from bouncing at the back end. Initially I decided to just replace the main bush MMC753AA and followed the first set of instructions above. Once replaced the transmission mount looked like this
You can see that because the spring is worn the post attached to the transmission is able to fall well below the bottom of the newly installed bush. I decided to do the job again and replace all the necessary parts. Spring seats x 2 CCC3764 and the spring CCC5763.
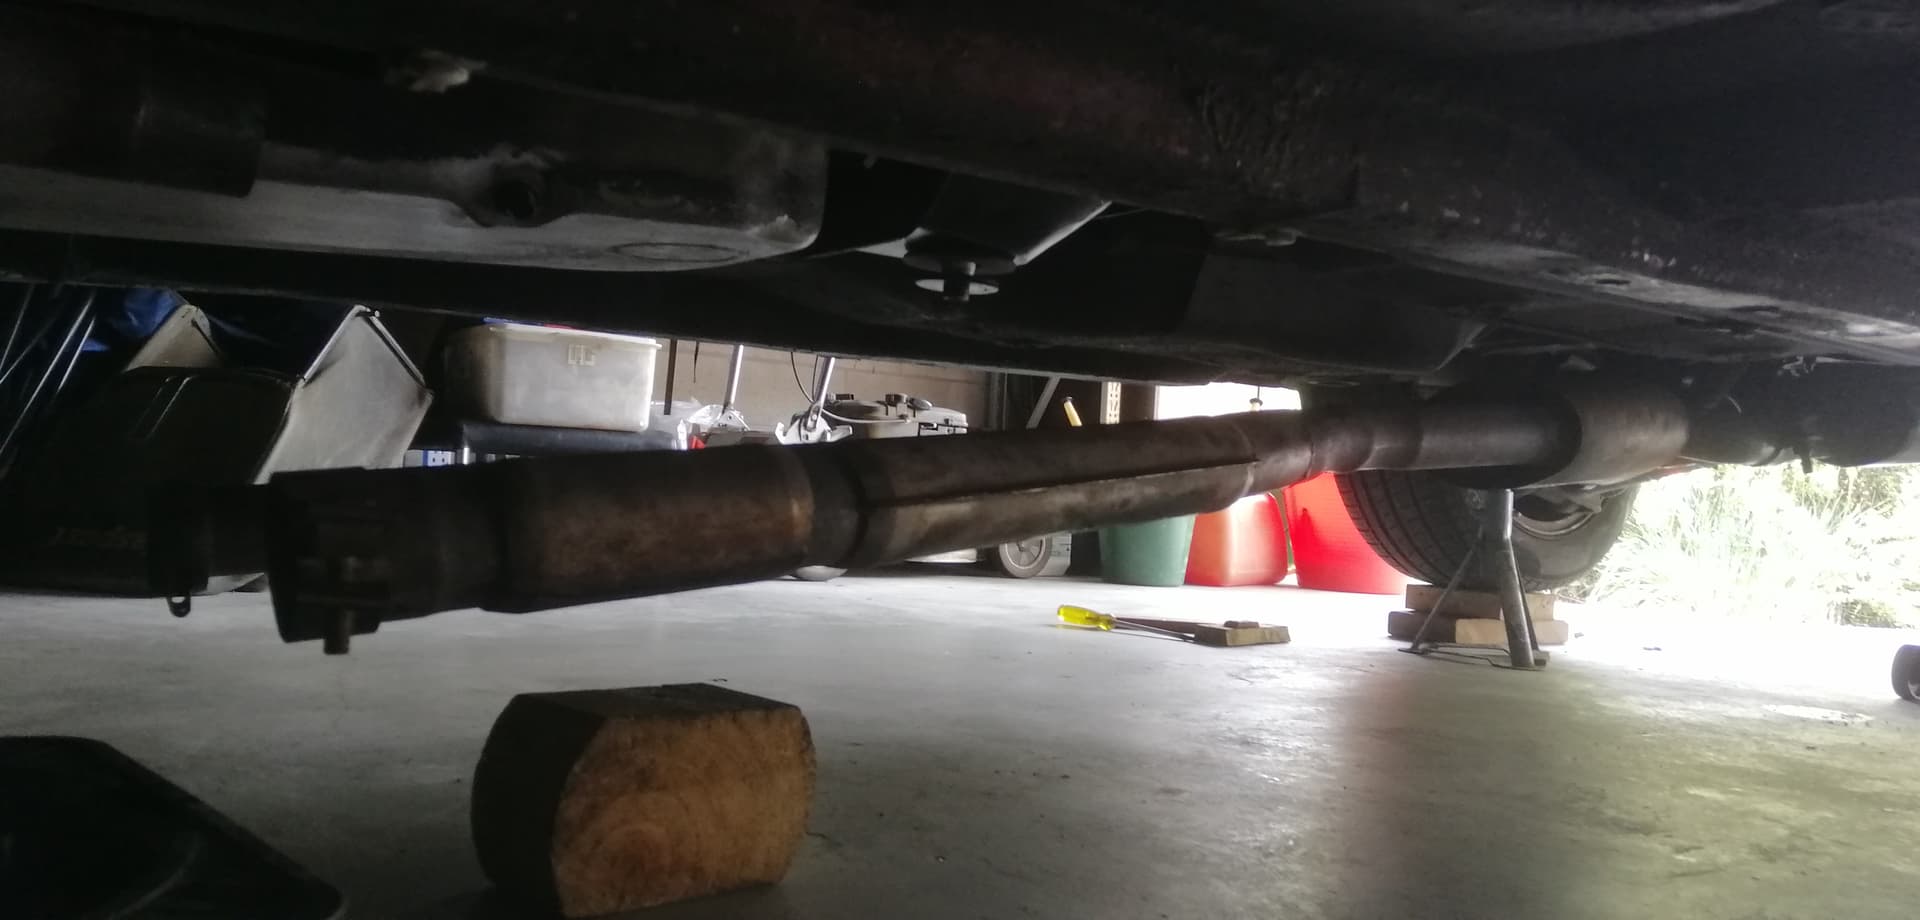
In order to remove the transmission mount the exhaust has to be dropped and I followed the second set of instructions listed by the original poster. My car was a little different in that one side of the exhaust was an olive joint and the other pipe was a sleeve joint which meant having to pull the whole exhaust to the rear a couple of inches to separate the sleeve joint.
To remove the main mount requires a small jack to support the back of the gearbox because you’re removing the support for it and also one to support the mount as you undo the 4 mounting nuts. This will prevent it springing off as you undo the last of the nuts.
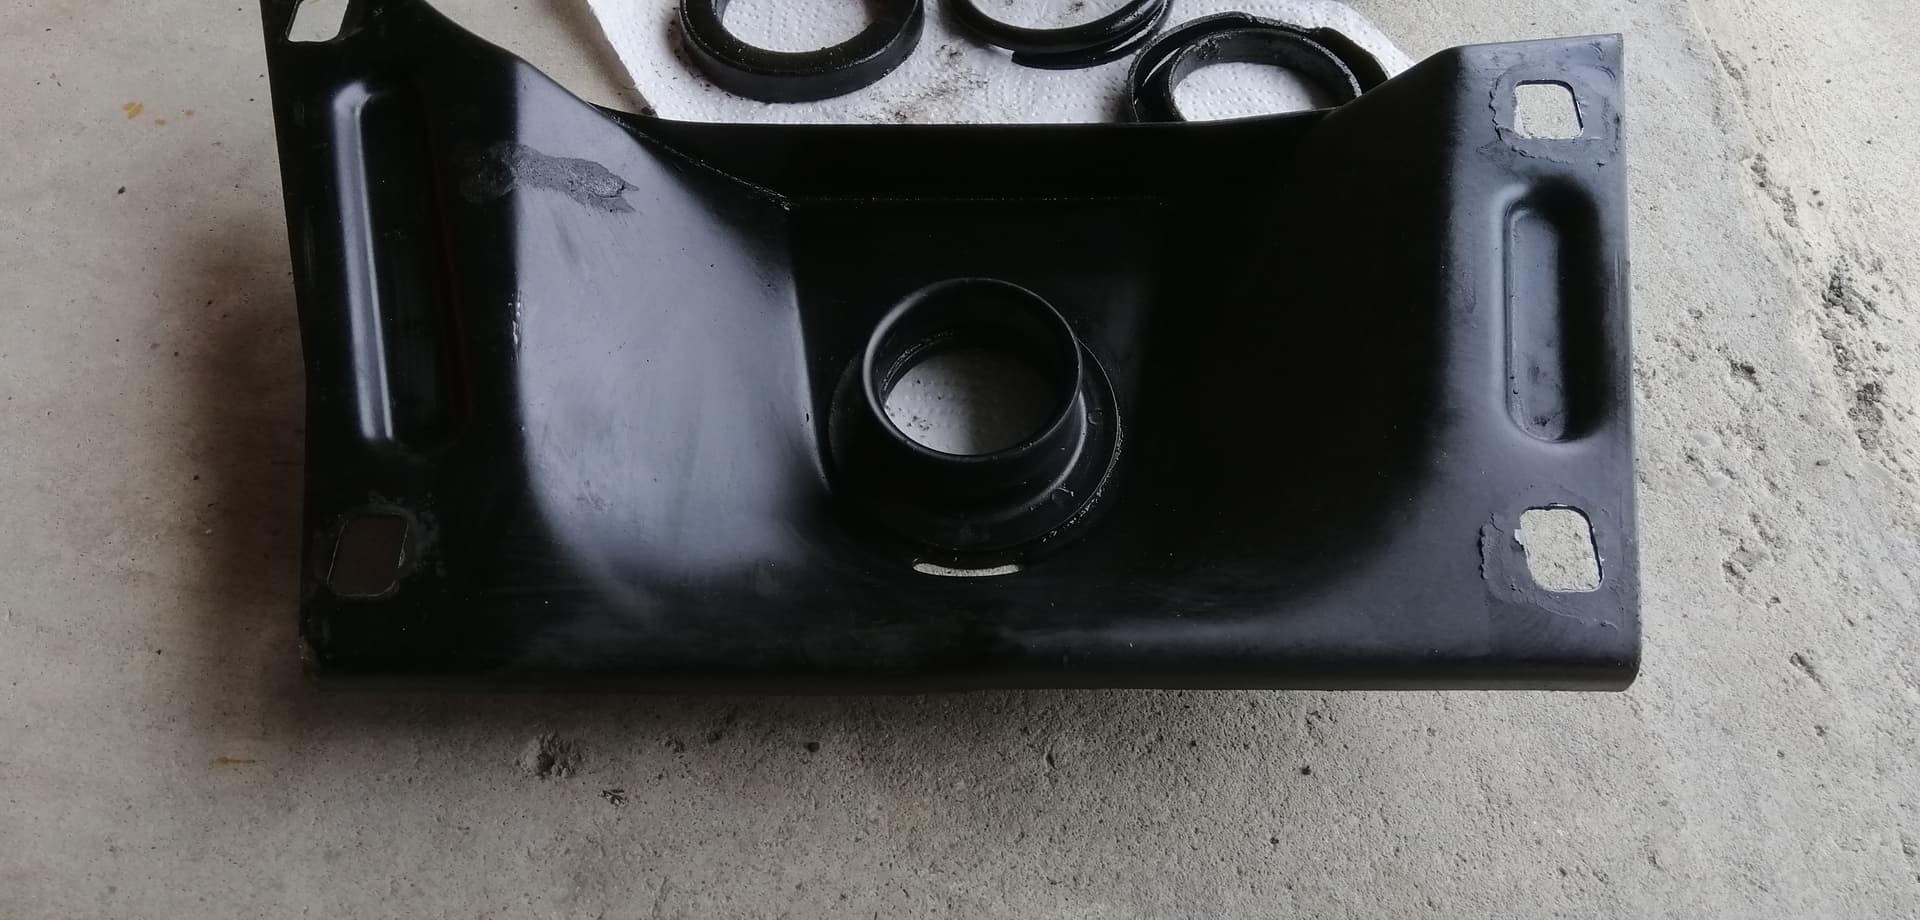
Refitting the bracket was a little more challenging as the new spring was more difficult to compress. I found that removing the new centre bush and using a jack to push the whole mount into place and secured with the 4 nuts was the easiest way to refit it. Once in place I used some Vaseline to coat the centre bush and refitted it.
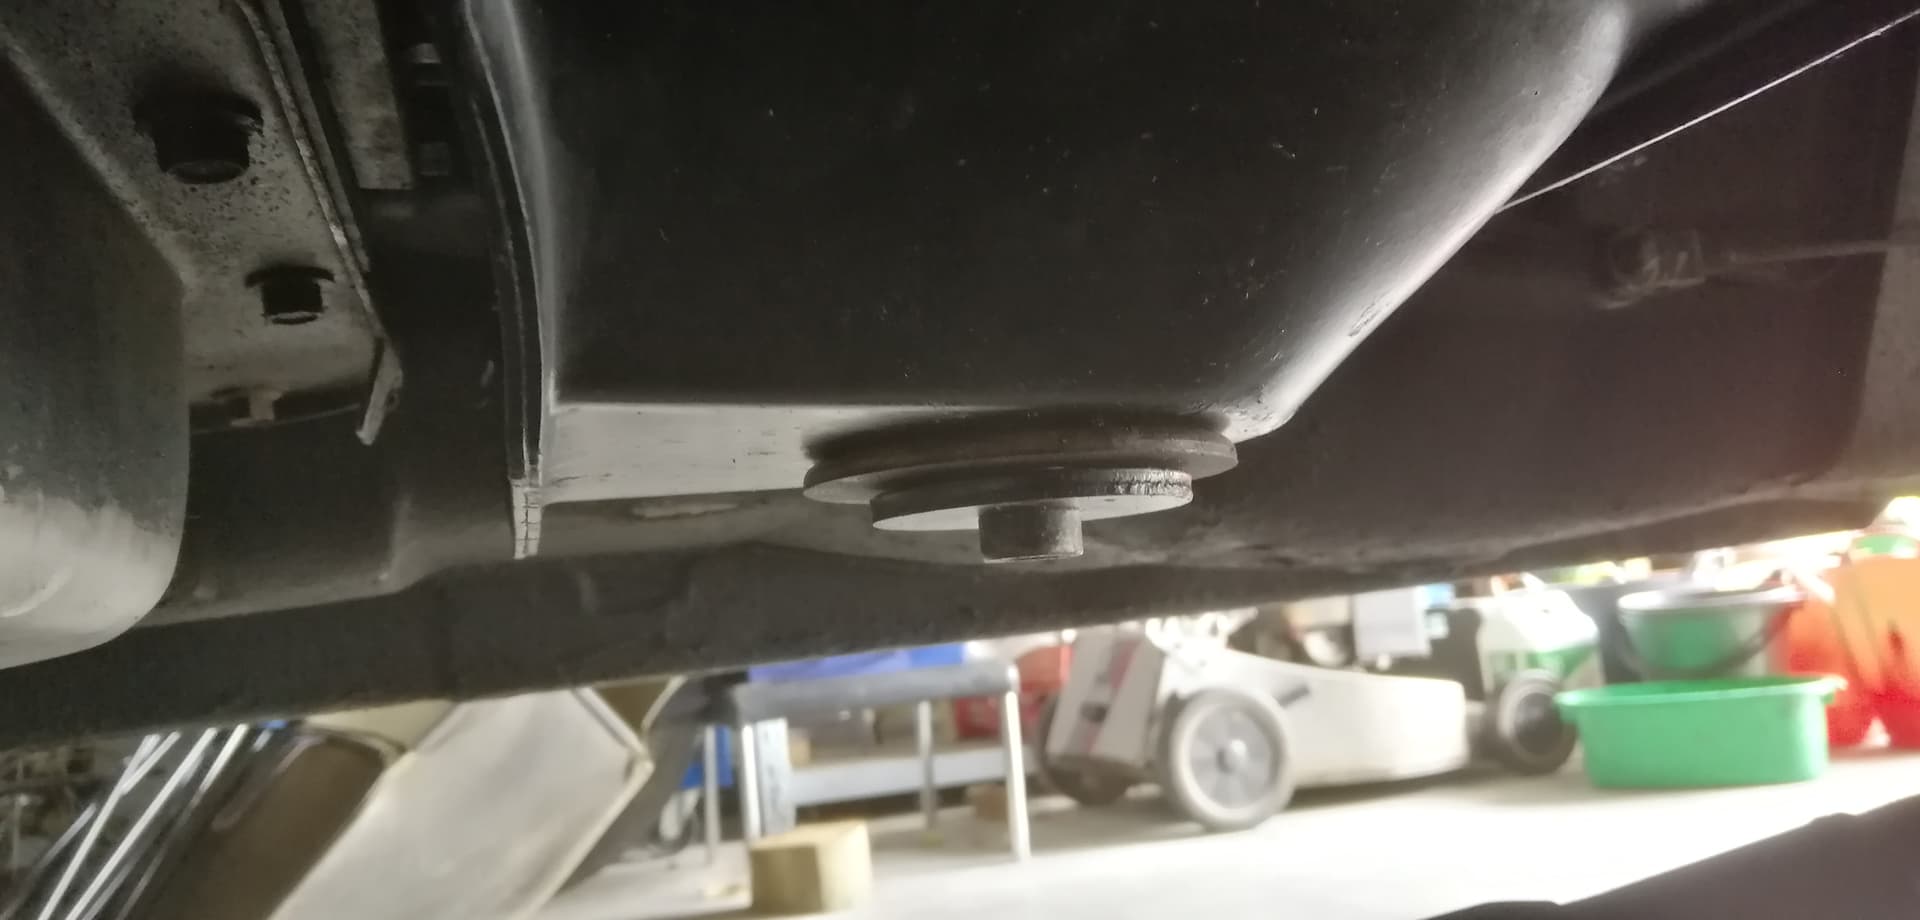
You can see that at the end of the job the new stronger spring takes much more slack out of the mounting. This job took me about 3 hours to complete including jacking up all 4 corners of the car to get good access. As always don’t rush and take great care with your support jacks and back up safety measures before getting under your vehicle.
Interesting read. It’s good to know there are such detailed instructions should I ever have the need. And, excellent safety reminder at post’s end - can’t be said too often. Many, many years ago, a friend paid the ultimate price for not being careful enough.
The transmission warning light fault turned out to be the forward speed sensor on the left side of the transmission, there are two, one forward and one to the rear of the transmission so I replaced both which solved the problem.