After many years of silence, it looks like I will be back on these beloved shores.
Motorcycles and family have kept me away but the desire to tear the XJC apart and make it the car I want it to be has not subsided.
I have now found a suitable workshop, 2 great mates that will provide knowledge, muscles and solace, bank savings to see this through.
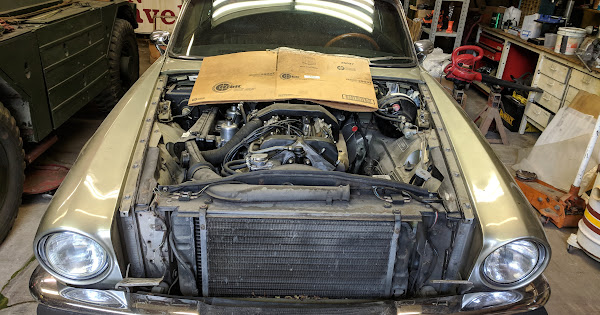
The first scene of the first act has begun (see photos). Please shower me with advice and warnings as I go through this, almost every Saturday for the next 12 months…
The objective is not a 100% faithful original restoration. The car has been pretty much 99% original for the past 13 years in my custody, I now yearn for something more personal. Nothing crazy though, just thoughtful and tasteful improvements.
Nothing much to report this weekend, just continued to dismantle bits and pieces off of the engine. Stopped at the last few bolts and nuts holding the gearbox mount.
Next weekend the workshop is closed so will have to wait for following weekend to extract the whole engine+box.
I am in awe of the amount of oil this engine has been capable of leaking from at least the timing gear cover, and probably ever single matting surface to the rear of this. This is all just a big lump of oily mess. Does anybody have a failproof tip to stop the leakages once and for all on these engines? Better quality gaskets? Sealant everywhere? Skimming everything?
The only real problem is the rear main oil seal , other then that I am sure they are pretty much oil tight , as far as I know , standard seals do the job !
So I will soon need to dispose of a cylinder head, a BW 65 and a complete dismantled engine with a cracked block. Location San José, California. Anyone?
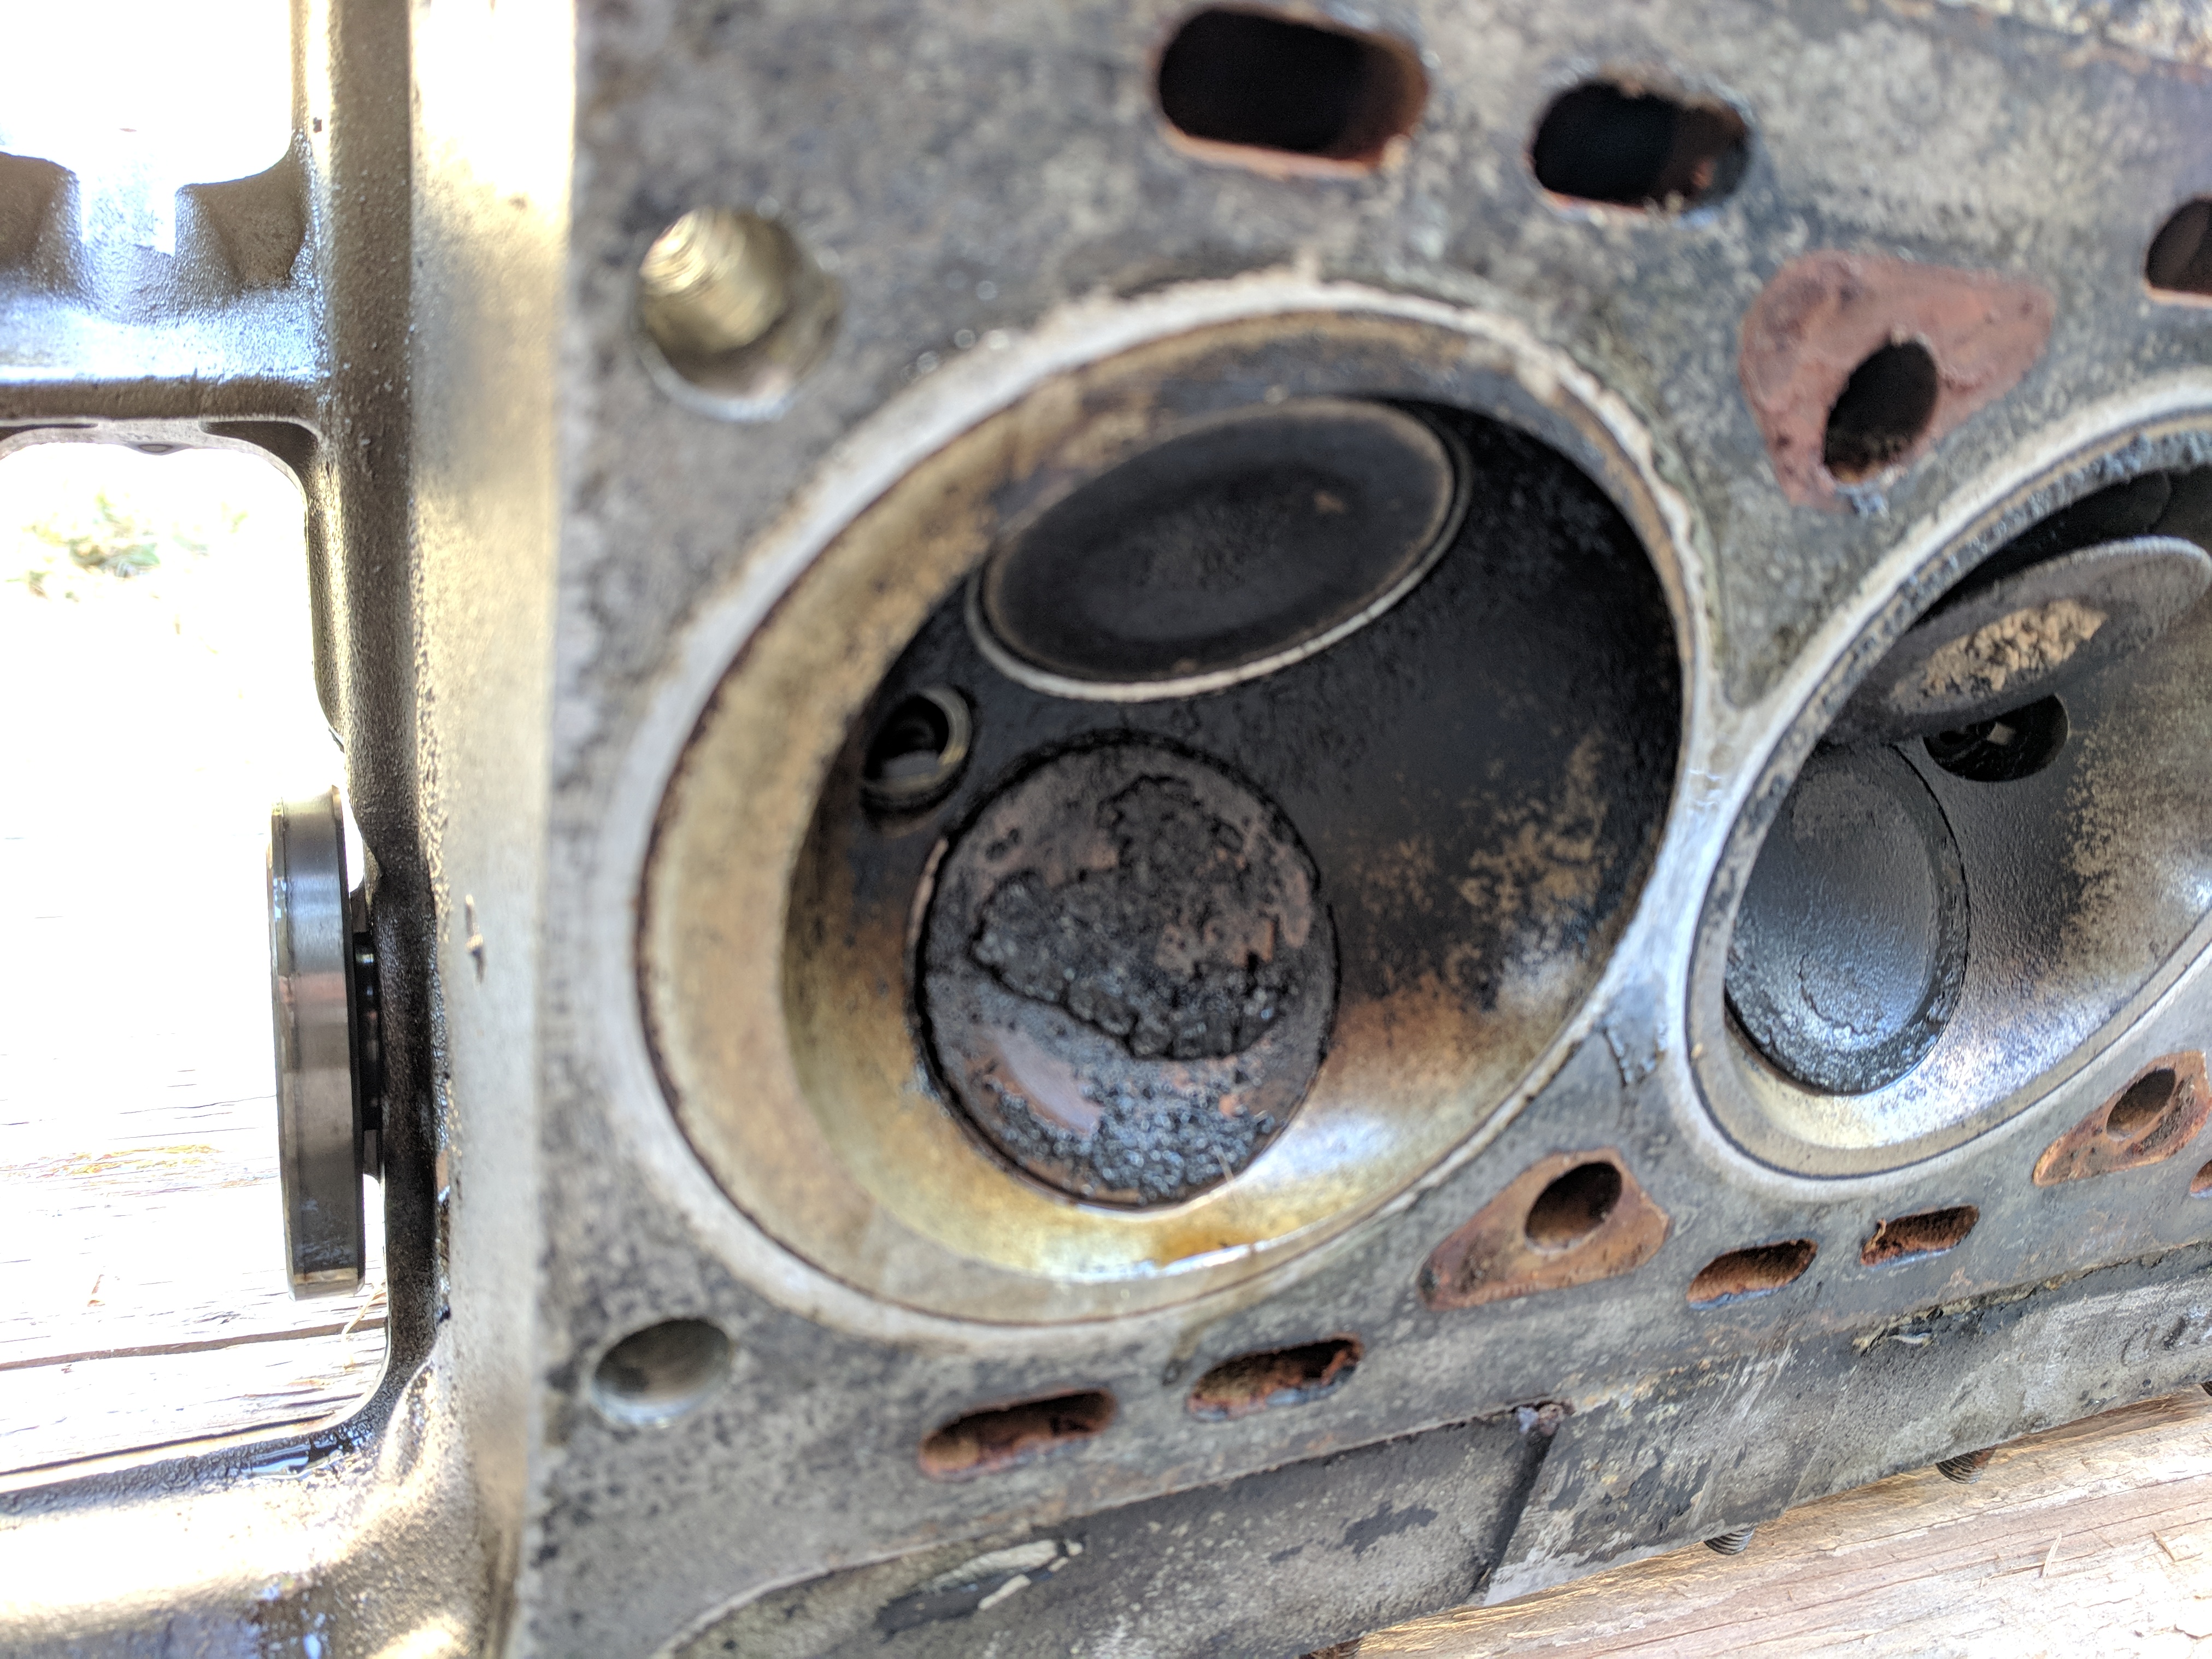
The cylinder head came off easily (but I a screwed up and damaged the mating surface on one of the studs, I don’t intend to use it anyway. If any one wants it…).
4 of the studs came off with the dome nuts. 2 of them are badly corroded near the bottom thread and stretched thin!!
Cylinder bores look rather nice, but piston domes 1 and 3 are quite oily.
The most noteworthy thing is that the inlet valve on cylinder 1 seems to be more recesses than any of the other valves… May be this is pointing to the cause of my long standing woes with this engine: intermittent tapping noise, low compression on cyl 1.
For reference, the first recon cylinder head I got from Coventry West some years back did not seem to be suitable for my first engine. They graciously took it back and reconditioned my own c/head from engine no.1 on the right in the video) Top service!
Now engine block no.1 is a boat anchor (cracked), so I hope this nice c/head will go on engine 2 (the one showed in this thread).
The replacement head has the rear cam top bearing housing for a generator , to drive the taco !
So may not be from a XJ6 ,you would have to check numbers to be sure
, the head can be used , just need to change the top bearing caps over , and bolt up the holes you don’t need in the back .
Picture is of a XJ6 cam cover I guess like yours , has a half moon rubber seal that hits in the head , and the back of the cam cover sits on !
To address oil leaks: Cometec gaskets, liberal use of Hylomar or Permatex equivalent (85420), Teflon front crank seal, Terry’s rear crank seal kit (modern lip seal), make the downward facing stud holes in the head portion of the chain gallery “blind” (epoxy them closed).
Not on an SIII, but on older E Types and maybe the Series I, what I know is that S2 E and SIII XJ had their Tacho pickups at the coil. From your picture it doesn’t look too oily…
Which does not mean they will not benefit from the use of sealants!
Such as, on my E Type, I did away with the thin paper gasket—paper gaskets being just very thin wicks— on the front cover and, voila: completely oil tight!
Cometic cam cover gaskets, coupled with Stat-o-Seals, in place of the not-totally-effective copper washers, resulted in leak-free cam covers.