
The Sovereign had a timber look around the instrument cluster, and as you can see in this picture, it is very different to the colour I have started to use on my timbers. The 2 XJ6’s had a plain black instrument surround so I thought why not have a go at doing the veneer thing to that as well.
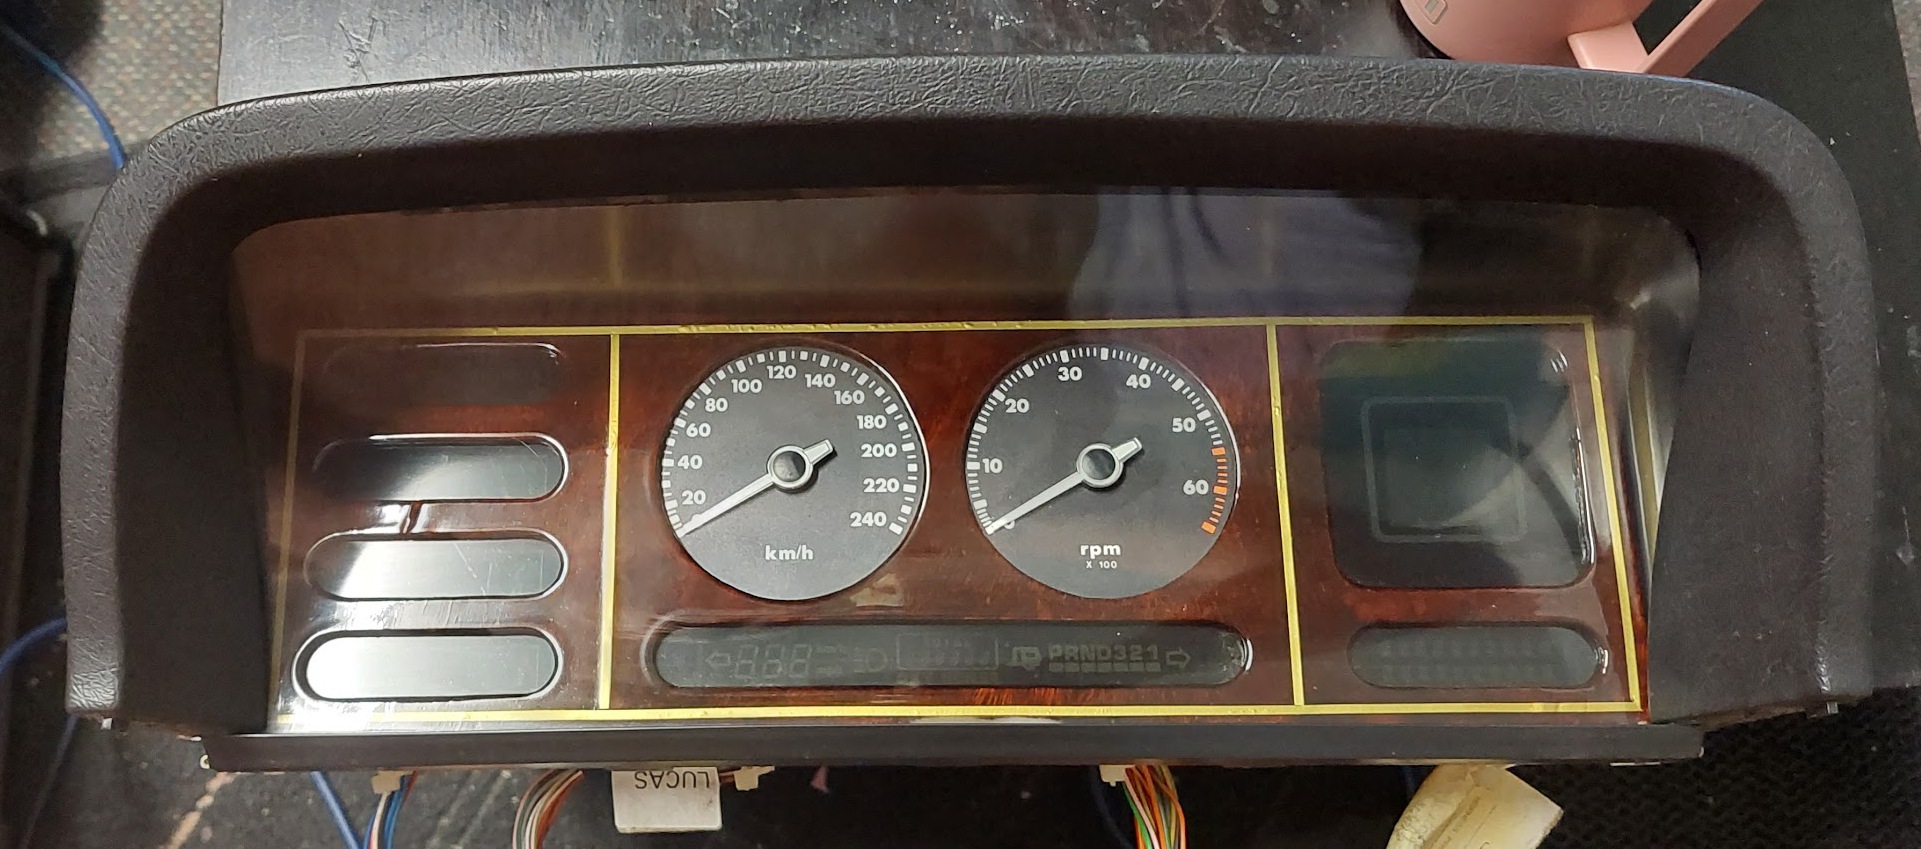
Apart from a small blemish in my veneer I thought it turned out reasonably well, yes I took to it with the gold paint pen again.

I done the door timbers and while they sit in the sun, and in the sunlight they look a lot brighter than they do in the shade,
1 Like
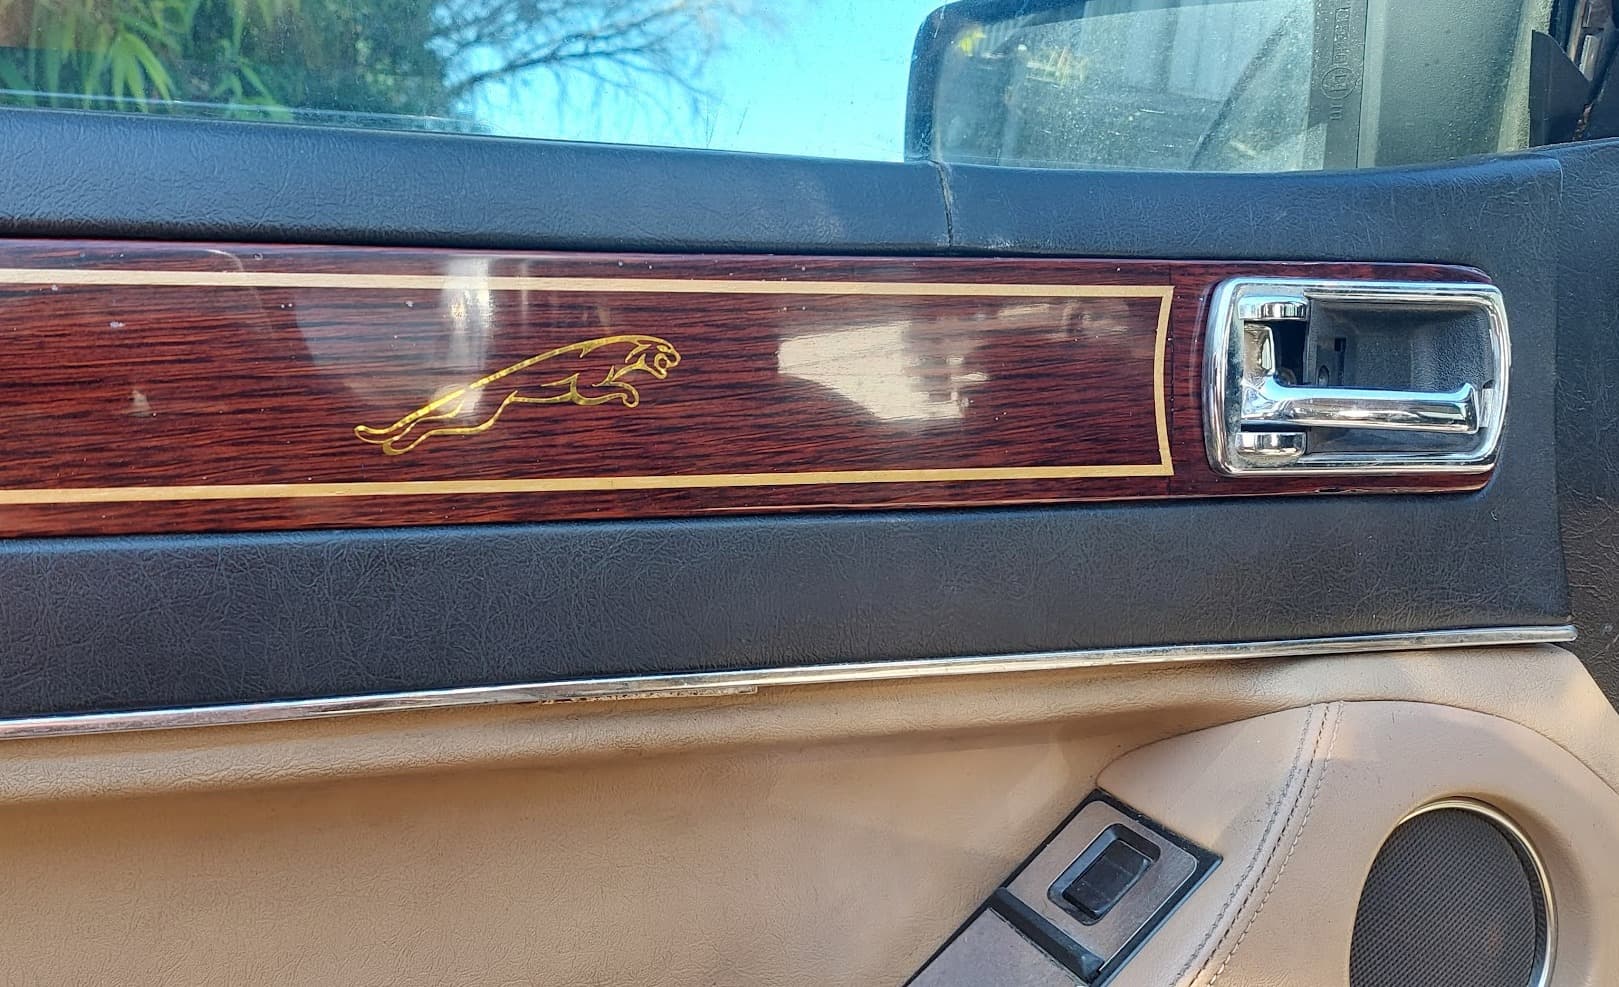
These door timber turned out nocely with the gold kitty on the front doors only, yes the gold paint pen again, and then sealed under a few coats of clear.
1 Like


Finally the last part to get the veneer treatment for now, I hope. I took the cloth covering away as it was looking a bit sad with the foam rotting away and letting the cloth part to sag.
This may look like I am blasting through thing here, but this build has been going for a few months now so when I finally catch up things will slow down a lot. One of the things I have to point out also is there are going to be a few mods done, may not be to everyone’s taste, My car has a mixture of different cars fitted to it. The rear wing on the boot is a XE Commodore part, the sideskirts are from a BF Falcon XR6, and the bonnet scoop is from an old A9X Torana. These will be shown in a little more detail as this thread goes on.
1 Like
Keep posting this car porn… ![]()
Your grasp of the process, and the quality of your work are a joy to behold, and I’m looking forward to more updates.

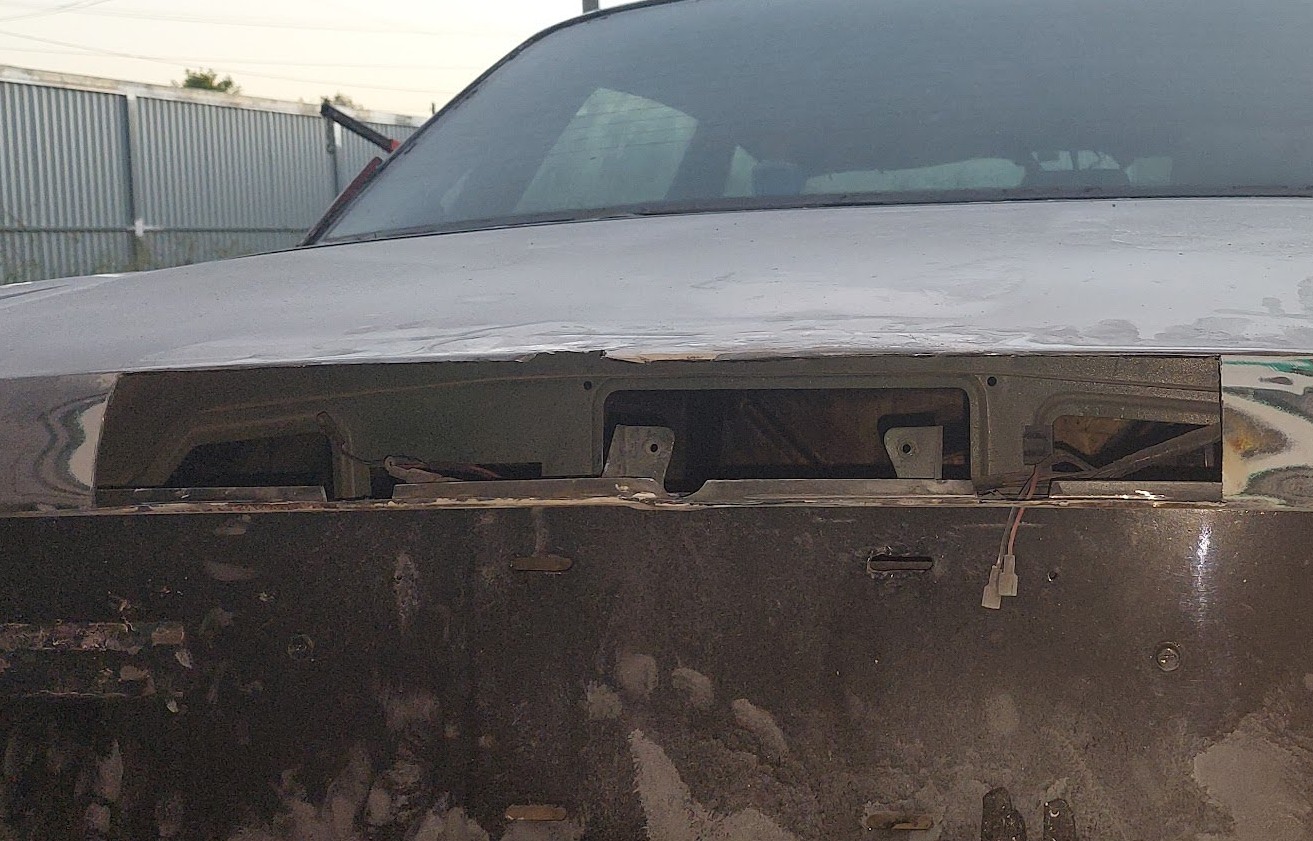
I found a small piece of cancer that needed addressing, the next job will be to remove the hole for the power antenna. I will be using a sharkfin style of antenna on the roof.
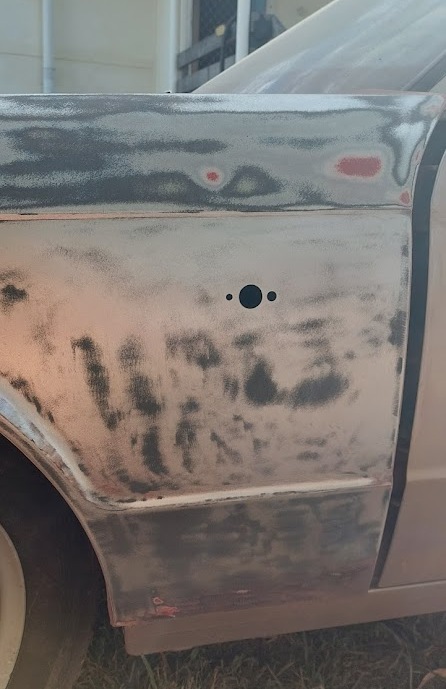
Now for the purists, please look away things are about to start changing, the gold car has a mountain of paint on it and believe it or not it is much faster to use a paint scraper to remove it, but the red car the paint is so powdery it sands off really easily.
1 Like

This is not a rust hole. I have cut this section out so I may graft into the guards a VZ Commodore flutes, the other lines marked are where the donor panel will overlap on the inside.

I have cut the flute out of the Commodore guard and with the flanging tool I have pressed a flange the will allow me to weld the panel in and have the outer skins at the same height.

Then I tacked it all into place ready to weld out. These flutes are rather large, but I took a bit of a liking to them, so here they are.
After using a bit of body filler I managed to make it all flat.

Then came a bit of colour and some pinstriping, I will have to sand down the clear because of the bloody bugs using it as a landing strip.

There is a fair bit of orange peel in there, I will have to sand that all out as well but you get the idea about the gold pinstriping I will be using on quite a few parts of the car.

And to finish off today with the sunroof is about to get a make over. the rest of it will be much later when I get the car into the garage to strip it all down and get it ready to paint.
1 Like
EVERY. DAMN. TIME!!!
![]()
Okay, today is bootlid day. All 3 of my cars had rust in them, but at the time I started this, I only had the red and the green cars, and the green bootlid was the better of the 2. I cut out the offending part of the bootlid and proceeded to get this problem out of the way ASAP.

Then I cut a piece of metal from the rear door, (it had almost the exact curve I was looking for, so I started tacking it into place, this was a good day for me. I got the part welded out, and time to get ready for shaping and drilling.

By this time I had seen a couple of XJ40’s with a boot spoiler, and I didn’t mind them, but I didn’t go much on what Jaguar had to offer so I started a hunt for something a little more appeasing to me.

I got a hold of an XR6 rear wing, and I didn’t mind the look of it, but it sat quite high, so I cut it down a bit, long story/short, I stuffed it. It seemed the Falcon wing was not the answer I had hoped for. I then went to our local wreckers and they had a VE Commodore wing, slightly damaged but it gave me a chance to see how it would look.
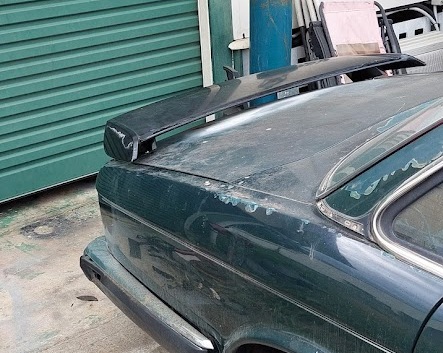
I liked it a bit more than the Falcon wing but it just didn’t quite tick the box, so I kept looking, then at the wreckers again I noticed a slightly later model wing that had a step on the leading edge, and I didn’t look quite as bulky.

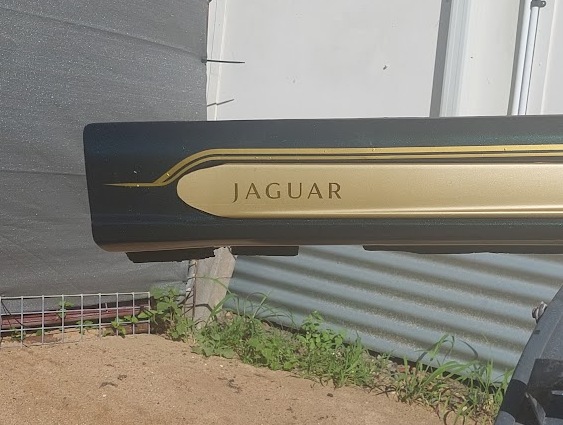
This wing I did like so I settled for this one, so off it came and along came the paint. My theme with this is green with black accents, and a gold pinstripe to separate the colours.

Now for a splash of colour.

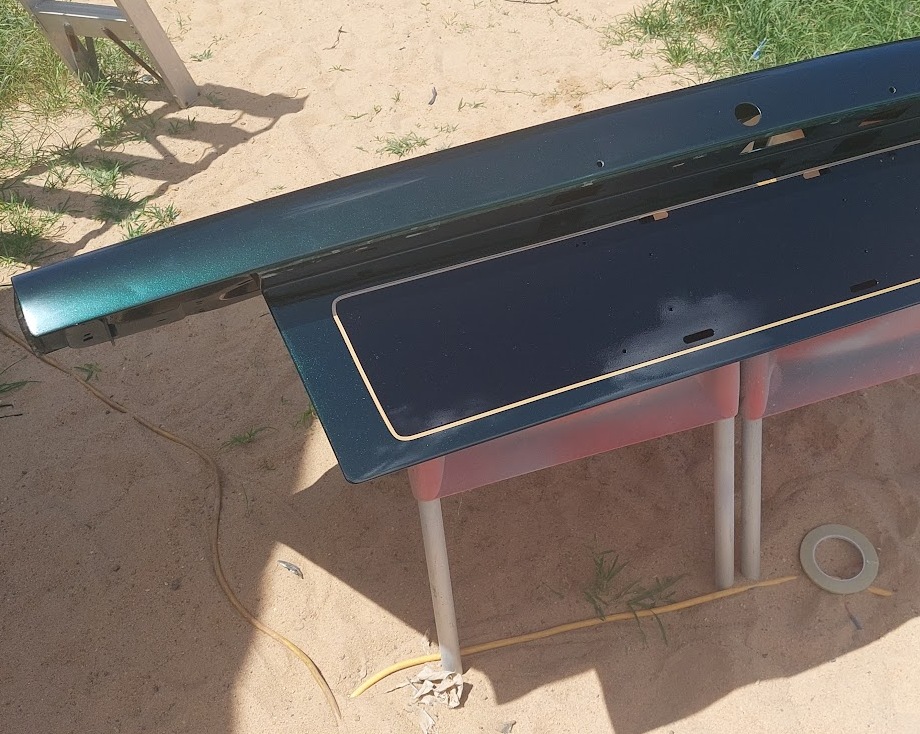
The underside was done in Black with the green being around the border with the gold pinstripe to separate them.
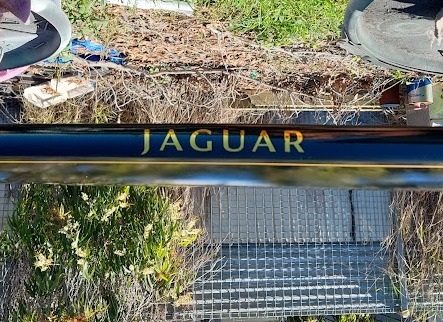
Stick a brand name in place in the centre of the rear section of the wing.

Although it looks black, the upper area of the wing is actually green, just as you can see the green on the bottom Right cornerI am very happy with how it turned out, the next part is a little story about buying something and going to all the trouble of fitting it into place only to find after applying gloss black that it looks terrible. I did fix it though.
1 Like
Um… this ain’t your first rodeo, is it? ![]()
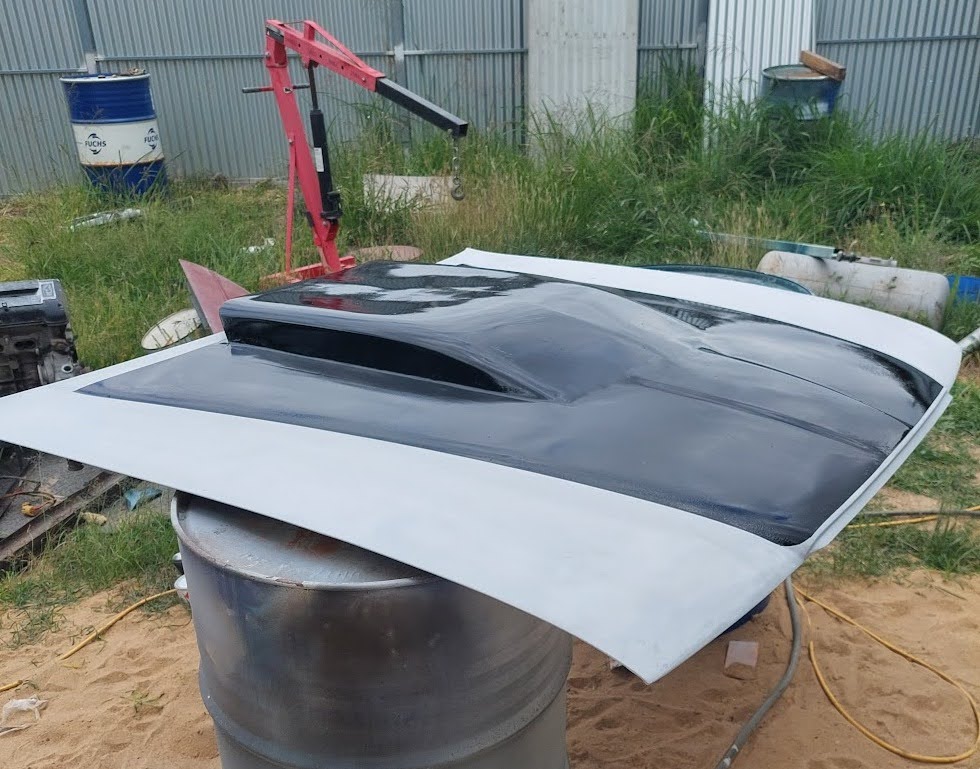
the next part I am hoping to finish some time this week, this is bonnet scoop.

I got me an A9X Torana scoop from some place in Sydney that does body kits for all makes of cars, I sat this one on the bonnet to see how it would look, I liked it and decided to mold it into place, The Torana’s had them screwed in place, and for me that looked a little cheap.
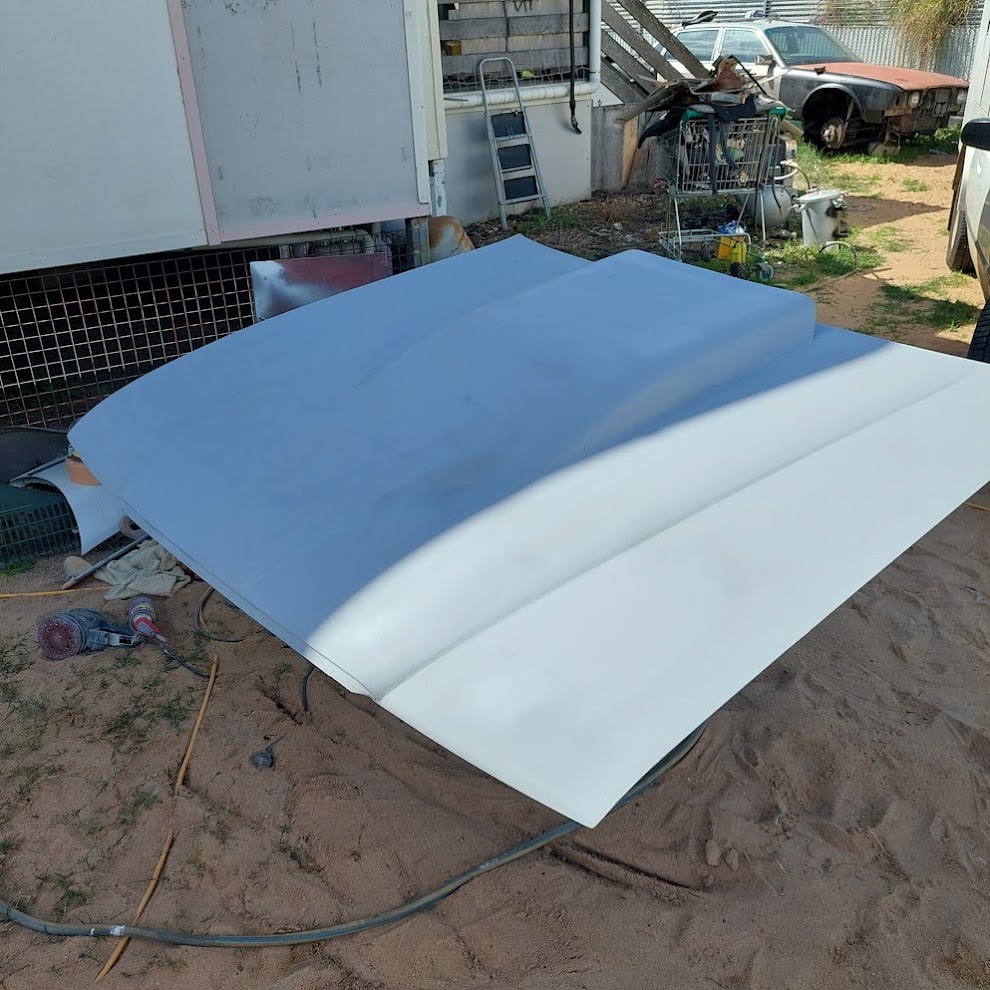
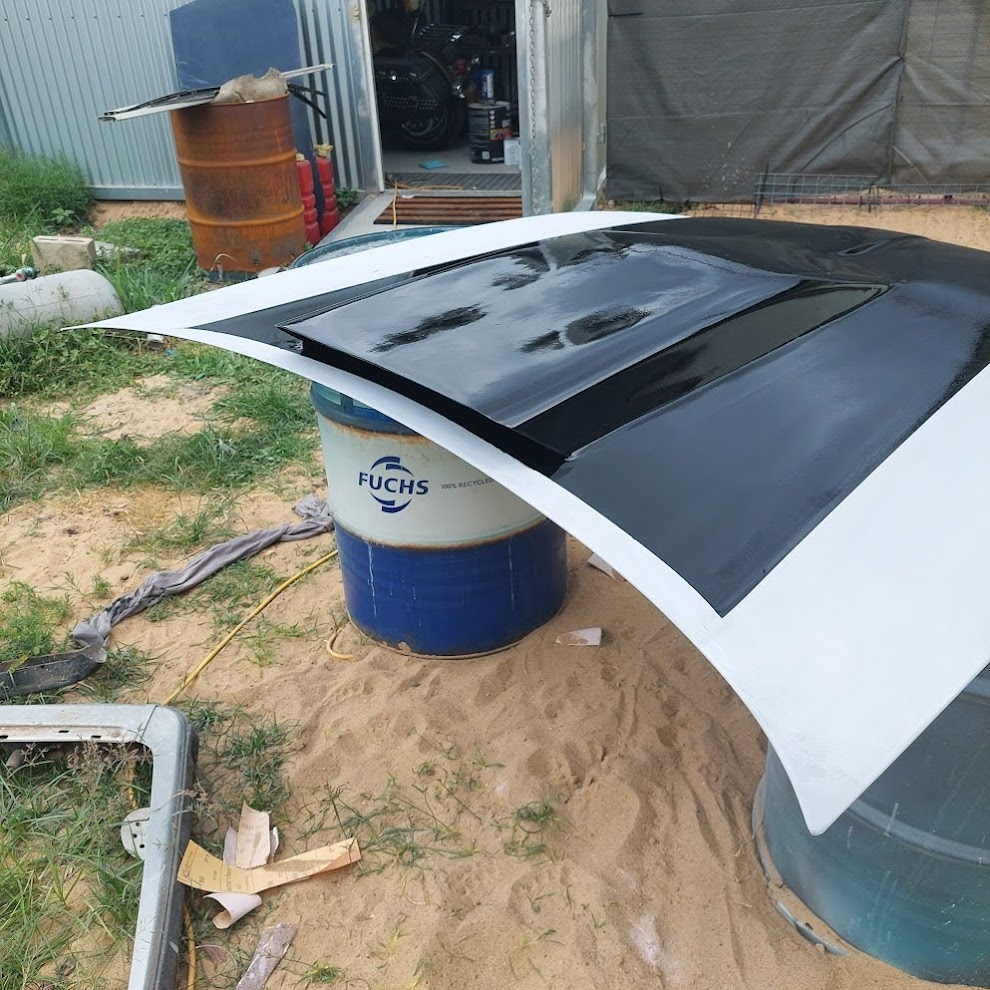
I got it all glassed into place and gave it a dose of primer.

I gave it a good sand with some 800 wet and dry sand paper, so far so good.
Oh no! that looks bloody terrible, the top of the scoop looks like it is caving in, I didn’t check the top as I should have, and gloss black will gladly show you where all your dents are, All that work for nothing, I am far from the happy person I was at the begining. That needs to come off. I let it sit for a couple of days thinkling maybe I am just over reacting, maybe it will grow on me.
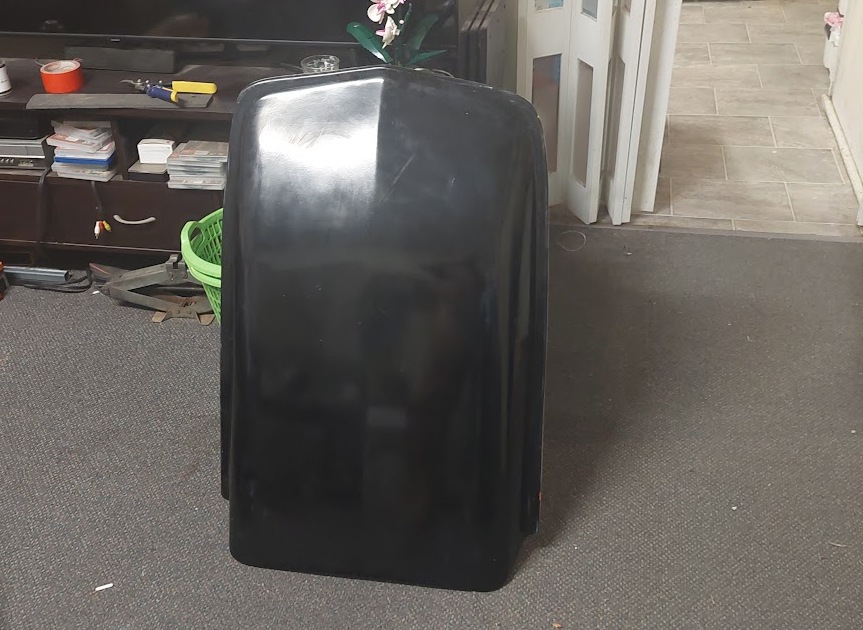
Nope! I dislike it more now than before, fortunately I had another one made by our next door neighbour, he finished it just after I painted the black onto the bonnet, He used a satin black gelcoat and right away I saw it was a much better scoop.
Now I have to get the other one off and get started on this one.
My first modified vehicle was an old Toyota 4 Runner 1984 model I think that was a vehicle that really put me to the test, this believe it or not my second attempt at modifying a car, I am a boilermaker by trade, the rest I am just winging it. You may be surprised how much I learn doing this stuff.
1 Like
Not sure about what I am going to do here, I am not blessed with a shed to work in right now, so I am at the mercy of the elements, today the temp was fine, calm weather, it seemed like a great dat to get something done.

Well that was not to be it seems. I had just laid down the 3rd coat when disaster hit. I went inside to grab a drink, when I heard the wind blowing pretty hard all of a sudden I looked outside to find a willy willy working its way towards my freshly painted parts,( a willy willy is a small cyclone style of dust storm,) and my yard is almost completely covered in sand, and now so is all the things I had been painting today.
This little bundle was mainly plastics, I hope I have saved them from being torn down again and redo everything here.
Ah the dreaded ‘texture’ coating. ![]()

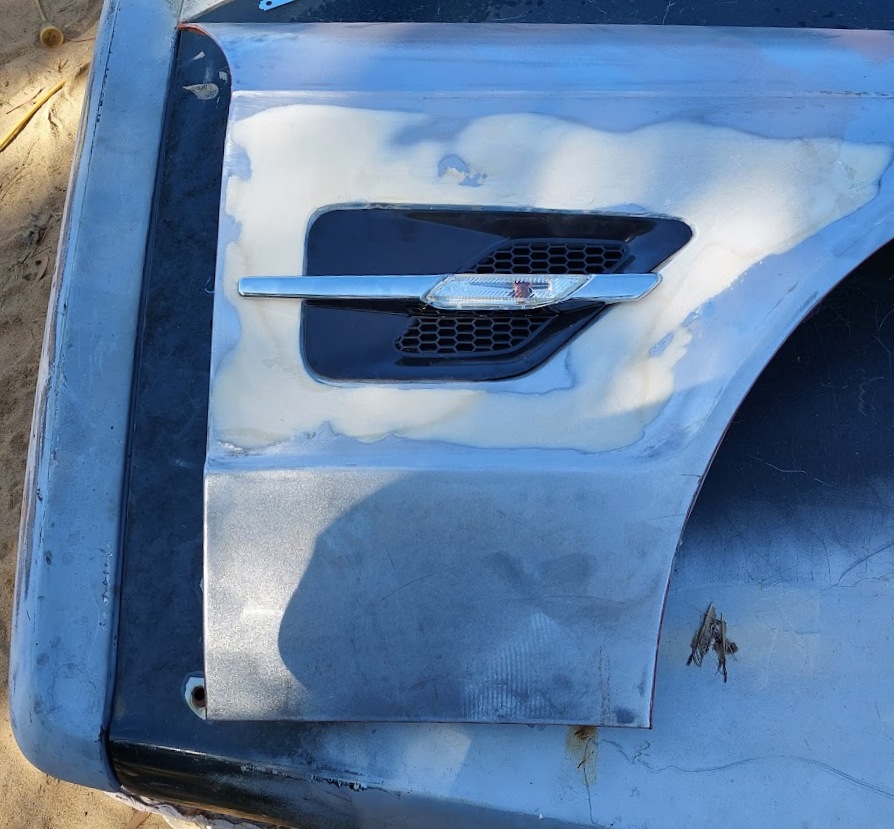
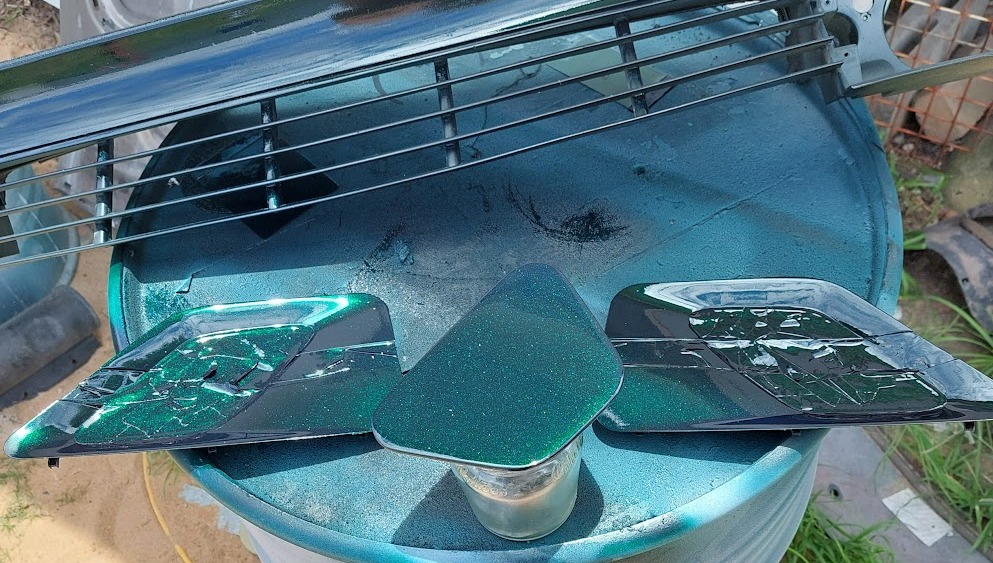
now something a little bit different to the rest, here we have a pair of XR6 Rebel sideskirts, only the Rebel had the inserts put into the skirts and they wrapped around the rear of the front guards, however this was not going to work for me here because the skirts were about 3 inches too short.
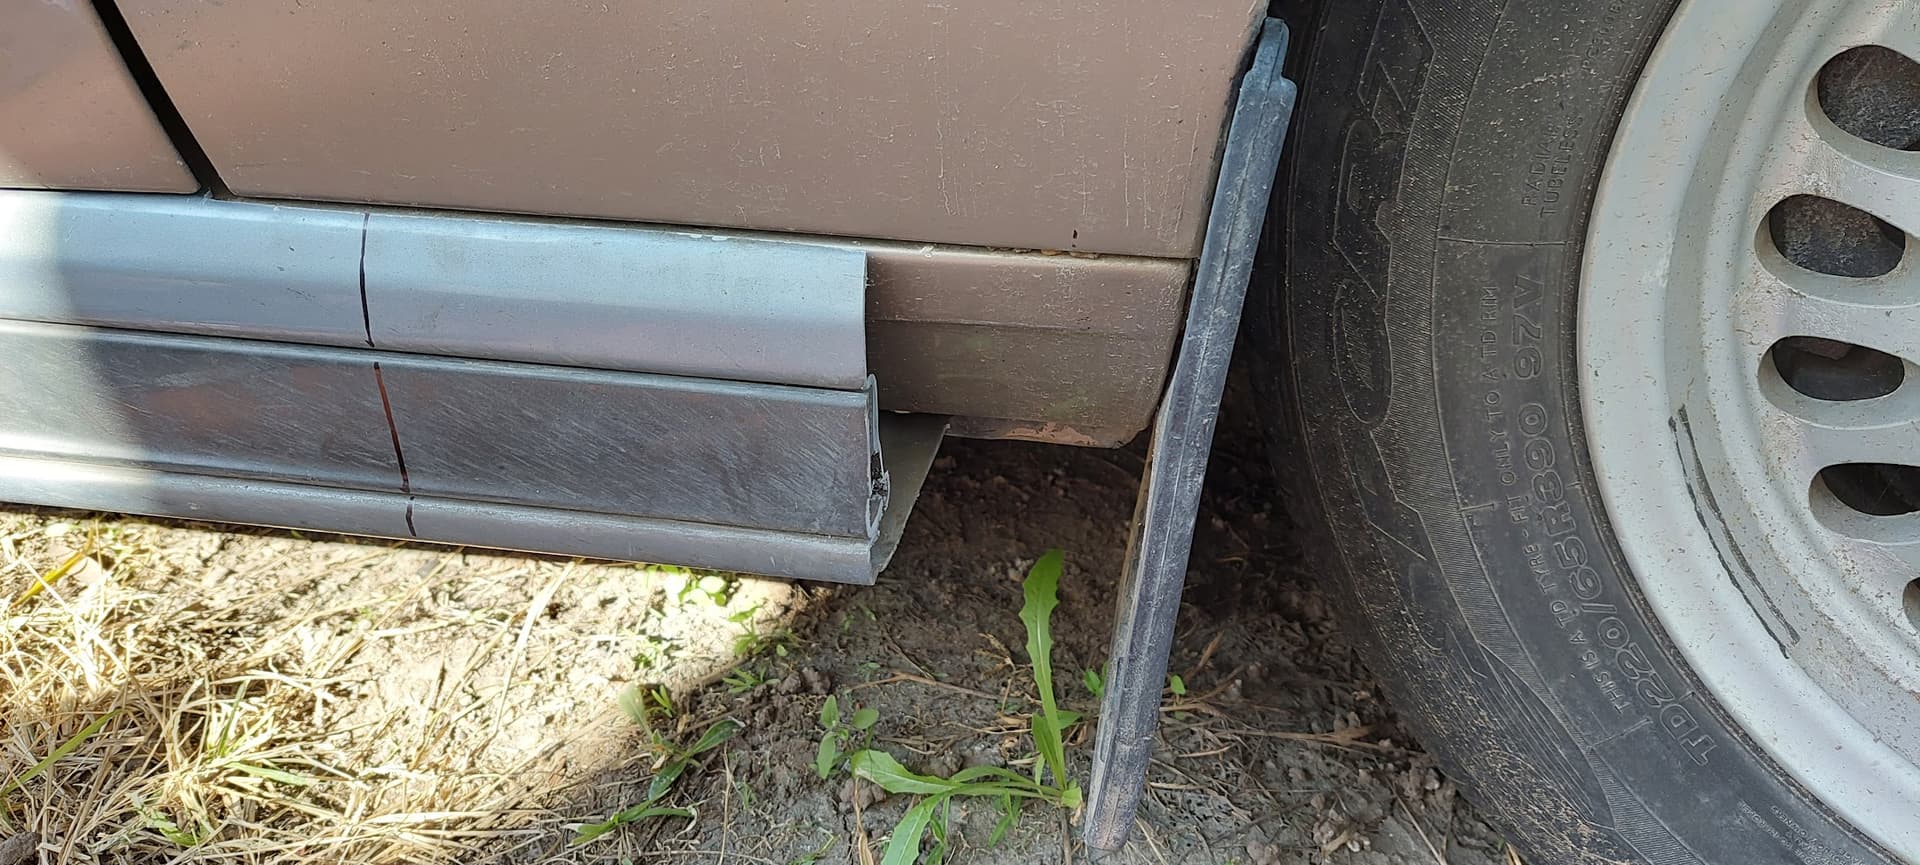
Here we can see how short they were, so I made a sort of mold with some aluminium sheetingthen placed it where the extension need to go and start puttinf the fibreglass into the mold from behind and because it was almost the right shap it didn’t take much to get it to fit.

After having the glass work done it was a simple matter of shaping it and getting it ready to paint, and I had to work out what I was going to do with that insert.

This didn’t turn out too bad at all, it didn’t take much shaping and a little bit of grinding to allow the front of the filler strip to look like it really was suppose to be there.

Now that is all done, time to give it a bit of colour.

Then add a touch of colour to the insert and we are done with this part.

I am happy with how it turned out, just have to put all the clips back into it and all the screws to finish it all off.
1 Like
To avoid any confusion about which car I am actually rebuilding, I am rebuilding the green one, the gold one I use as a template from which to work from, if it looks sort of Okay then I will transfer it accross to the green one to see how it will look once it is done. I will be fitting these parts to the green one to get an idea of how it will look when finished, although I am quietly confident it will work out.
Hi everyone it has been a slow day again today, (I am just too lazy to much today.) anyway I did get a couple of pieces done so they may be put into storage until I can get the body inside the garage. Big thanks to Derek for having a bootlid with no rust and I put the final coats of clear onto it today, the black parts were done yesterday.
the little blotches are the reflections of some clouds, it had me worried so a raced outside to see if it was damage done to the paint, fortunately all was good.

Finally the air dam under the front bumper also got a lick of paint as well.

Yes I do like my gold pinstriping too.
1 Like