Hello everyone, I am new to this forum and I hope I can find a someone that can give me some advice.
The car is a 1967 S1 OTS, the issue is the handbrake. Basically, even if I pull it all the way up, it does not completely stop the car from rolling. My diagnosis is that the cable needs to be adjusted, but here’s the dilemma: my car does not have the inspection access from the boot (later model, I guess) and I have conflicting info on how to adjust the cable for my model. On the car Owner’s Manual it says that the adjustment can be done from underneath the car, on the Haynes Workshop Manual it says that there is no alternative but to drop the rear suspension, which sounds very involved. Any idea of how I should do this?
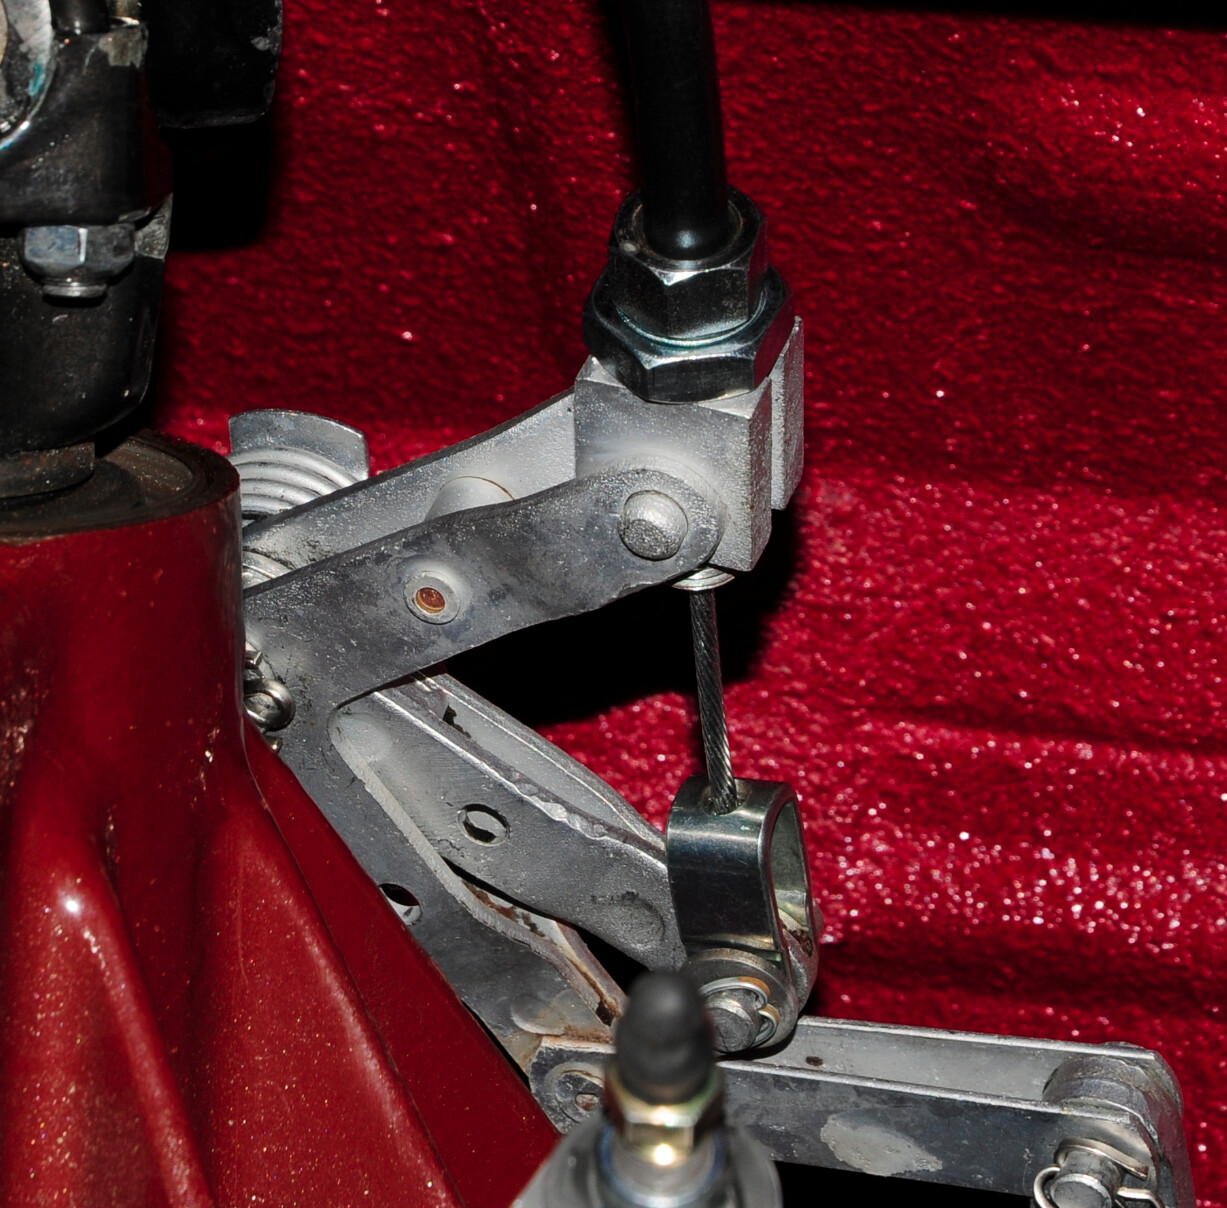
It can be adjusted with the car in the air and the IRS installed. Here is a photo from below showing the adjustment point for the cable:

Daniel - Welcome to the J-L Forum!
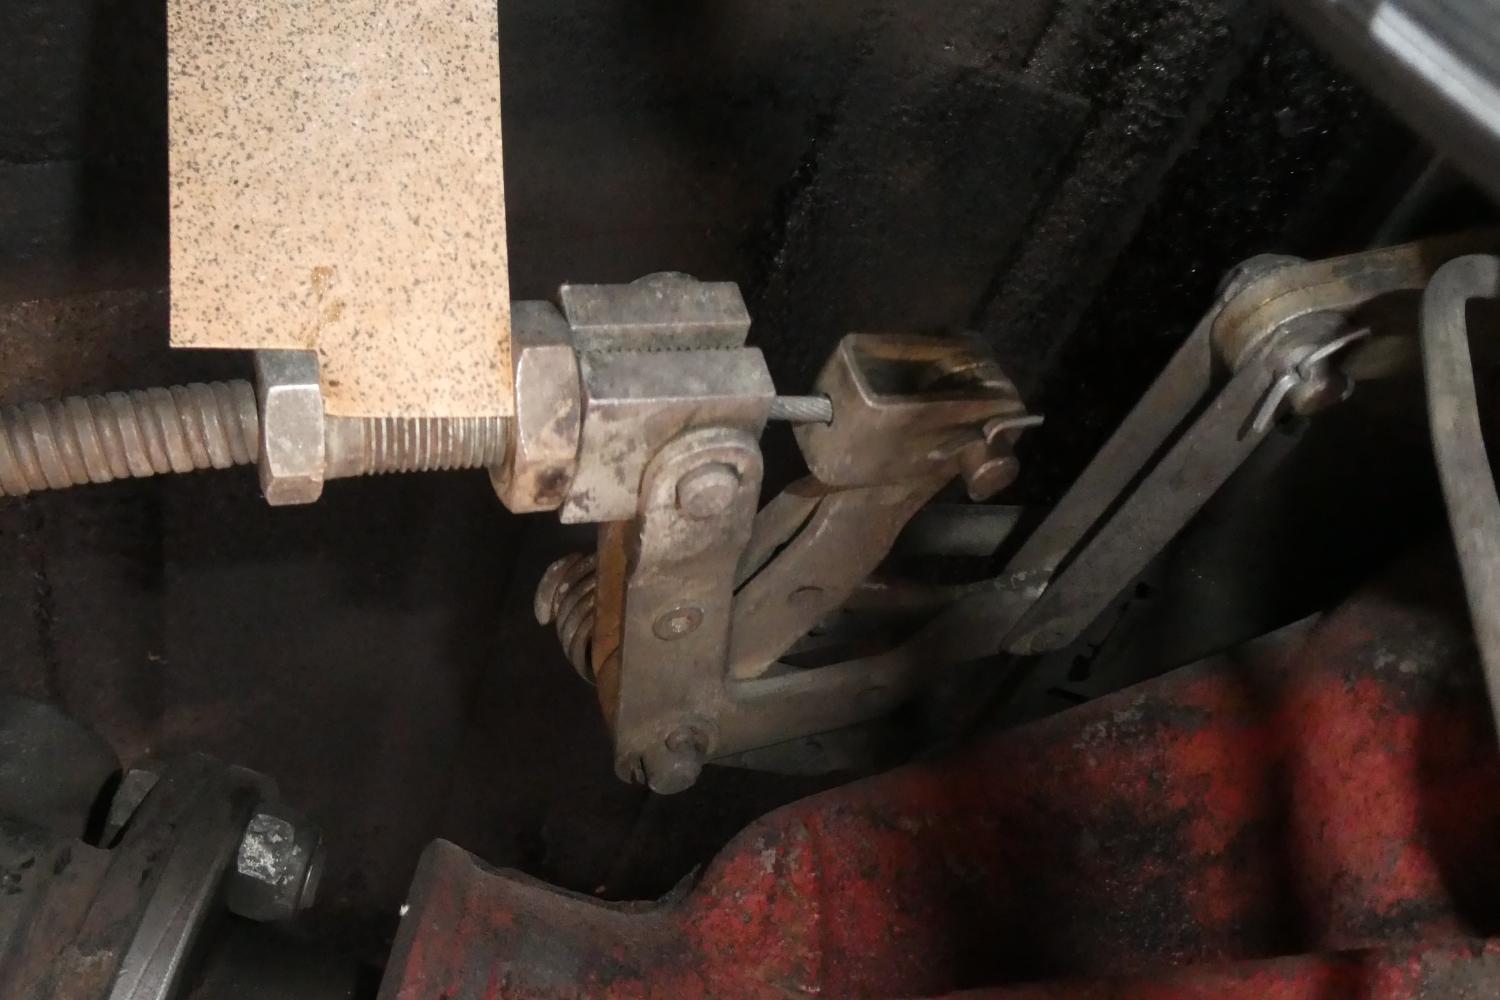
Doug is quick. Here’s another view of the lock nut and the piece that threads in or out to change the engagement. The cardboard piece was me noting the setting so I could return it to its prior setting after having it apart:
Hopefully shortening the cable with that adjustment will get you where you want to be.
Have you inspected the handbrake pads (not the same as the caliper pads)? They can wear down to nothing if someone has abused them in the past (mine were like that).
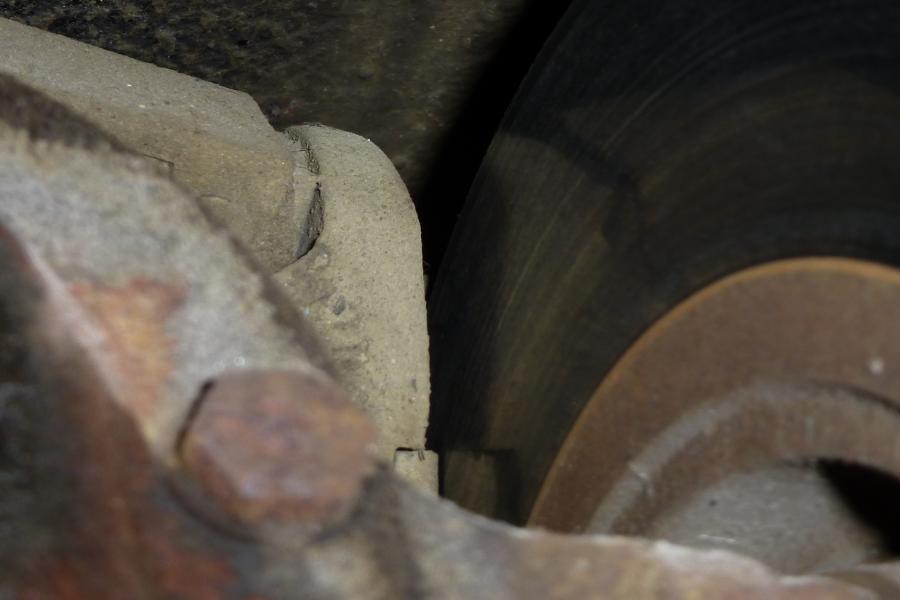
In case it helps - here are a couple of views of very worn pads. It is hard to get a good look at them but a flashlight and the right angle will work:

Replacing those pads is not difficult but very likely best done with the IRS out.
It might be the the handbrake self adjusting part of the mechanism, that is in the caliper, is not doing its job as it is siezed up. It is is thus noit compensating for wear
Althought it has been a long time, I think the fix is to exercise the mechanism on each caliper so that they each take up the slack and compensate for the wear
Dennis 69 OTS
Thank you all. Great tips. Couple of follow up questions: I don’t have a lift, only jack stands with which I can lift the car up about 20”. Is that enough? Also, Do I need to remove the exhausts to access the adjustment nut?
As long as you can fit under the car to work you should be able to get to the adjustment nut with the exhaust still on.
Super! I’ll give it a try and report back.
If you don’t hear back from me, means I am stuck under the car! 
This is one of those jobs where I would be much more inclined to leave the car on its road wheels on ramps, or on stable cribbing. Messing with the IRS lying under the car with the wheels off the ground and only supported by jack stands is unnecessarily risky in my view. The IRS mounts are not designed to hang the suspension from - they are usually in compression. Be safe!
4 Likes
Or keep your floor jack under the irs as a safety measure.
In my experience, even when adjusted properly the E-type handbrake with it’s tiny pads isn’t much good at completely stopping the car if it’s rolling at any semblance of driving speed. It’s really a parking brake rather than an e-brake. If anyone’s been able to get his to lock the wheels at speed I’d like to know how he did it.
Which I’ll take as my cue to repost how I use cribbing to support the car:


Can be used in pairs (as shown) or singly on each corner.
3 Likes
Can we play Jenga with them afterwards?
1 Like
I’d love to know how you get the car up high enough to use both cribs. I have a set of ten inch race ramps (fancy brand name for hard plastic wheel cribs). They separate into two five inch cribs. At the full extent of my floor jack I can just get one set of the five inch ramps under my tires. What are you using to get the car up high enough to use the double set?
I raise the car in two steps. First with the jack then the second time with the jack and a block of 6x6 wood (see it next to the LR crib).

So cool!! Did you build these? Looks like 2x4 screwed together. What kind of fasteners? My jack lifts the car up about 23”, should be plenty for something like this.
So, I’m try to reverse-engineer these. If indeed they are made with 2x4, the dimensions should be around 32"(W)x14"(L)x16(H). Am I correct?
The ones I made are 11 3/4" x 13½". Height is whatever 4 or 8 2x4s add up to.
The 2x2s are used to ‘key’ the two halves and are removed if using the set as 4 singles.
That size just seemed okay and probably maximized the use of the wood I was cutting.
They are assembled with construction screws (like you’d use to build a deck).
A pair of singles on the front is just right for setting the bonnet in the ‘full upright’ position (after undoing the springs).

Be careful and, of course, use at your own risk.
1 Like
When you say “undo the springs” Do you just remove the single bolt holding the bracket pivot point on each side?
That’s how I’ve been lifting the Jeepster, repeatedly, since August!