It just struck me that we don’t know how original your ccooling system is!
If you don’t have an original bellows thermostat but a modern one instead then you need a significant modification to the thermostat housing to ensure that the bypass hose is shut-off when the thermostat opens.
If you are using a modern thermostat without a modified housing then you would need to block-off the by-pass hose. This is not a good thing to do but if the by-pass remains open when the engine has warmed up then a large part of your coolant will be flowing through the by-pass instead of the radiator and your car will overheat.
Ed Nantes created a method for modifying the housing for use with modern thermostats.
AN EASY CONVERSION FOR Mk4/5 THERMOSTATS.
Since late side-valve cars, Jaguar have used a thermostat that is a 2 way switch. When cold the water runs through the bypass hose and as the temperature rises it is diverted through the radiator core.
When the originals got old and gave up the ghost, a variety of fixes were tried.
Removing the internals altogether… not a good thing as the water will prefer to take the easy route through the bypass rather than fight through the radiator core.
Blocking the bypass and putting in an on/off thermostat… better , but takes longer to warm up which increases wear.
Making a new housing to incorporate an XJ6 thermostat… good but not cheap.
This conversion is suitable for 6 cylinder Mk4 /5 thermostats which have the bypass entering the housing in the direction of the centerline. i.e. not SS and 1 ½ litre cars where it enters at a tangent.
]
The original mechanism blocked the bypass by blocking the feed which faces the rear of the car.
In the conversion, the bypass is turned 180 degrees so that the XJ6 thermostat can push from the front and close it that way.
The first step is to remove the old brass mechanism… unsolder the nut and remove the screw at the front to take out the closing plate and the rest is pretty much force. Cut the 4 tabs which hold it in at the back but don’t damage the housing.
It’s good to clean the housing by sandblasting as you need it clean to braze it.
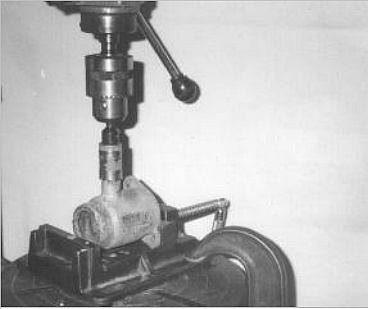
Mount it in a vice with the bypass vertical, and use a 1 1/8” hole saw [ a good one not the hardware shop cheapies ] in a pillar drill. Remove the pilot drill BEFORE starting.
The saw will cut around the bypass, being guided by it, to separate it from the housing.
The saw will bottom out before it cuts completely through but a light tap with a hammer on the end of the bypass will sheer the last 1/8” tags of metal remaining.
The bypass is now free and can be rotated 180 degrees.
It has a 3/8” hole through the centre and a with a piece of allthread and washers and nuts it can be held in place with the large opening squarely facing forward while it is brazed. It will sit slightly forward up against the edge of the hole but not to worry, the bypass hose has enough give to compensate.
Start brazing at the front edge and finish at the back.
Tap the 3/8” hole remaining in the centre to 7/16” [ UNF ] and shorten a set screw so the it is just long enough to block the hole when held in with a spring washer.
The XJ 6 thermostat mounts in the front opening. To get the correct spacing between the flange and the bypass opening, I insert a ¼” [6mm] spacer. The local laser cutters make them for me as a ‘washer program’, but if you haven’t access to one they can be cut from brass or steel with a hole saw, turned off the end of solid bar or if your local steel supplier has 2 ½” thick-wall tube he might cut a slice off for you.
Braze , silver solder or soft solder the spacer in place and mount the thermostat with 2 1/8” [preferably] stainless steel screws tapped in to the spacer.
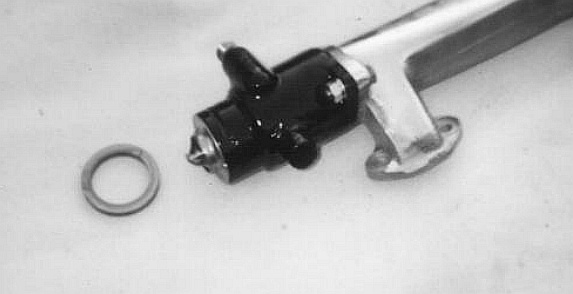
Here’s what it looks like finished with one of the spacers shown for illustration.
Total cost , here thermostat about AU$20, spacer lasered AU$10 , screws and a bit of gas and time.
Oh, and while not mandatory, drilling a 1/8” bleed hole in the thermostat will make it easier to fill the radiator.