You are making the best long term choice. Might as well fix all the issues on the pan.
2 Likes
thank you John. I hope that turns out to be the case.
Do your son a favour and get the sump as clean as possible a good distance around the repair area. Lacquer thinner works well. He will likely groove the crack as well.
1 Like
Since you will be having the sump off you might as well remove the baffle, buy a couple of cans of engine degreaser and a scrub brush you can toss after use and scrub the inside and outside as clean as you can get it and then go to solvents.
Indeed: clean with hot, sudsy Simple Green, then copious amounts of acetone or lacquer thinner.
Erica’s advice is always sound. In this case auto-correct or habit has altered her intended meaning. I am sure she meant to refer you to a “Cometic” gasket, with no “s”. In case you are unfamiliar with the brand and don’t get it. Of course, I may be wrong and ladies may indeed insist on a cosmetic sump gasket at all times, if such is their want…
3 Likes
Thanks all…clean, clean, clean. I am familiar with Cometic. But Erica might beat you with her guitar. 
4 Likes
Pan is off. Not too bad a job. I spent more time preparing than I did in the actual pan removal. I found the engine builder had not fully installed the stabilizer cross bolt - not all the way through, no nut. Anyway I fixed that and then loosened bolts so I could raise the back of the engine a bit. The harmonic damper was interesting to get off. I have yet to separate the pulley from the damper; and my pulley has a divot out of the pulley flange. I’ll be replacing that. I used a pulley puller to remove the damper/pulley combo and that was easy. Then out came the pan bolts. The 4 studs up front are missing. I had made sure to place the crank at #1 Cyl BDC and then jacked the bell housing. Then just a bit of prying and the pan came loose and came down and forward easily. Thanks to all of you.
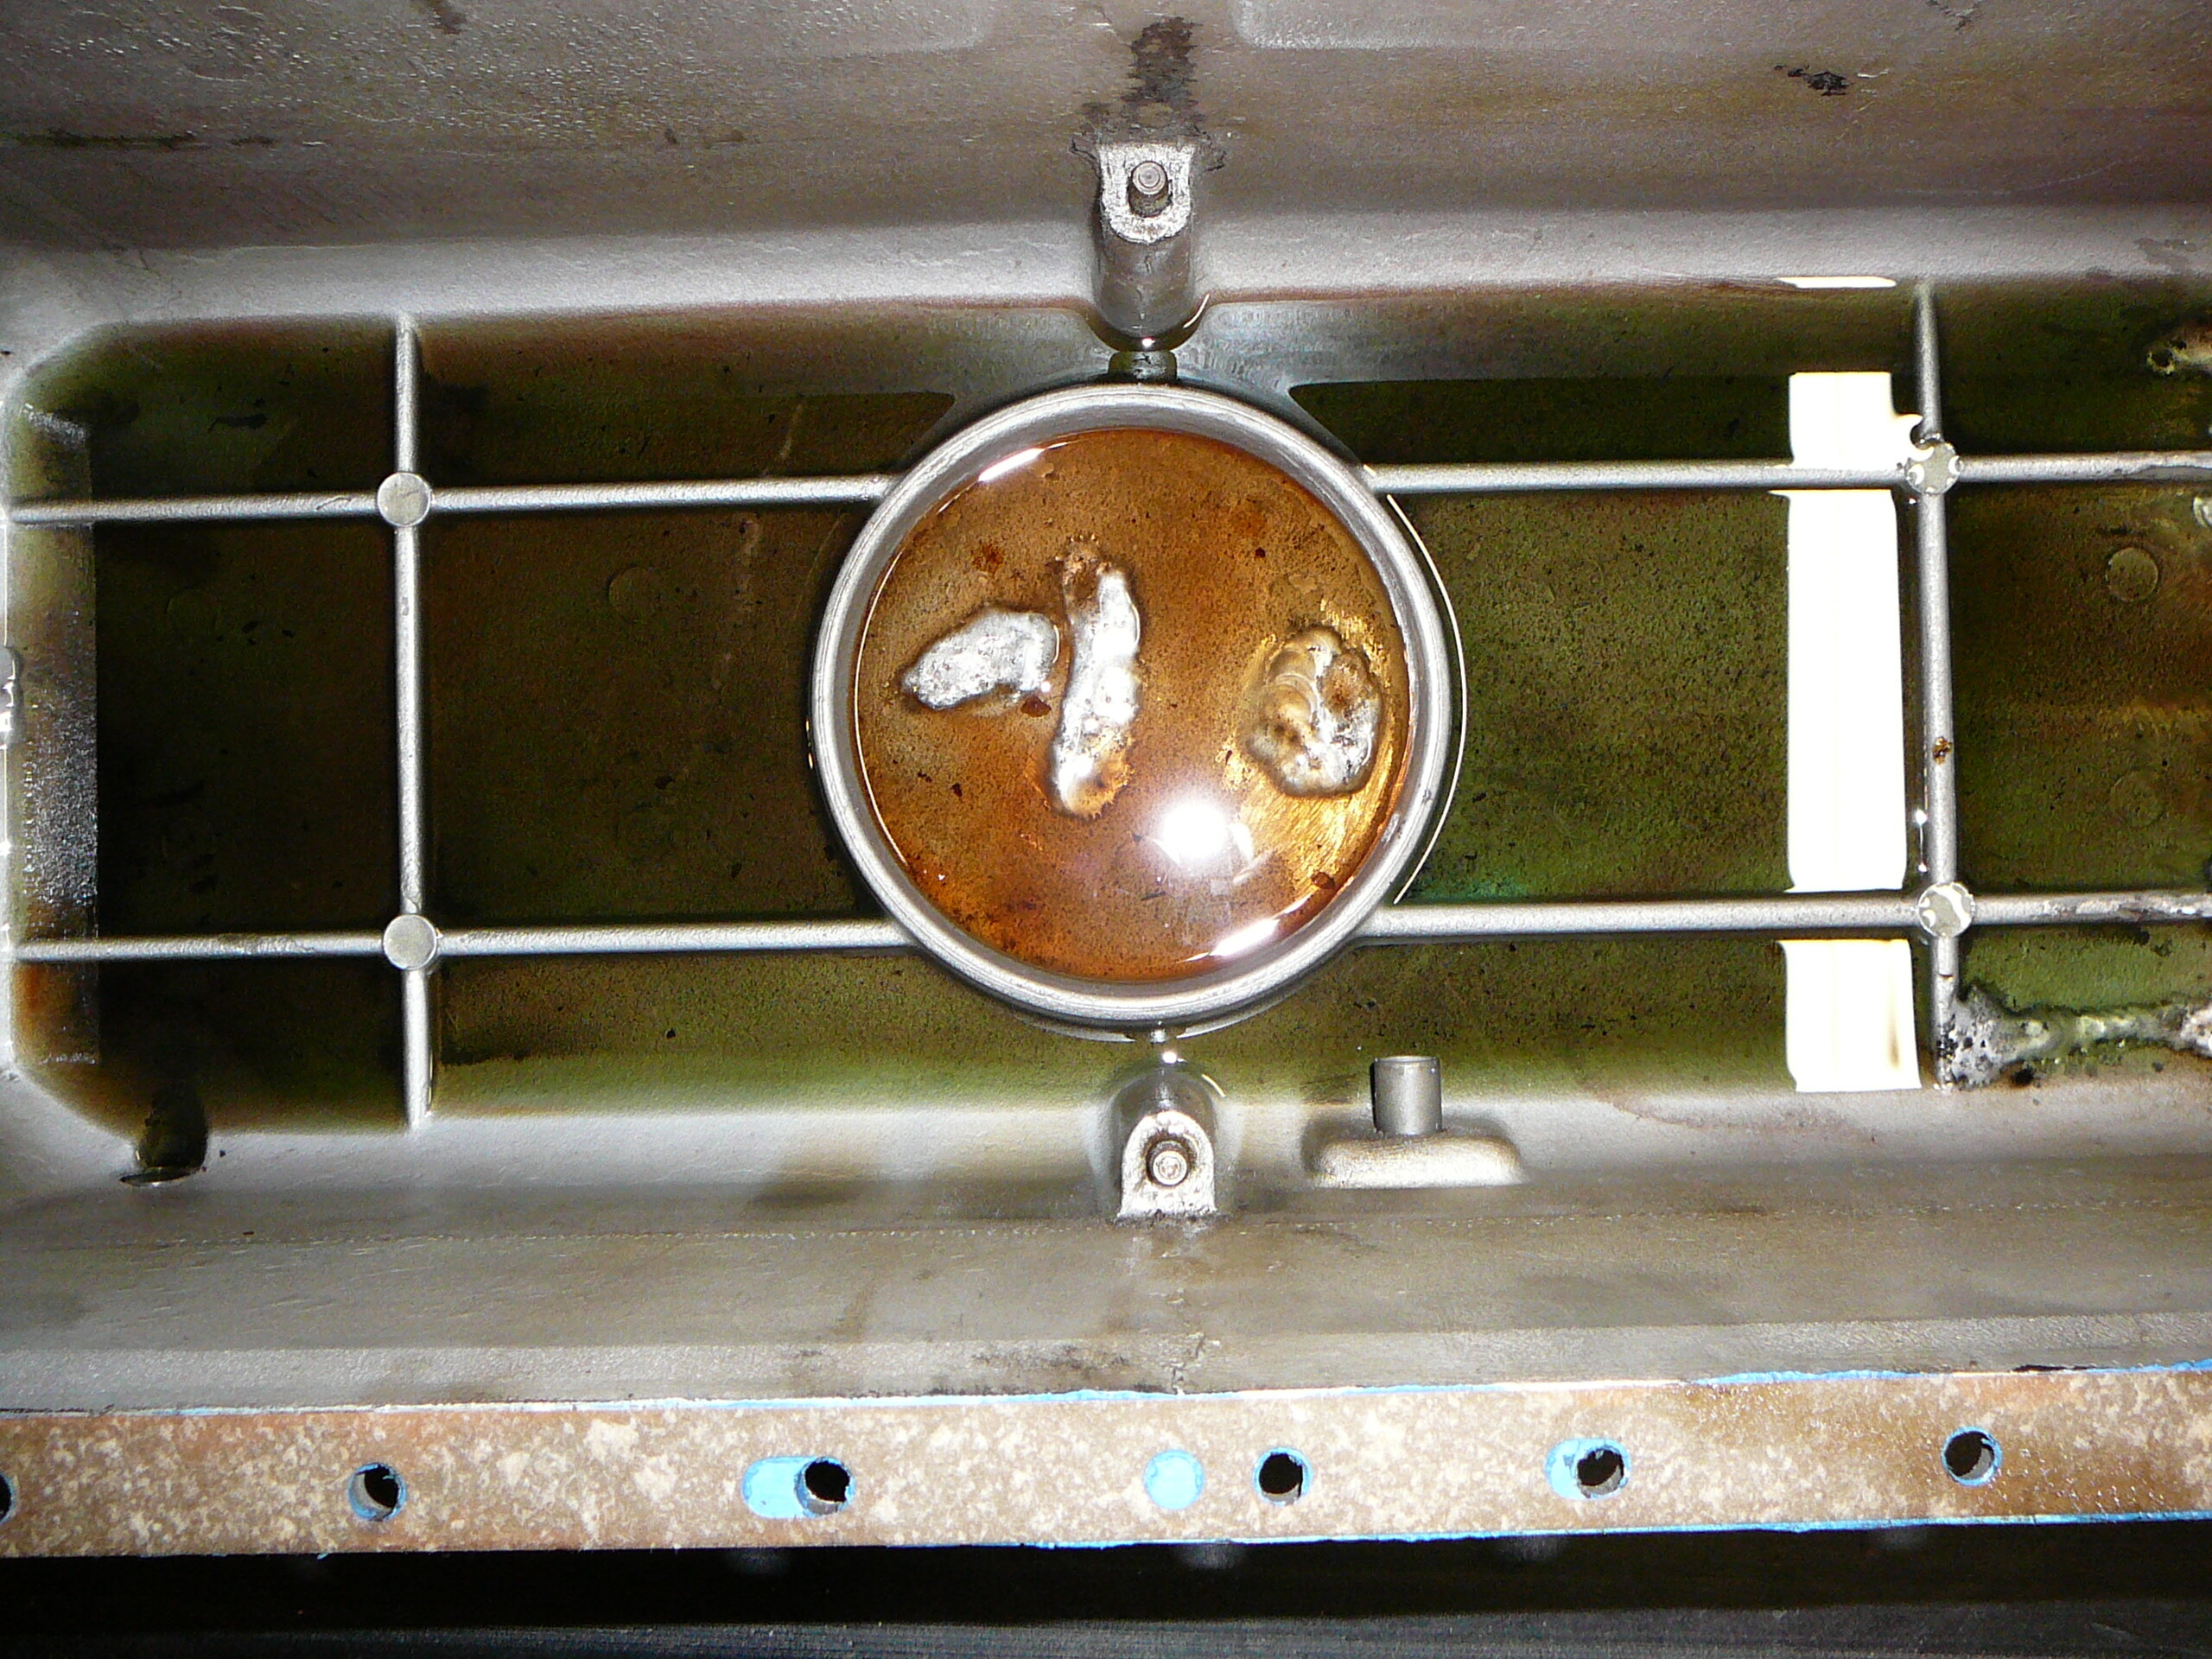
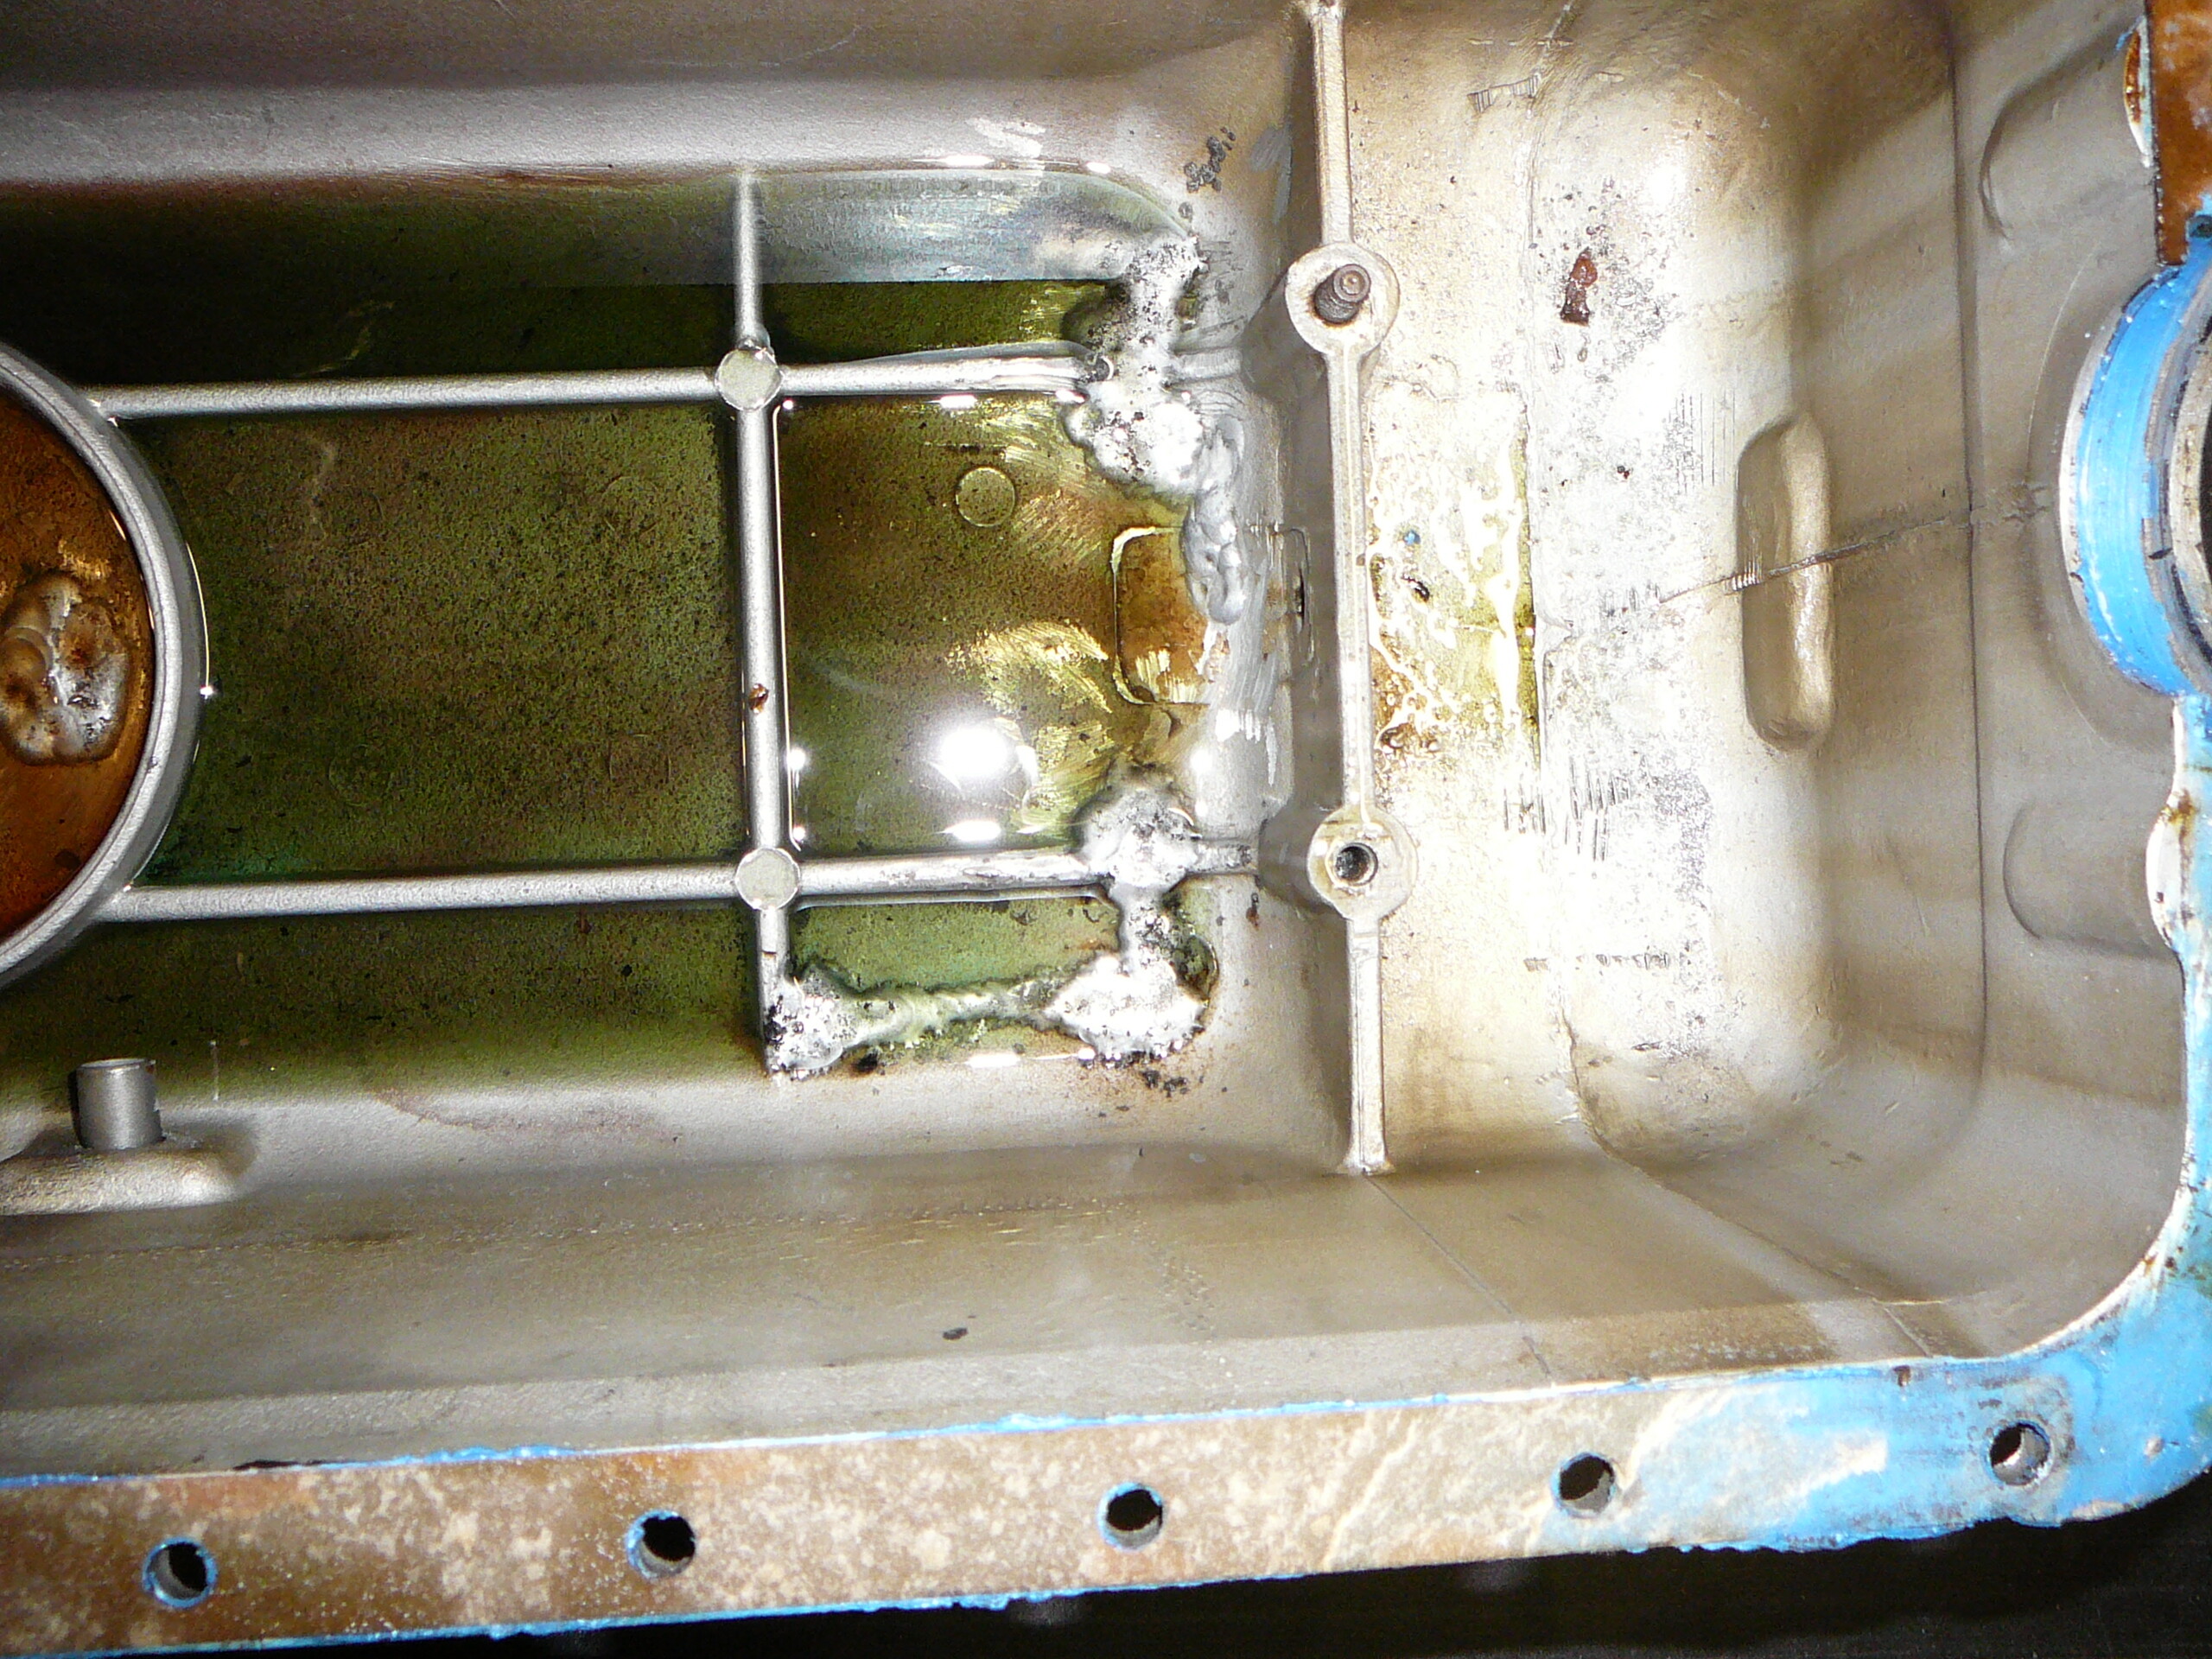
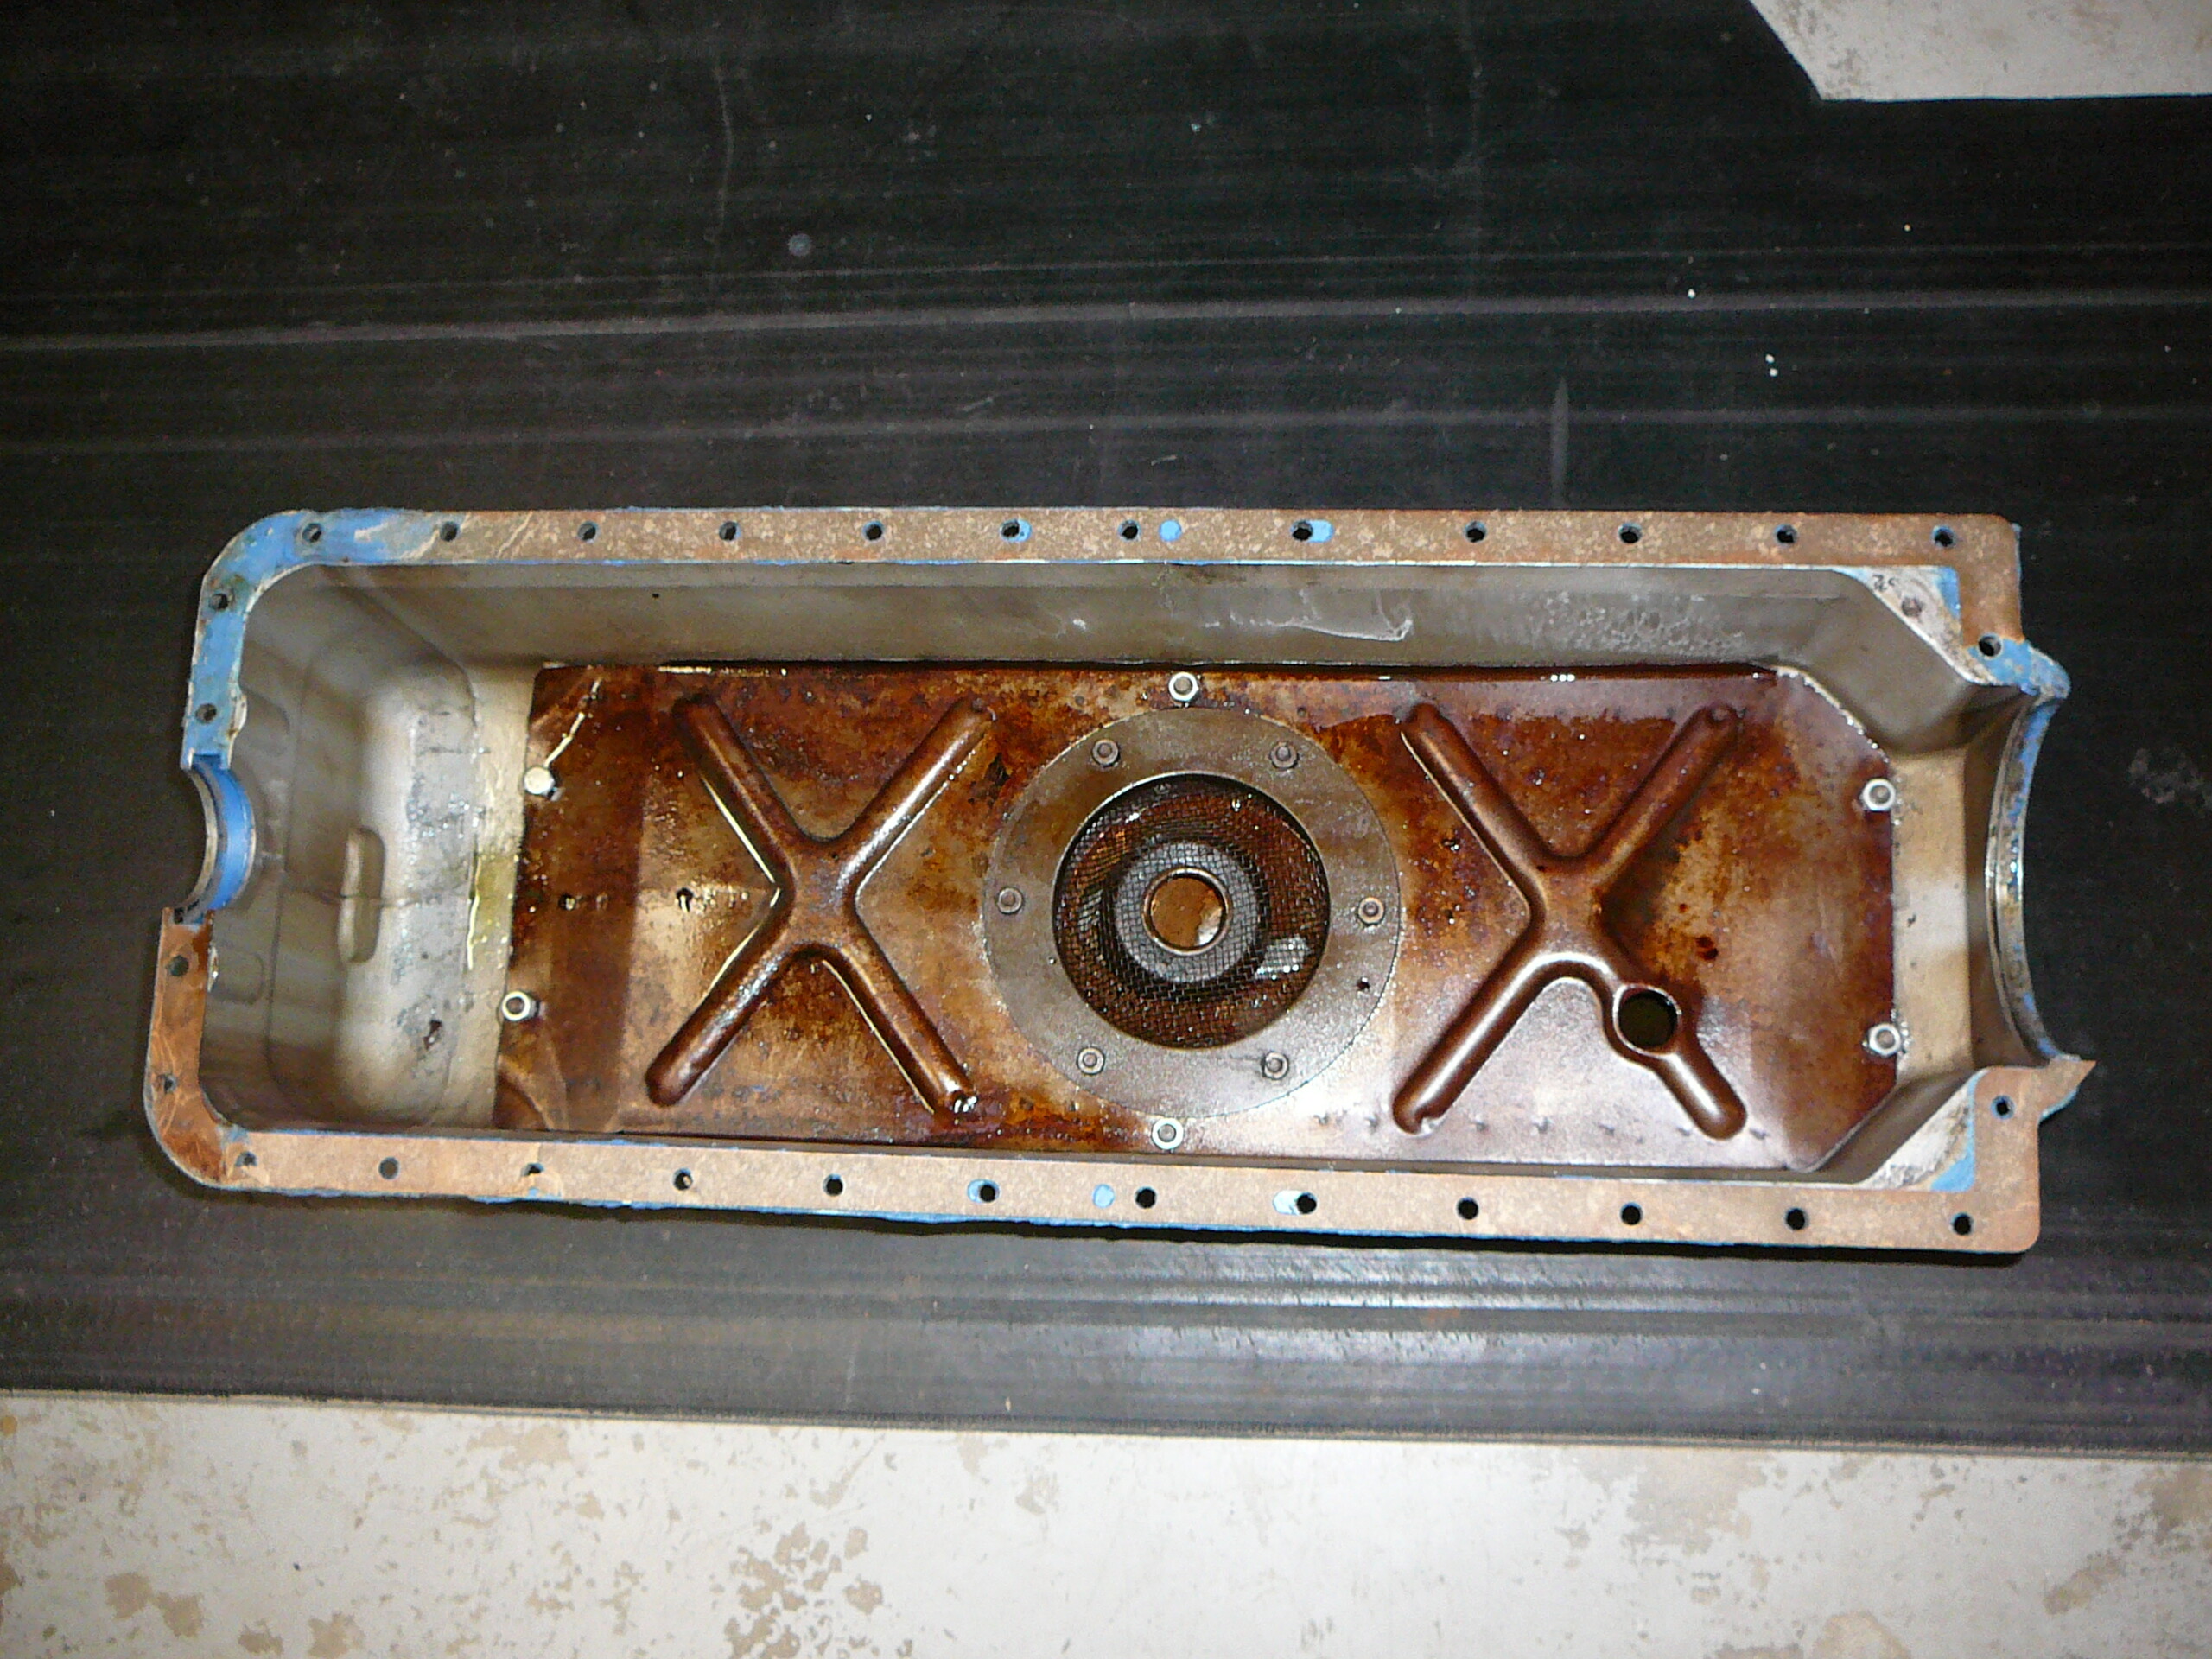
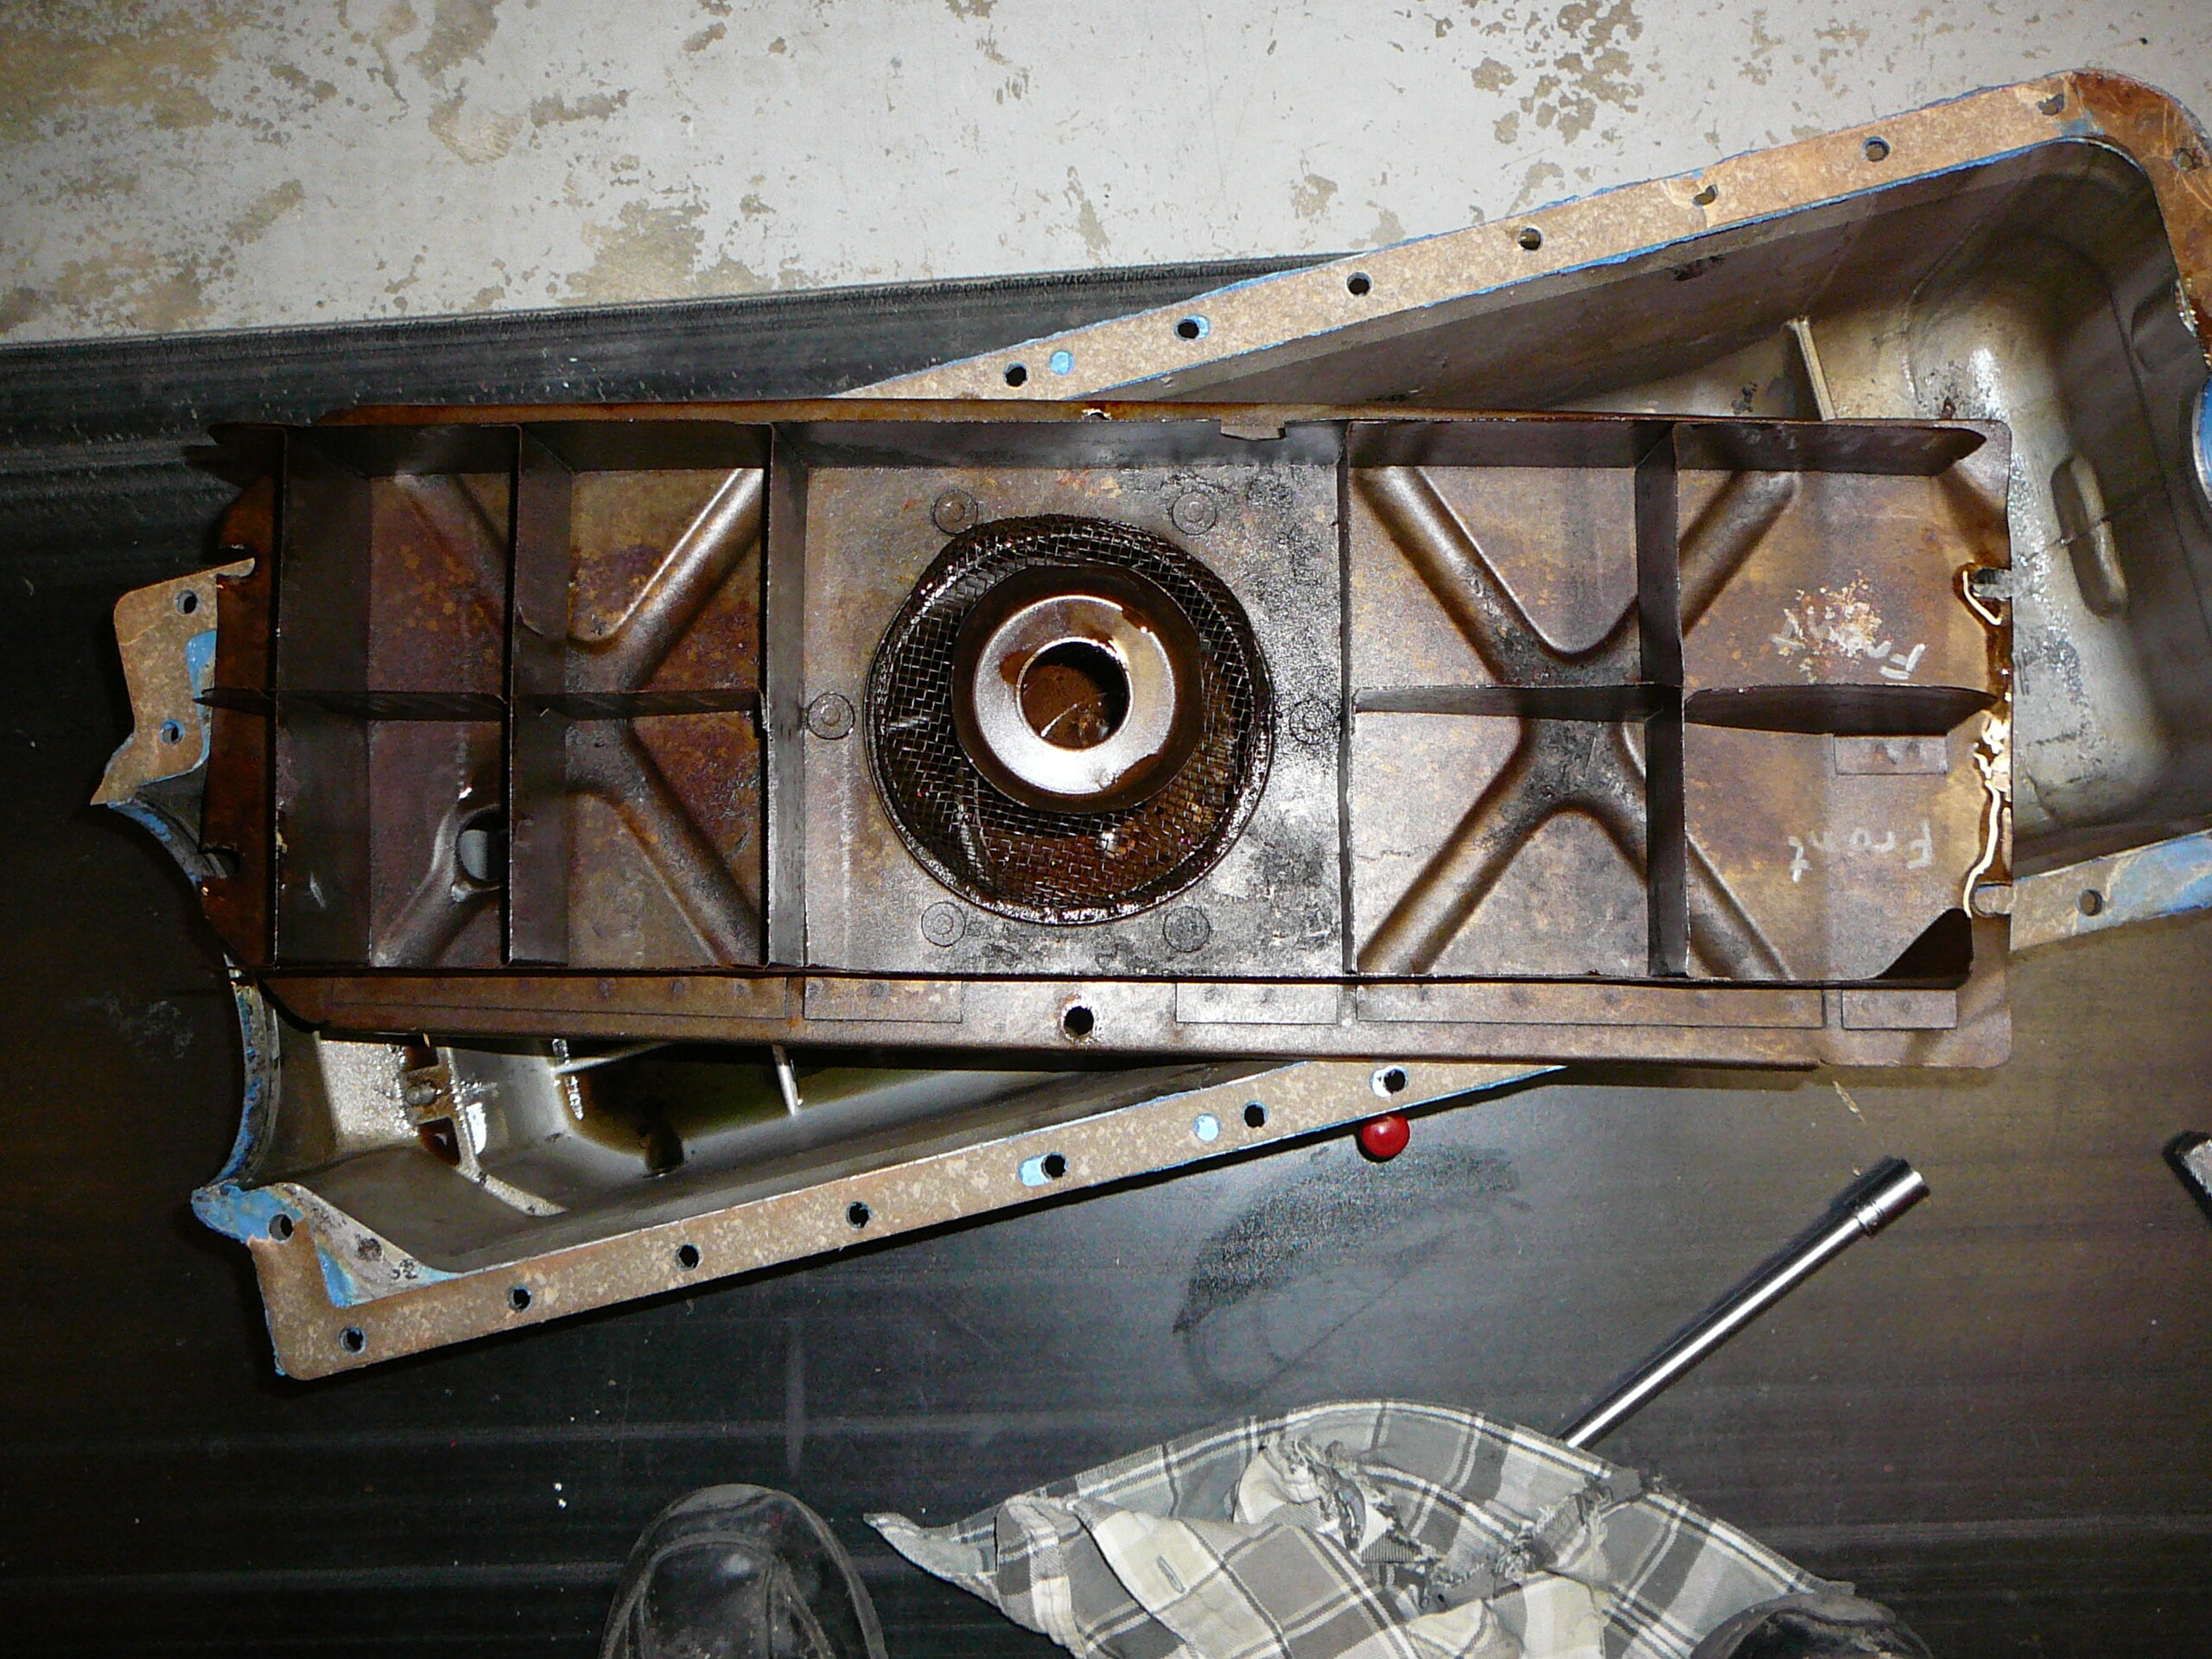
Lots of pics below. The inside of the pan has multiple weld repairs…perhaps 6. The two in the center are definitely leaking. Two questions about the baffle. These are suppose to have studs with nuts. One of mine is a bolt. I see no reason for it. Also, one front corner of the baffle is bent. Like on purpose it looks. Should this be bent or should I straighten in out?
I cleaned the baffle and the pan with Simple Green, my pressure washer 4 or 5 times. Blew it dry and set it in the sun. Then flushed both with acetone 2xs. It is squeaky clean; it does not smell at all. I think I’ll heat it lightly and see if any oil weeps from the repairs.
Please look at the photos? Let me know what you see that may be amiss? Thanks.


More coming…


As in… they weren’t installed??
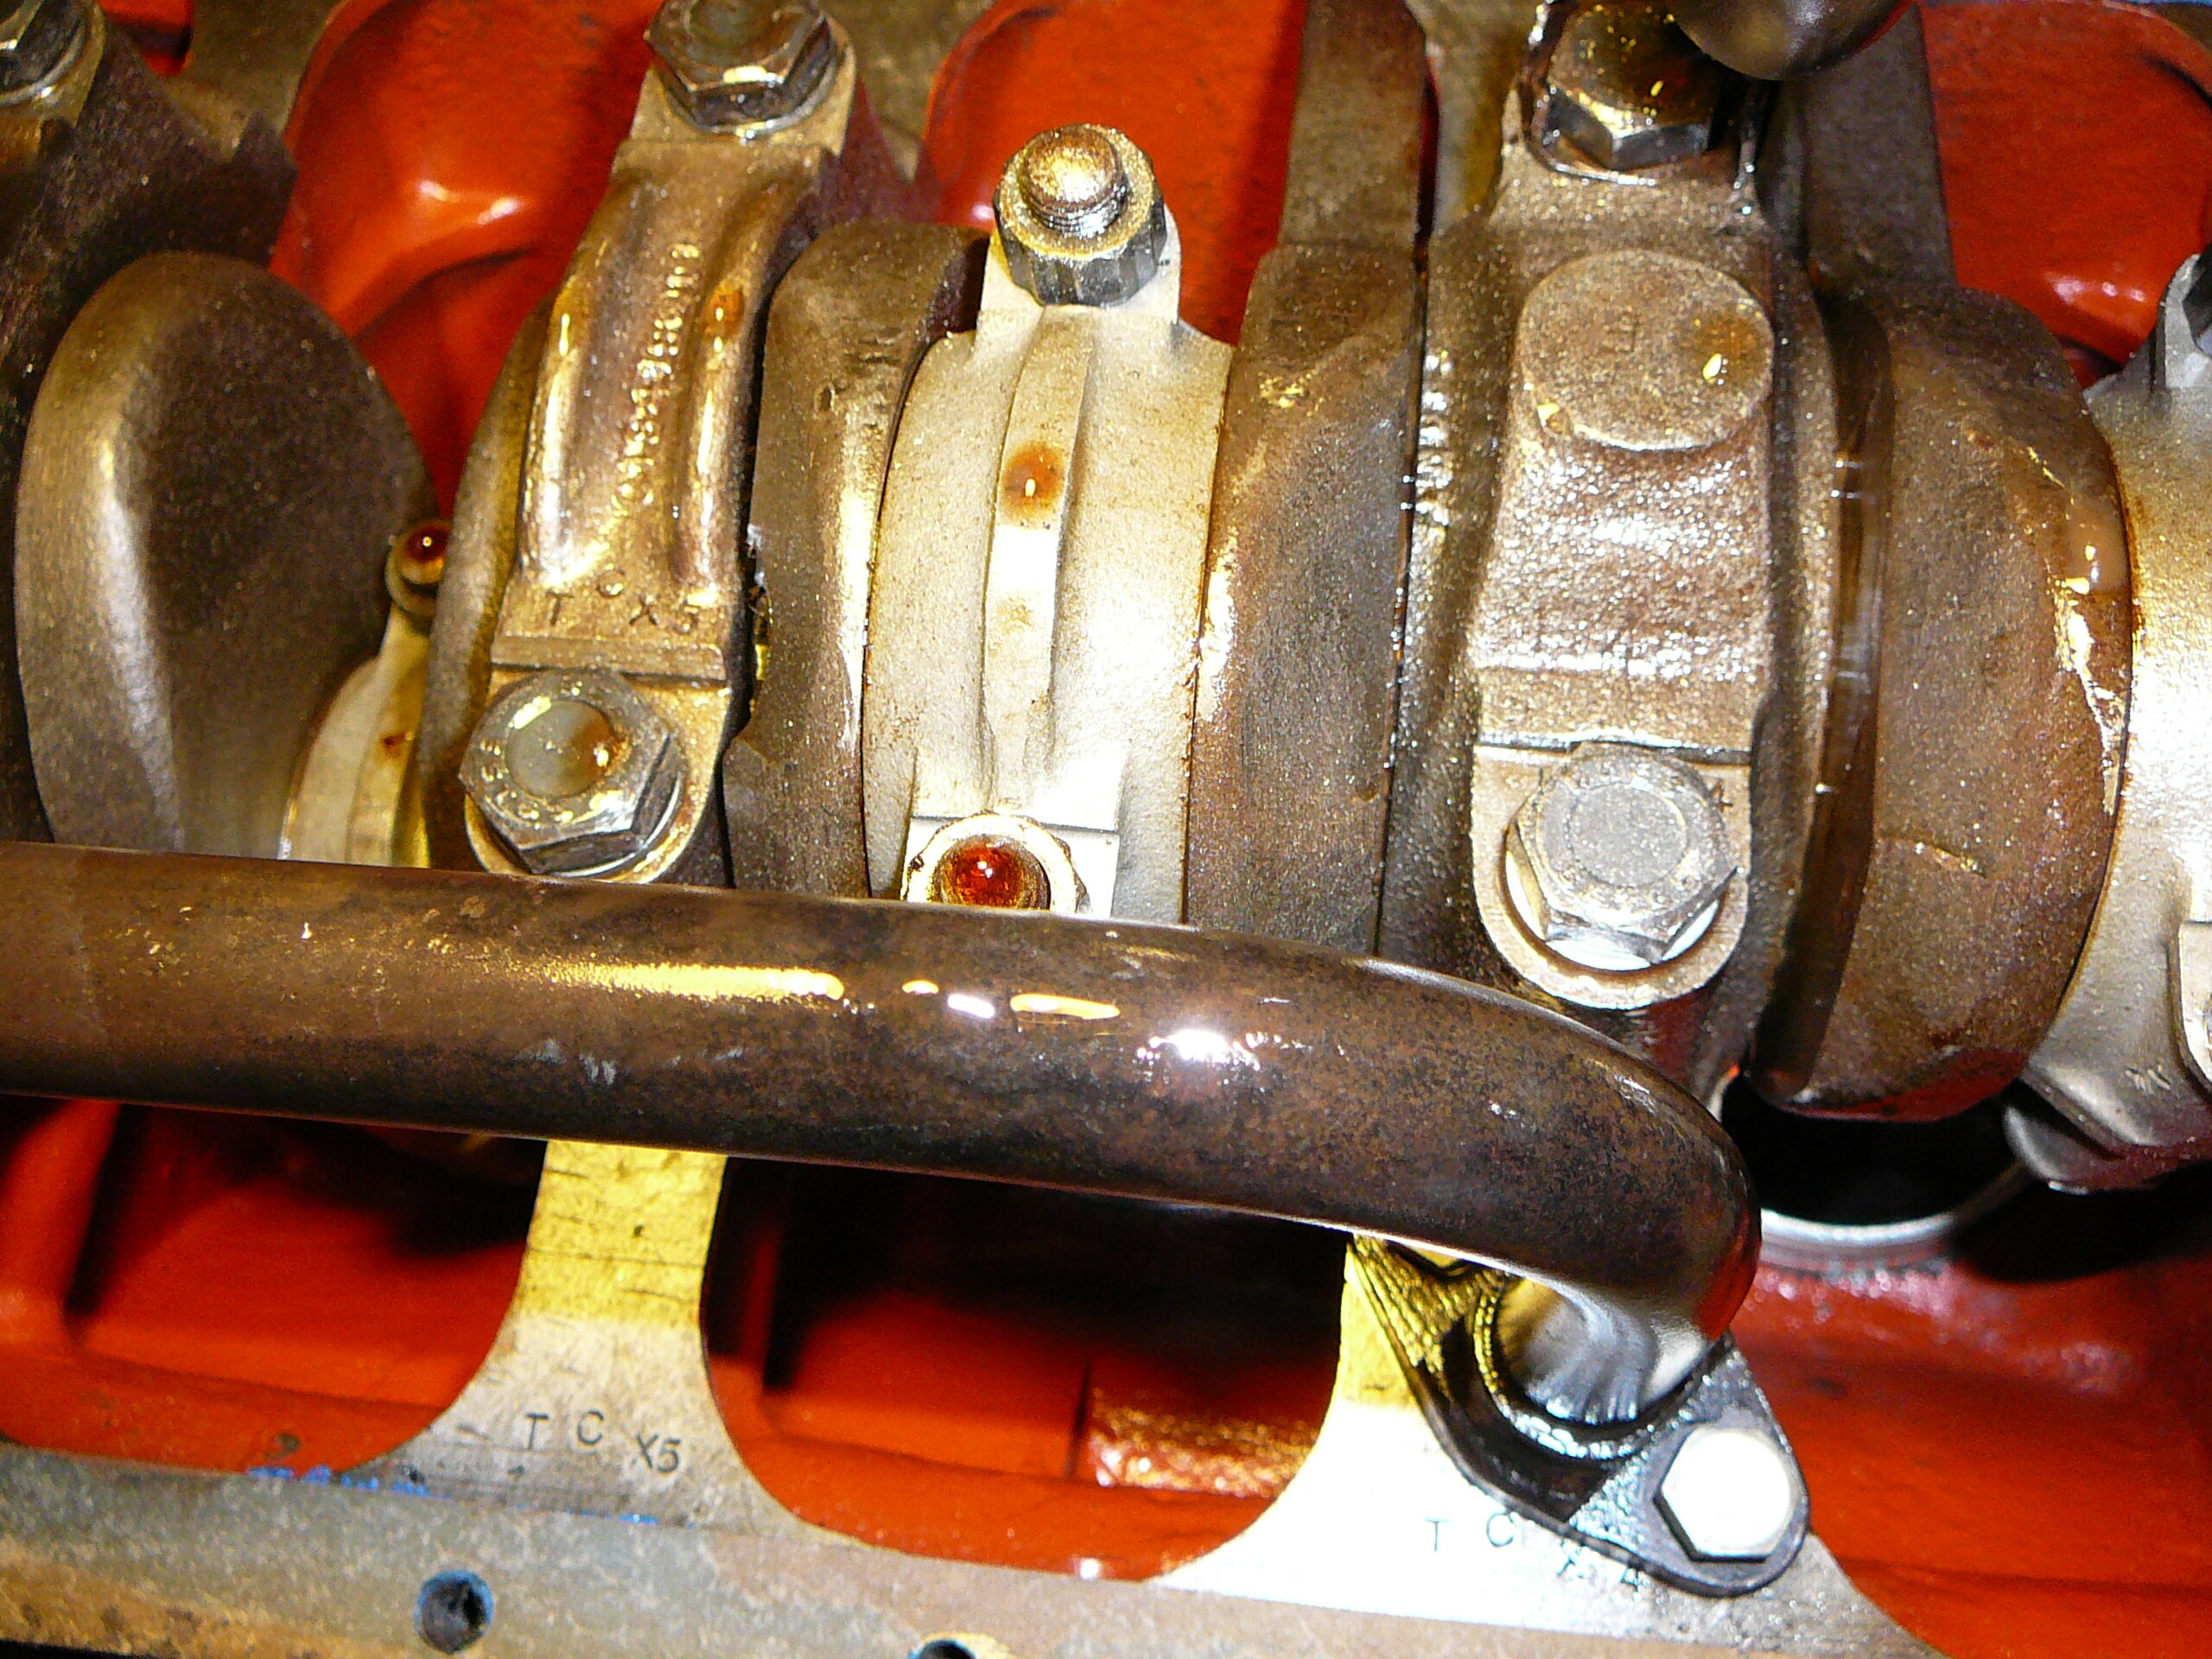
Hrmmmm… I’d closely inspect things in the bottom end, among those things, the torque values of the rods and mains.


Yes Paul, but to be clear, I’m talking about the 4 studs at the front of the pan that take nuts. The rest pan fasteners are all bolts.
There is a concern that I have. I found metal filings when I rinsed out the oil pan. If I can get the pics uploaded you will see them. The filings look like aluminum, not bearing material.
Inspect the crankshaft plugs very carefully to ascertain if they have been removed and restaked. If not there is a concern that the sludge traps and oil channels have not been cleaned out. When you are checking torque values have a look at the bearings and consider plastigauging them.
1 Like


You beat me to it: PITA though it may be, with the engine in situ, I’d be tempted to pull a rod journal plug, and inspect.
If sludgy… apart it all comes.
Geoff you’ll have to educate me on the crankshaft plugs. But I agree I’m going to remove at least some bearing caps and check the clearance and re-torque all to spec