Hi Tony,
Scot’s diff will use shims to set the Pinion pre-load; accordingly, the torque one way or the other of the current used to tighten the Companion Flange nut will have no affect on the bearing pre-load. Even with the collapsible spacer, its unlikely that the bearing pre-load is as it was when assembled and therefore, can be set again using whatever torque measuring device that’s available.
I found my fish scale. I have 4.5 lb-in of torque on the pinion pre-load. So there is something but it is 3.5 lb-in below the new-build spec. of 8 to 12 lb-in. However, there is no spec for a used condition. I’m leaning towards just changing the seals (and the incorrect bolts) and moving on. I worry that changing anything will have negative consequences. I.e., either I re-set the diff or I leave it as is.
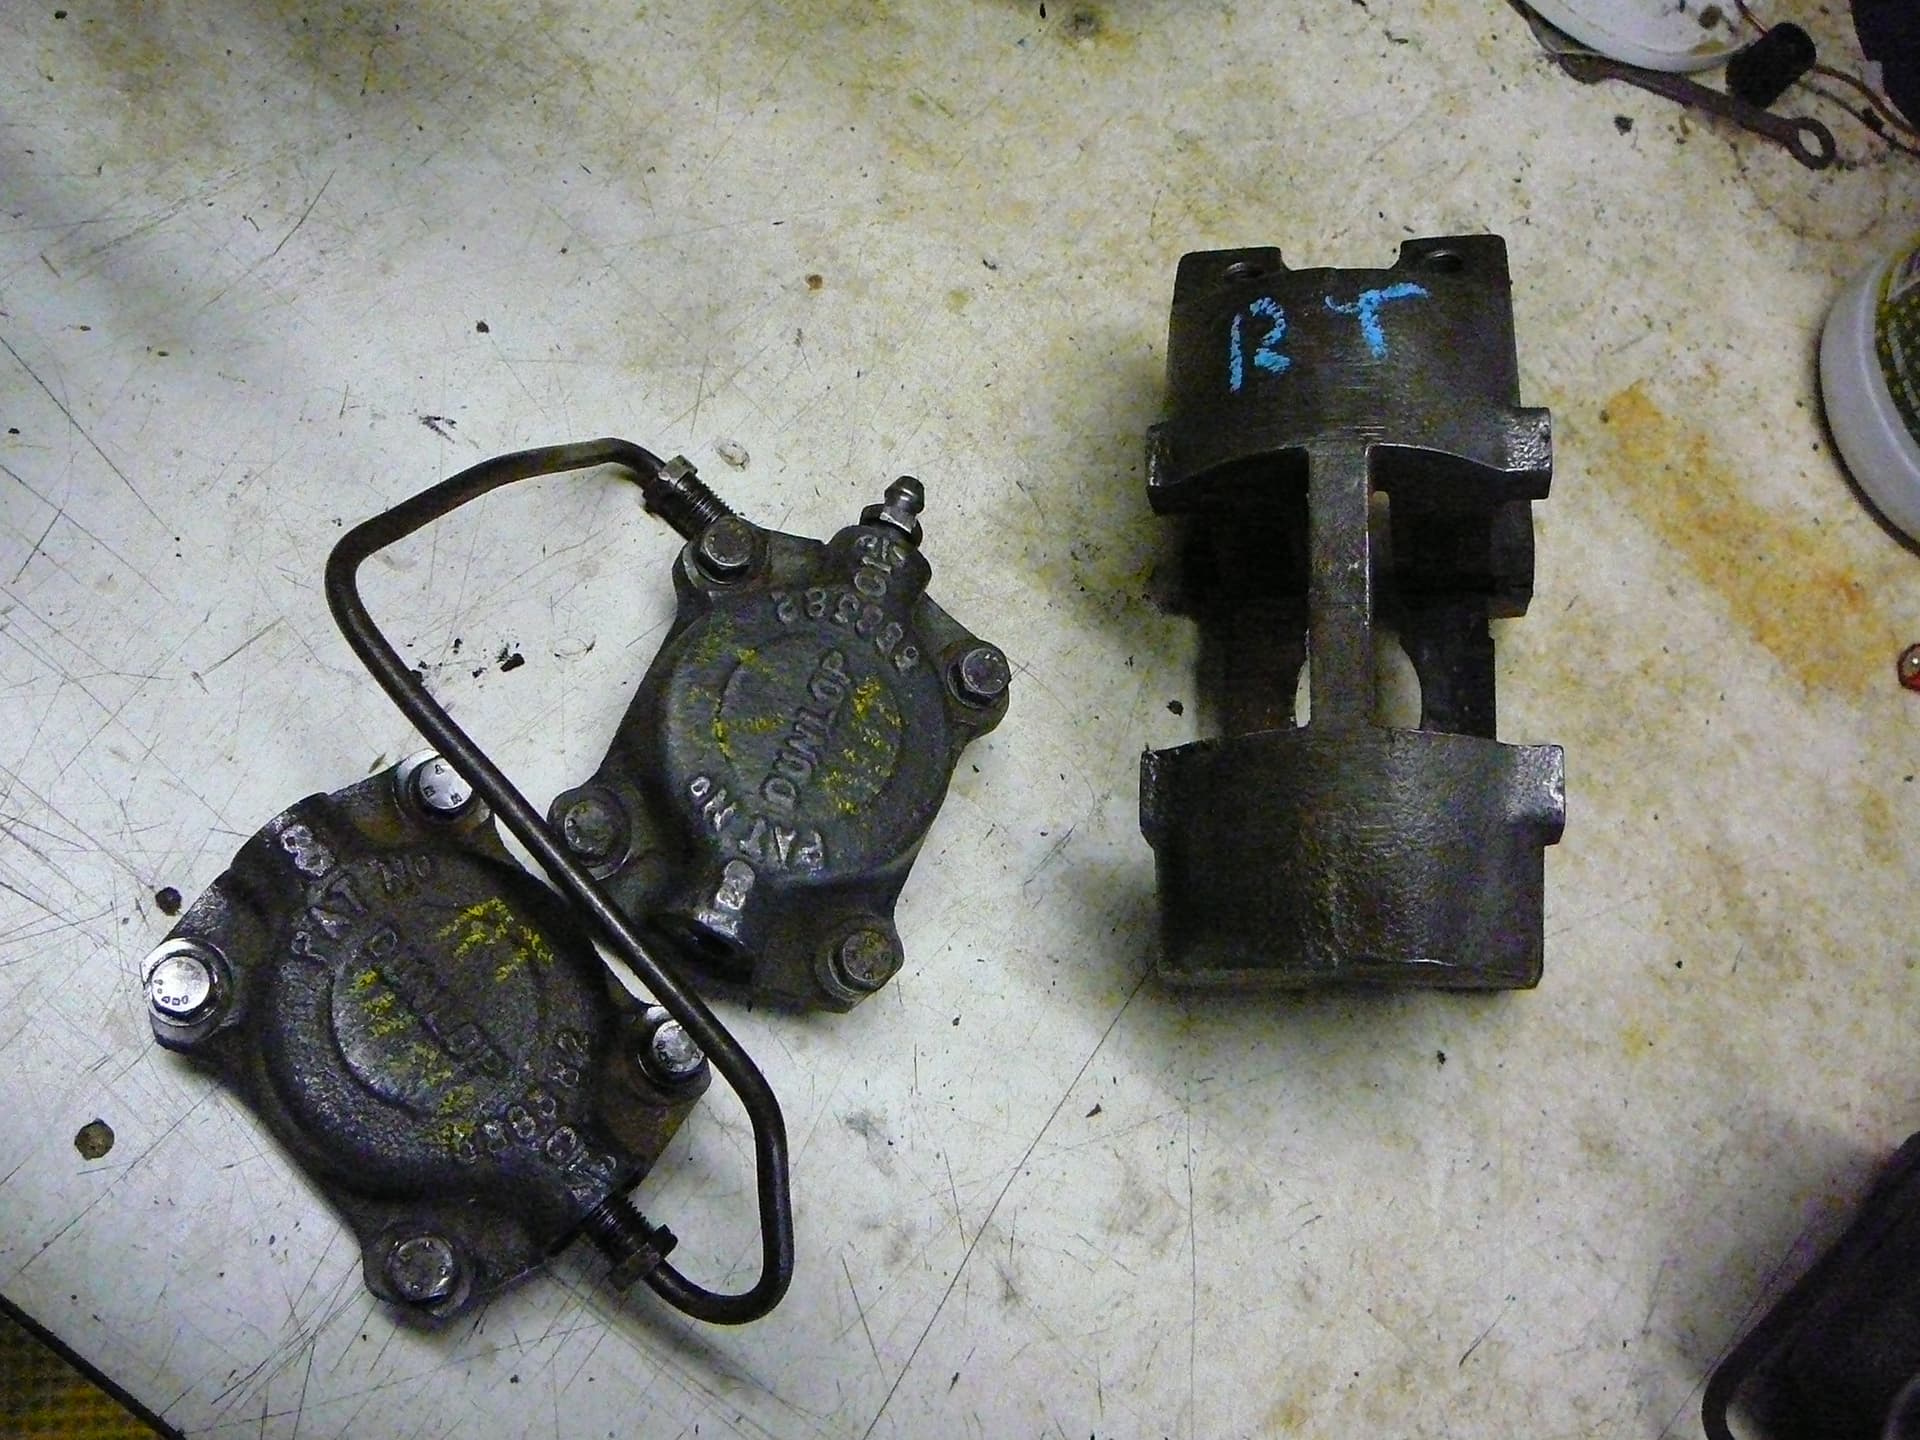
One of the truly fortunate aspects of this car is the condition of parts because of it’s desert life. These brake parts are as they came off the car. I simply hit them lightly with a brass wire wheel. The broken left side caliper is totally untouched. The pipes, although a bit rusted on the outside, came off easily.
Here’s the handbrake calipers. They are in nice condition. Note however, the oddly worn shoe that probably came from the goofy caliper shim installation. It made this one shoe wear like a triangle; and that is with very little mileage on it…if any! Here’s pics of the handbrake calipers after a light touch with the brass wire wheel.
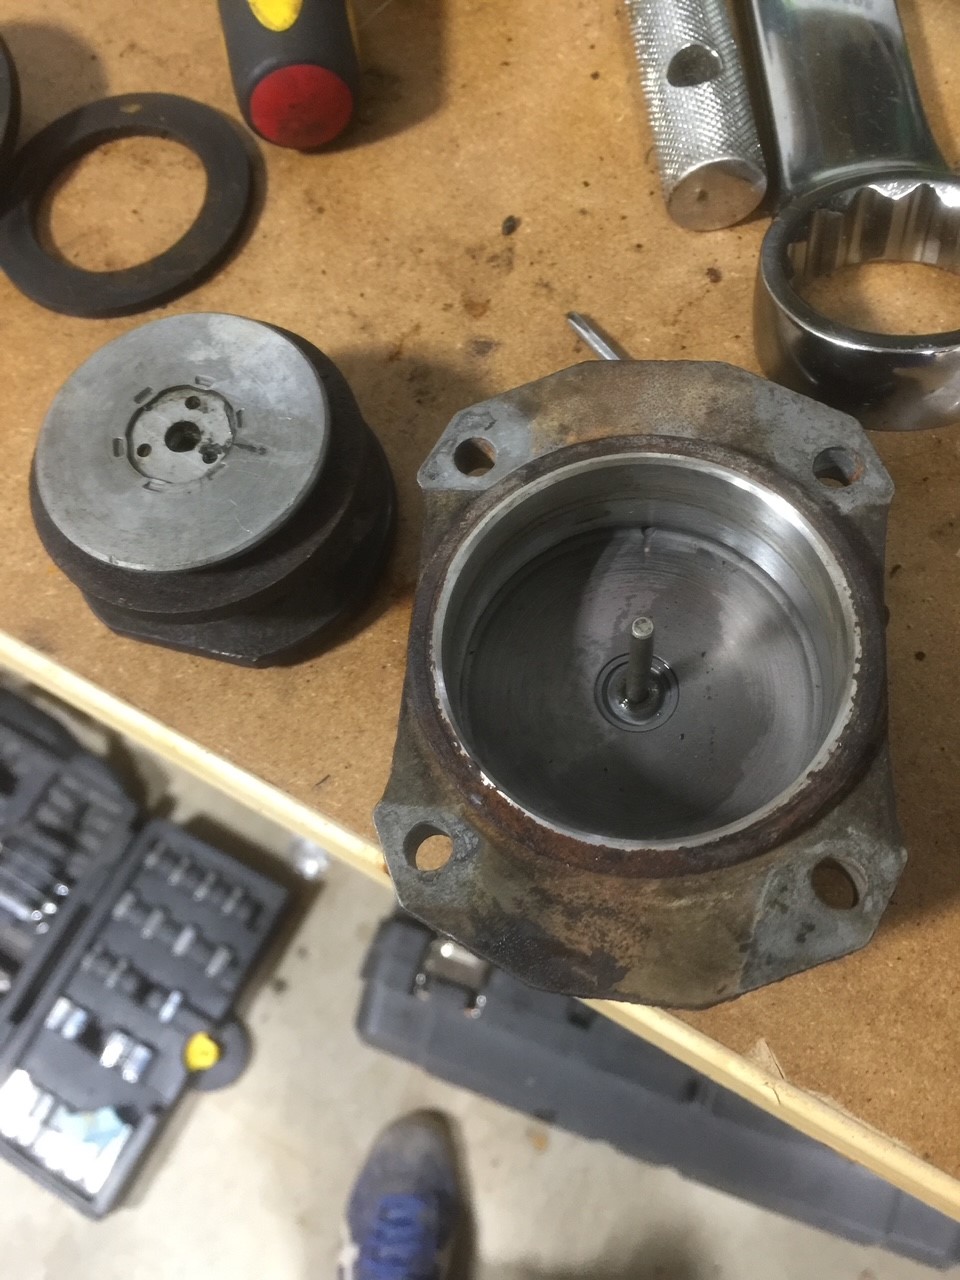
What do the bores look like on the inside of the cylinders? Mine were in pretty good shape, even though they had been sitting with nasty brake fluid in them for 25 years. I bought a brake cylinder hone from HF and gave them a light hone, cleaned up the outside, and rebuilt with new seals from a kit from one of the usuals. It was a pretty easy job and quite satisfying. Can’t remember what the rebuild kits cost, but I’m sure I was in for less than $50 total for eight cylinders, vs. several hundred $ to send off or replace…
So my recommendation would be (C) “none of the above” and rebuild yourself if possible. Definitely take the pistons out and inspect before you decide. (Take the nipples out, use a compressed air source with a rubber nozzle in one opening and use your finger to plug the other. In my case the pistons shot right out.)
Edit: Attached are a couple pics of what I found when I opened mine up and then the finished product before reinstallation. Maybe not a show finish, but I’m not expecting too many folks to crawl up into my rear end to inspect, so to speak.
Even 4.5 lb-in could be much for used bearings. Better loose than broken.
Mine felt also loose (Salisbury with crush sleeve), tighten the nut a bit more to try but went back just a hair past its original position.
Yes, Scott! I like solution C. As I have not yet removed the pistons from their cylinder’s, I will do that. I don’t know their condition, but I know there has been no brake fluid in them for 30+ years. So, that will be today’s task.
For informational purposes:
Apple-White will re-sleeve the cylinders for $80 each and that take 10 day MOL. The rebuild kit for the rear cylinders is $16.45. So, that is $385 plus shipping.
While the one Girling cylinder is a 1-3/4" diameter cylinder and there’s no real reason to not use it (it’s made in England), I’m going to get a Dunlop core from Dick M. and make these all match. I’ll be selling this Girling down the road.
If you have any difficulties removing the pistons, you can carefully attach to a vice by the flat spots on the piston flange (not sure if that’s the right term) and turn the body of the cylinder to twist the piston free. Hope that makes sense.
And yes, definitely replace the oddball cylinder. That’s not a bad price for resleeving if you have to go that route.
I some suggestions because the cost of remove and replace the IRS is high (whether it be your time or paying someone else)
Resleeve or buy new rear calipers unless you are certain a light honing will restore the caliper to a long life.
Test the calipers with hydraulic pressure before installing. (I have seen cases of rebuilt and new calipers leaking right away from seals twisting during the pressing-into-the-piston process.)
Use new caliper handbrake fork springs and be sure the handbrake cable has lots of grease in the sleeve and moves freely
Check bleed screw balls are sealing properly during 2) above
Put in all new differential seals at a minimum. Check the surfaces that the seals run on are perfectly polished. Installing a new seal usually means it runs on a different area compared to the old seal. Maybe have a machine shop polish if needed.
I admire your courage to open up the diff. I have learned a lot but there are two things I won’t touch. Automatic transmissions and differentials. The R&R cost (in time or money) is too much for me! When I did my IRS 20 years ago, I sent out the diff to a shop with instructions to put in new seals and new bearings as needed and set up. It did not need new bearings and has been flawless since!
Thanks Scott. I couldn’t get the piston to budge with air, so I put a zerk fitting on the cylinder and pumped grease until it came out. Took just a few minutes.
I plan to replace the Girling definitely.
Hi Dennis, Thanks for listening in!
the one caliper piston I have apart is badly pitted. It will be resleeved.
Testing is a good idea. I’ve seen the threads on how to do it.
Good advice on the handbrake
Yes to the bleed screws. I am going to mount a remote bleed system also.
Hmmm. I like that suggestion. Almost have myself convinced to replace only the one I took out as it was still very flexible and the flange surface it runs in was very smooth. I’ll think about it.
The bearing in my diff are new, albeit 30 years old! This car has just sat!!!
Sounds like maybe you’ll want to have them all re-sleeved.
On the handbrake cable, I had everything back together before I discovered that my cable was hopelessly seized. Life would have been a lot easier had I discovered that before I re-installed the IRS.
I would like to convince you to replace all the Diff seals. It is a minor investment compared to a future remove and replace the IRS, and then take apart the IRS to get to the diff and opening up the diff …
You could even take it to a diff shop to replace the seals and give the surfaces a polish as needed…
Have you never had that sinking feeling like a Forum Member had when he put his rebuilt engine and transmission back in but forgot to put a pilot bearing into the flywheel…
I’ll most likely re-sleeve them Scott, but I need to take them apart first. I’ve been using my handbrake as my only brake for years and then with the front brakes plumbed, I used the handbrake for the rears and the pedal for the fronts. The cable is good, but I will lubricate during this process. Thanks for the reminder.
Dennis…I’m listening. I don’t need a shop though; I’m pretty self-sufficient and I’ve the right tools. And that sinking feeling you mention. Yep, had that…more than once. I’m thinking…
I agree with this, even though it will almost certainly destroy the outer side shaft bearings, as even the sharpest clamshell bearing puller usually makes contact with the outer cage.
I use a slide hammer with self-tapper to get out the Pinion seal, drill a small hole (or two) in the metal case first (with a taped drill bit so I dont go to deep)…its a 1/2" thick metal collared seal, and even though there is special tool for pulling seals, I reckon you would struggle with a Pinion seal…I have used this method on many different seals, and would even consider anything else for a Pinion seal (or any recessed seal) with a shaft in the way. I got a pic somewhere that I might add later
That was one of those sinking feelings…installed a replacement auto trans to replace a failed one (not a Jag)…torque convertor front oil seal was leaking heavily…got to do the job again after a days rest, seal cost $20
(did save $4500 on the trans shop quote to rebuild mine)
here is the pic of seal removal (that works very well with Pinion seals)…those long bolts help guide the transmission home…you can cut the heads off and make studs, but no real need
here is another trick…if you want to move something heavy under very smooth control, be like the Egyptians, make a loop of rope, twist it up with a lever. This exerts hundreds of pounds of pressure and moves the item in tiny smooth increments
I agree with this as well and I would add to the list the output shaft bearings.
Being part of the suspension they see a lot of abuse.
Yours is the shim type and not the crush sleeve, right?
From what I’ve read, chances are that with new bearings the existing shims will give you the right preload as bearing tolerances are very precise.
You don’t want to be doing this again any time soon.
Hi Scott,
Did you check the pre-load with the seal in place? If so, you’re not measuring the Bearing Pre-load only, but a combination of bearing pre-load and drag caused by the seal.
Once again, good ideas and comments from y’all. Keep 'em coming.
Tony, I like your slide hammer idea and I will go get one at H.F. Mine disappeared into my son’s toolbox years ago. I did not have a problem removing that seal from the right side output; I just used a long, stiff screwdriver with a bit of wood under it to pry out the seal. Wrecked the seal, but it came right out w/o damage … didn’t come close to the bearing. Anyway, I like the slide hammer idea.
The rope trick I have used, but have forgotten it. That’s a great way to squeeze the cage vs. wood working clamps…nothing to slip. Thanks for that.
Aristides. Yes my pinion setup uses shims vs. a crush sleeve. But my output shaft bearings, at least the one I have seen so far, have been replaced as witnessed by the USA and the Bower manuf. I think that had to be around 1992 and the car has not been driven since. Changing them will change the ring & pinion gear setup. I’m going to leave them be.
Brent, yes, with the seal in place. I recognize it is inaccurate and very sketchy to get a measurement in that bit of backlash so I don’t measure the pinion driving the crown. Still, I think this falls into the category that I either completely redo the differential setup or I leave it alone. I’m going to leave it alone.
What I have found with lots of cases in this car is two-fold. 1) the shop itself did good work in the beginning and 2) the shop sent most critical things out to specialty shops like paint, machining and (my guess) differential setup. There are scraps of bills and notes to suggest this. Some things they assembled nicely but after 5 years, a rift occurred between my aunt and the shop. That’s when things went south and they slapped things together to get it on a trailer. You can just sense what has gone on after working on the car over the years.