Hello Folks -
Let me start by saying I got this to work - so there is that, and generally speaking it wasn’t overly tough, but nonetheless annoying - lets go through it:
I needed to replace the alternator on my '70 2+2 A/C + P/S, and discovered there are few options out there, aside from the comparatively expensive re-manufactured Lucas unit. One of those options is a WOSP performance alternator (available from one of the more common part sources - not sure if you’re allowed to say which specifically). This alternator is advertised as a quote “bolt-in replacement for an original”, making 70 amps and internally regulated - so far so good. The only issue of course is that this alternator was a “direct bolt in replacement” in the same way that Santa is a 120 lb clean-shaven athlete from Guam.
-
The fan is incorrect - being standard rotation versus reverse. Alternators don’t really care which direction they turn, alternator fans however, generally do. For a 2+2 with the high-mounted reverse position alternator, you need a fan that works while rotating counterclockwise. FIX: Multiple options, including a reverse rotation fan that will fit the alternator shaft, but in my case, I just used the fan from my Lucas unit. Does it really fit?..um…no. It is close though, so I used a dremel tool to widen the hole. The shaft on the lucas unit uses a key-way to keep the fan from slipping, the WOSP unit does not - it just relies on the clamping force of the nut and spring washer - so no need to worry about the keyway notch in the fan.
-
The pulley is out of alignment with the water pump pulley Obviously, you need the pulleys to line up so that the belt can do its job. You also need to make sure the fan doesn’t foul on the water pump pulley. The stock pulley has sort of a neck to it, the WSOP pulley doesn’t, so its basically too short. The stock pulley will not fit on the WOSP shaft, so you must use the WOSP pulley. The WOSP unit comes with two washers under the fan, then the fan, then four washers, then the pulley and lock nut - but this won’t line up or allow the stock fan (now fitted) to clear the W/P. What worked: No washers under the fan, then a 1/4 inch spacer and two washers (if I recall), then the pulley. I happened to have a spacer the right size, another four washers would also have worked. This allows the fan to be back far enough (toward the body of the alt) to clear the W/P pulley, while allowing the alternator pulley to be out far enough to line up with the W/P pulley groove. The locknut will engage all but perhaps two of its threads, and its a decent sized nut, so just be sure its tight, don’t forget the cupped spring washer, and perhaps add some blue loctite.
-
The wires are too big The two larger alternator wires have some pretty wide connectors, too wide in fact to fit into the back of the WOSP alternator. Ok…ok… I lied. They do fit, but with such tight tolerances that there is a fair chance you’d be striking a welding arc the whole time…way, way to close for comfort and the stock rubber isolators wont fit - there’s just not enough room and I’d be concerned they’d wear through, and then you’re back to welding. Both wires connect to the B spade connectors, but fortunately, WOSP also provides an actual B post in addition to the spade connectors. What worked: You need to transfer your stock copper connectors from the Lucas unit to the post on the WOSP unit - which sounds easy enough (see item 4). This of course is a much bigger issue if you don’t have a stock unit to take apart.
-
Naturally, the B posts are different sizes The post on the Lucas unit has a smaller diameter than that of the WOSP unit. You’ll need to enlarge the hole in both copper connectors. Dremel worked well here. Be sure to retain the black rubber isolator on the WOSP unit and the washer, the copper connectors should not be in contact with the body of the alternator.
-
The spacer / bushing in the alternator mounting hole is too long. While the alternator has the right mounting holes and fits the bracket, the spacer / bushing in the forward hole is too long. The net result is that the mounting bolt only shows about half the threads it should once pushed through the bracket. Options include a longer bolt, replacing the WOSP bushing with the stock bushing, or reducing the length of the bushing. What Worked: I actually didn’t do any of those things. In the stock configuration it goes Bolt > Washer > thick spacer> through bushing, alternator and bracket > nylon locknut. With the bushing being longer, I just removed the thick spacer, problem solved. I’m sure someone will tell me that the spacer I removed is a special shock-absorbing poly-mimetic alloy, that in addition to being a killing machine from the future, is also a critical Jaguar-only spacer…but…until that happens…I removed it…no ill effects.
-
Wiring Woes. There are several easy wiring alterations that need to be made, and the instructions do a good job of telling you what they are, while doing absolutely no job whatsoever of telling you exactly where to find said wires. For example, the manual tells you to disconnect the ground from relay 6RA - but neglects to tell you that there are several such relays, all the same place, none of which have wires labeled “remove me for WOSP installation”. What Worked For starters, on my car anyway, the 6RA relay you want is the lowest relay, to the left of the battery. This should have a white wire with a red stripe, right in the middle. The wire you want to disconnect is the ground, which is at the top of the relay, single spade connector on its own. The relay is also marked, though you’ll probably need to clean it off to see, but each spade connector has a code: W1, W2, C1, C2 - you want to disconnect W1. I can’t take credit for this info - I did a google search trying to figure out which wire to pull off, and data from @ Michael_Frank popped up with everything I needed - so thank you sir. Here it is for anyone else looking for detail on the charging system: https://www.coolcatcorp.com/faqs/Lucasalternators2.html
The 3AW relay is taken out of the circuit entirely - you remove ground, and connect the remaining two wires together. Ground is the thinnest black wire - I traced one wire back down to the wiring harness that goes to the dash (so to the ignition light) and the other middle wire is a pretty thick signal wire - that left the thinnest black wire as ground. I removed said wire from 3AW, then connected the other two wires together (I turned one into a male spade connector and simply connected that to the existing female spade connector of the other wire).
You also should (optional) disconnect the ground from the 4TR voltage regulator (middle spade connector on mine).
Lastly, the two field wires are not used with the WOSP unit, so you just remove or isolate them. You do use the small signal wire, and there is a spade connector for that on the WOSP unit.
In all cases, I disconnected and isolated wires, rather than cutting them - just in case I (or a future owner) ever wanted to go back to a Lucas alternator.
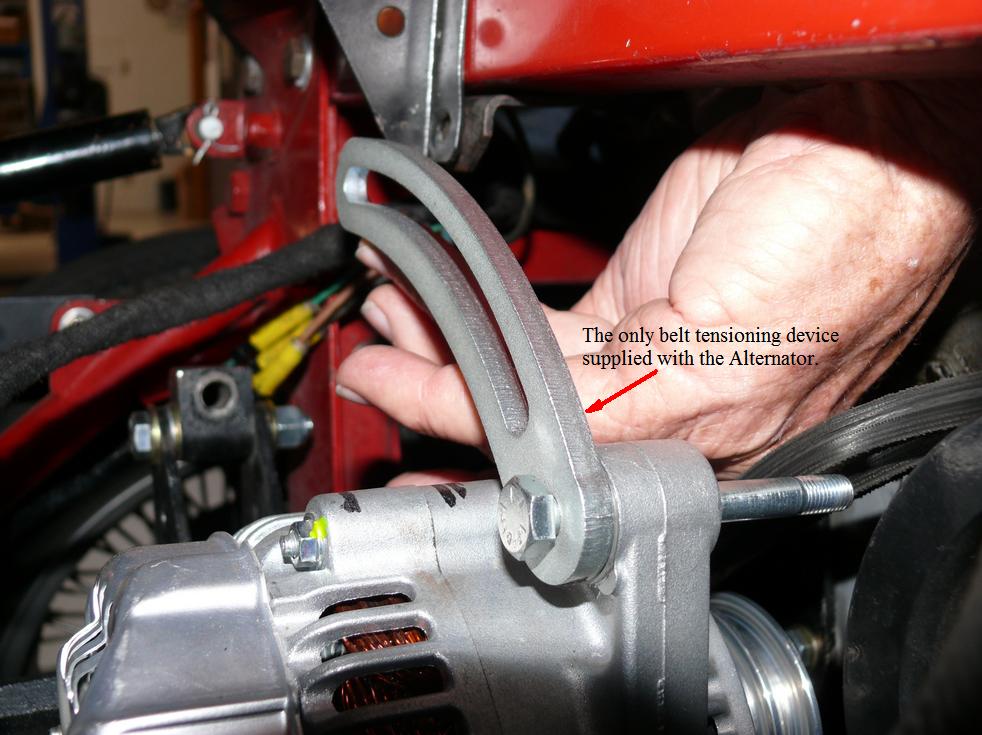
- Don’t let your nuts get whacked. The bolt, and specifically the nut, provided for locking belt tension at the top of the alternator is a little big. When fitted, the nut will clear the stock Lucas fan, but just - 1/16th of an inch stuff in some cases (depending on how straight your fan is). This was too close for me, so I reused the stock lock-nut, which was still 1/2 inch but had a smaller over all body size, and provided more like 1/8th inch minimal clearance.
The alternator works great best as I can tell, charging well and although I’ve not had it under any stress or miles, so far its doing all the things you’d expect.
Allan.