The bonnet is the standard 1974 item with the crash bars holes welded up. By 1974, the final iteration had the air dams going along both the left and right fenders. The left side ends into the fan snailshell but the right side is a dead end. The footwell ventilation system has two square apertures to feed air into the triangular boxes sitting on the picture frame. These don’t work very well, so what I did was fab up a couple of scoops to sit inside the air dams to redirect air into the footwell ventilation system. Anytime the car is moving, this works fantastically well and I have never thought aircon was needed with this simple tenpenny mod fitted.


At the same time, as I had the later bonnet with air dams on both sides, I decided to harvest cold air from the front of the grille and fab up a couple of trumpets to replace the ones that come with the car. The cold air intake boxes are shaped so as to clear the picture frame as the bonnet opens and they mate with the wider air trumpets you see in the earlier pictures.

The engine itself is not substantially changed in its technical specification as defined within the meaning of the UK legislation regarding the qualifying requirements of the Historic Vehicle legislation and the statutory declaration required to qualify the car to be MOT exempt. (And yes, I did take appropriate advice.)
The triple green rails on the v12 manifolds comprises the standard 1992-1996 6 litre fuel rail, a new twin wiring loom and the LPG rail respectively. I made the wiring loom connectors using the same tech that I use for making all the custom plastic indicators lenses.
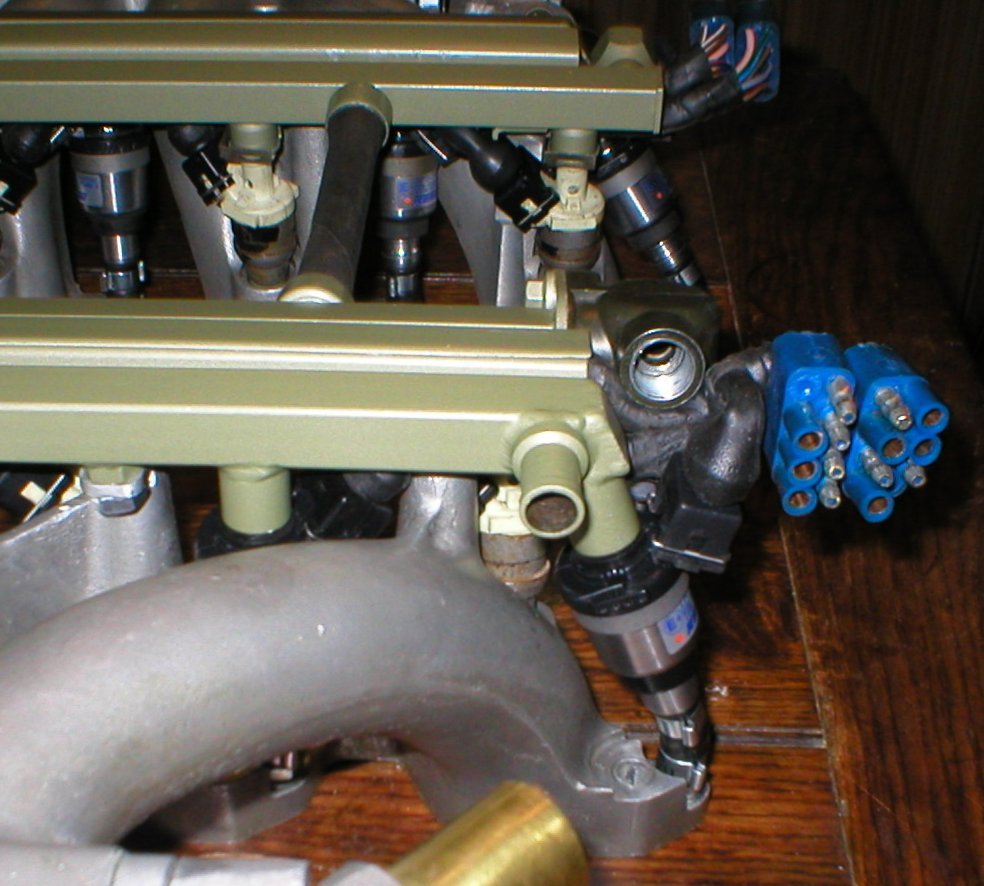

This is all run by a Megasquirt I built and programmed. That includes a custom designed and made peak and hold driver box to run the 24 low impedance injectors reliably plus coilpack ignition to provide a strong enough spark for LPG.

The beauty of a modern computer system to run the car is that the whole lot can be monitored and datalogged in real time, so it is possible look into the engine whilst it is running, see when the fans are running, how much water is flowing through the thermostats and how well the radiator is cooling. This means it is possible to take back-bearings and deduce how the earlier carburettored cars run and diagnose problems on other v12s using all of the recorded data from running “a modern car”.
For example here is a graph of exhaust gas temperature versus lean/rich idling:-

and another showing coolant temperature as it idles on the driveway.

All of this is done without changing the experience from the driving seat. The gauges look the same but the water gauge has twin needles for both “A” bank and the “B” bank. The LED is triple colour and provides a blue light when the engine is not yet up to operating temperature - then it turns green - it lights red when the computer thinks it is too hot.

The fuel gauge also runs double needles for petrol and LPG. The embedded LED lights up green when running LPG and red when on petrol. It flashes red and green alternately when it senses low fuel and wants to change over.


The last thing to be added were water flow meters. These datalog flow to the radiator or bypass for both sides.

Visible just below them are a couple of spare MAP sensors. I’ll connect one of them to monitor crankcase blowby pressure and the other can be to compensate for altitude. They seem to record that my head is permanently in the clouds…
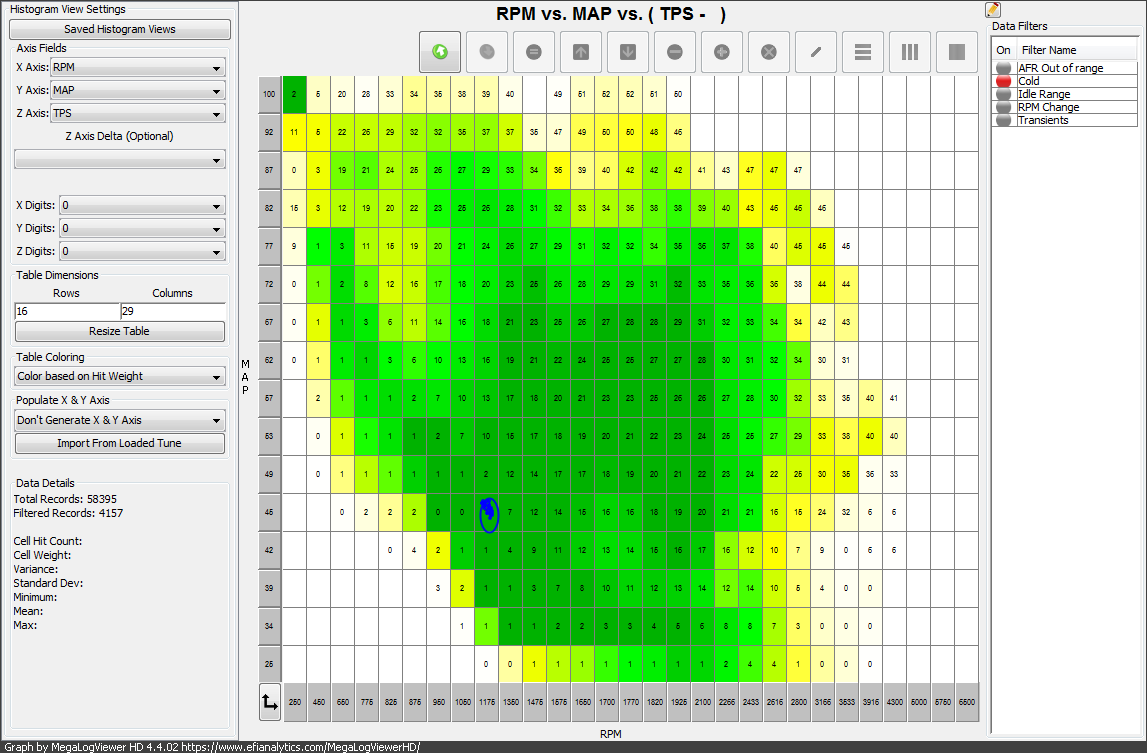
A while ago, people on another forum were championing ported vacuum over manifold vacuum for their carburettors, so I connected one of them to a ported vacuum port and drew up a table of ported vacuum versus throttle opening versus manifold vacuum and explained to them what was going on. I’m not really sure it really helped to tell people the answer as to what it was doing and when - they seemed to enjoy armchair debating from positions of profound ignorance over just looking up the answer on the graph. That’s life. No one likes a smartarse.
Pekka:- the whole concept of the upgrades to this car has been done on the basis of zero or minimal cost. The front grille was only done as a result of my fitting my covered headlight kit. In doing this, new bonnet beads were required as the old chrome eyebrows will have had shorter bonnet beads than that required with my covered headlight kit. I didn’t want to waste them, so I purchased a small amount of stainless steel mesh and fabbed up a new grille - the old bonnet beads were thus recycled as the chrome edging around the grille. I was most annoyed that the Jaguar leaper symbol cost ~GBP15. I think it is from an XK8 or one of the more modern jags.

I also took some old s1 bumpers, turned them upside down so the profile for the s1 indicators matched up my new below the bumper indicators and rewelded it all up. Appended are some pictures with and without bonnet chrome and/or bumpers. I’ve never really decided what looked best, so have them without chrome around the mouth but occasionally run with and/or without the mini bumpers.


