Craig- if you make the cut at 6 o’clock the two piece clips will not hold the cut together. It may be a shorter cut but I think it would be more likely to leak. In either case I’d seal/glue the rubber cut together with silicone or other sealant after assembling.
Good point.
I also like the seal/glue the rubber cut together with silicone or other sealant after assembling. You’re on a roll – another excellent point.
1 Like
In my experience, silicone doesn’t bond well with rubbers like that: seals, yes, but not bonding the split. When you are 100% sure of the fit, a better bond on the rubber would be urethane: just make sure NOT to urethane the seal to the body.
1 Like
Or I’ve had good luck with super glue after slicing it on one side. Did this again with the grommets for the harnesses through the left footwell as I didn’t want to disconnect the harness from everything to feed it through. IMO with super glue, it is difficult to even see what was done
Regarding the grommet, have you considered starting at the other end? All of the other end parts are smaller than than the double 8pin connector at the end you are looking at.
As a last resort, you could get a sharp scalpel and cut the 8pin connector smartly down the centre to make it two 4pin connectors and glue the two halves back together when done.
kind regards
Marek
I’ll have another look at the other end and bringing the grommet the long way around the barn.
Today I’m laid up with a bum knee – hopefully better tomorrow.
Craig
OK guys – finally got out to the hobby shop and hobbled around a bit. Took some pix of the wiring harness on which I need to thread the three-piece grommet.
One recommendation was to work the grommet onto the harness by starting at the opposite side. I had forgotten how thick the harness got in its middle. There are four 8-connector plugs that connect this harness (the Bulkhead Harness) into the Dash Harness (powers the gauges and light in the center of the dash).
Also that thick harness that is draped over the dash into the engine bay also must thread through the grommet. There is second slight thinner branch that is under the grey panel the feeds the far left side of the dash.
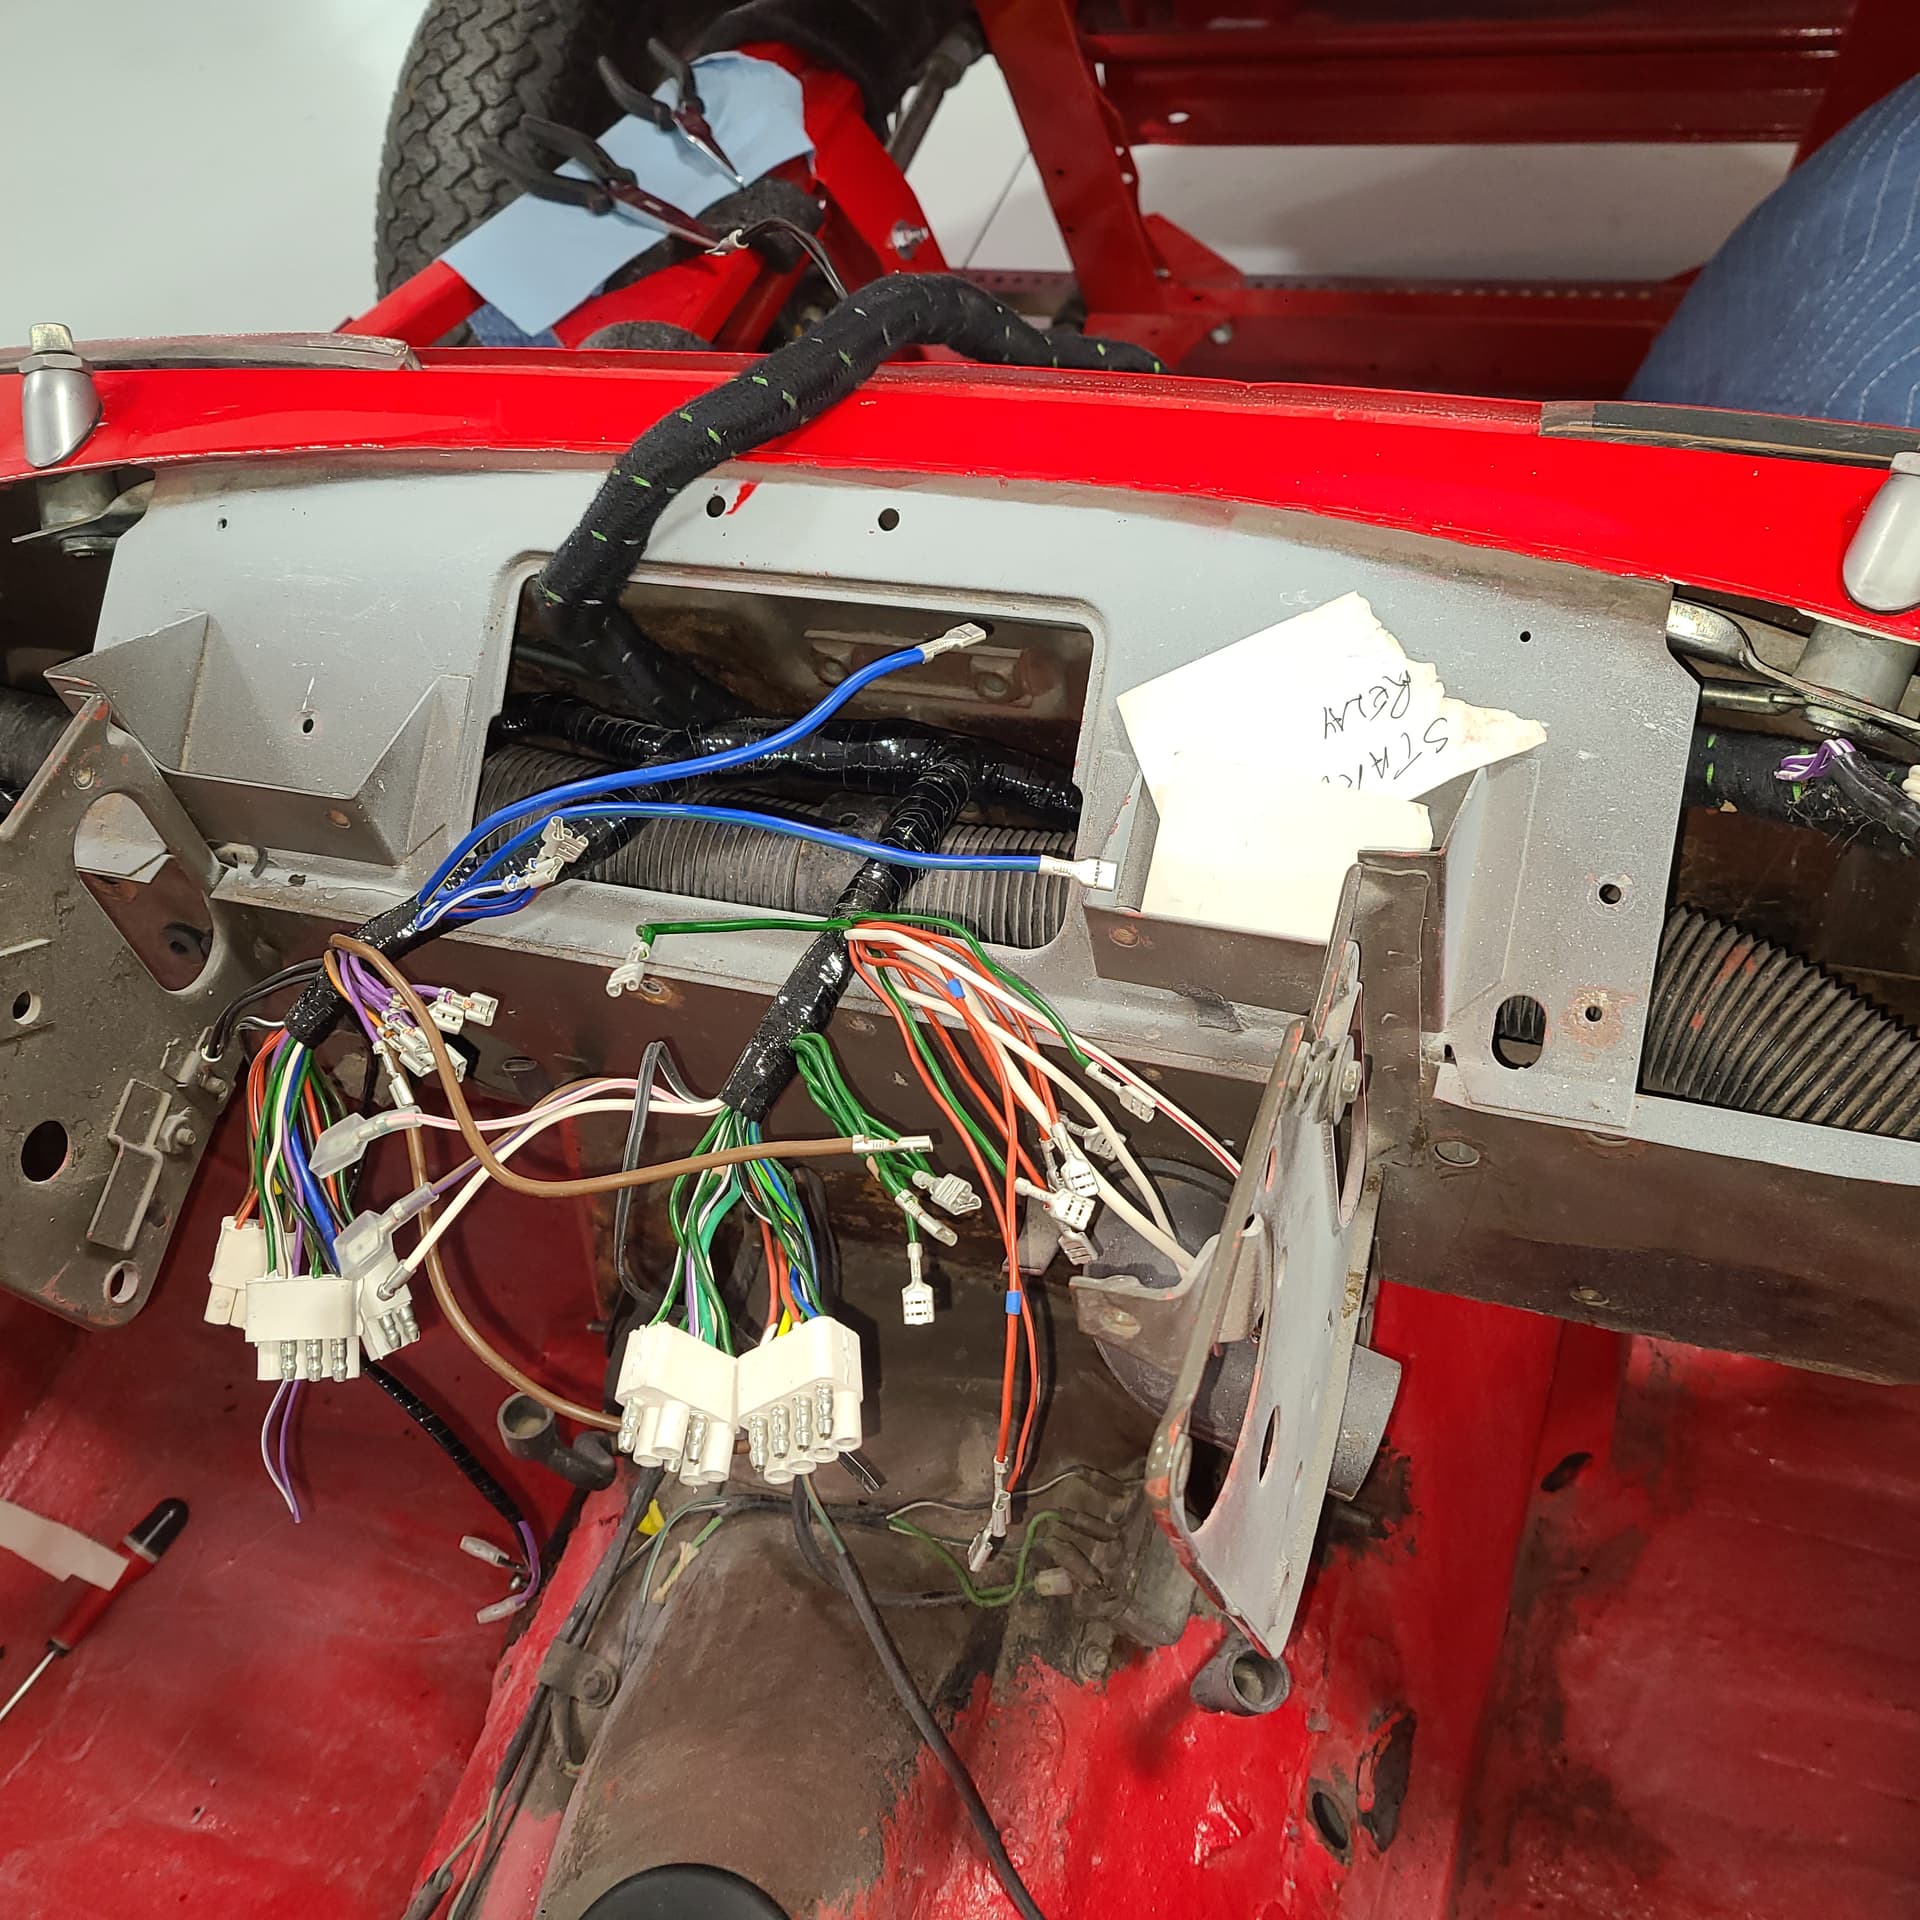
and then there is a fair-sized branch about 2 feet further down the line with a small tape-wrapped branch

I judge this approach as a no go:
Some others said to use a small screwdriver or pick to detach each wire from the block connector. As this slightly pixilated photo shows, the blocks are molded plastic with each wire embedded in the rubber:

I don’t trust myself the divide each block connector with a blade and then pass the halves through the grommet individually, I may (hafta) circle back and revisit this approach.
Here are two photos of the original grommet in place on the original harness. It must have been added to the harness before any terminals were installed
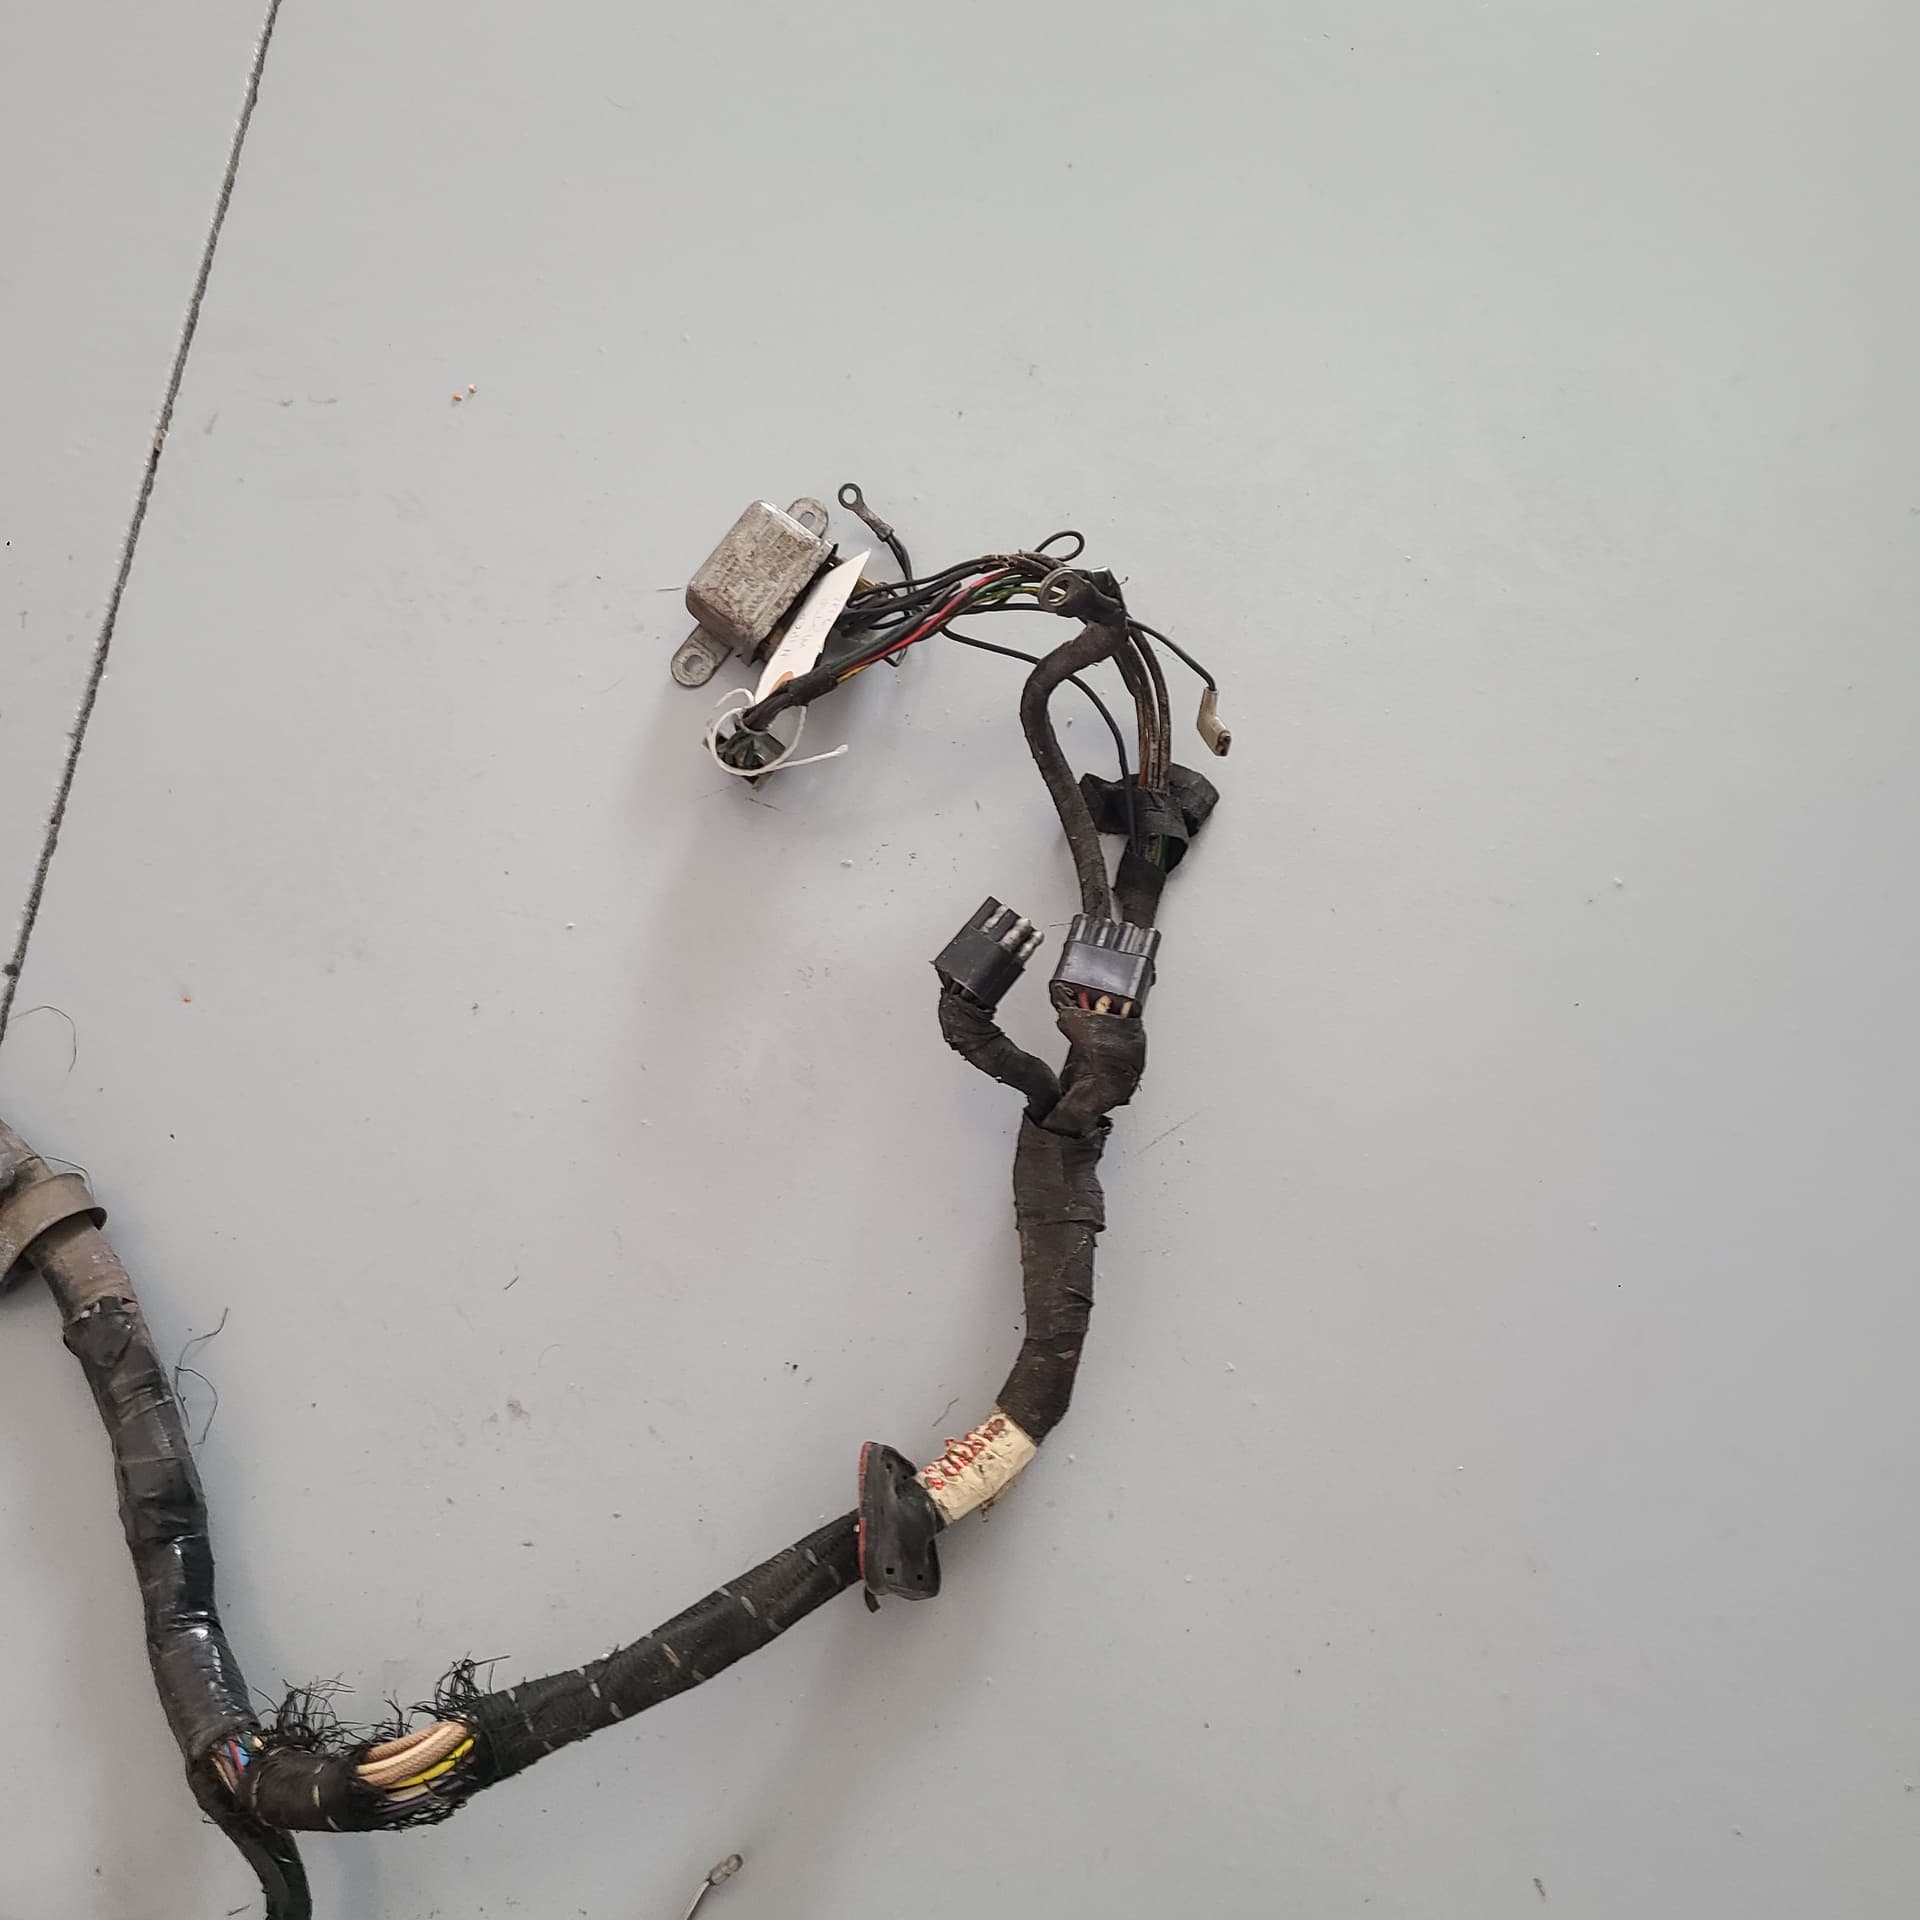
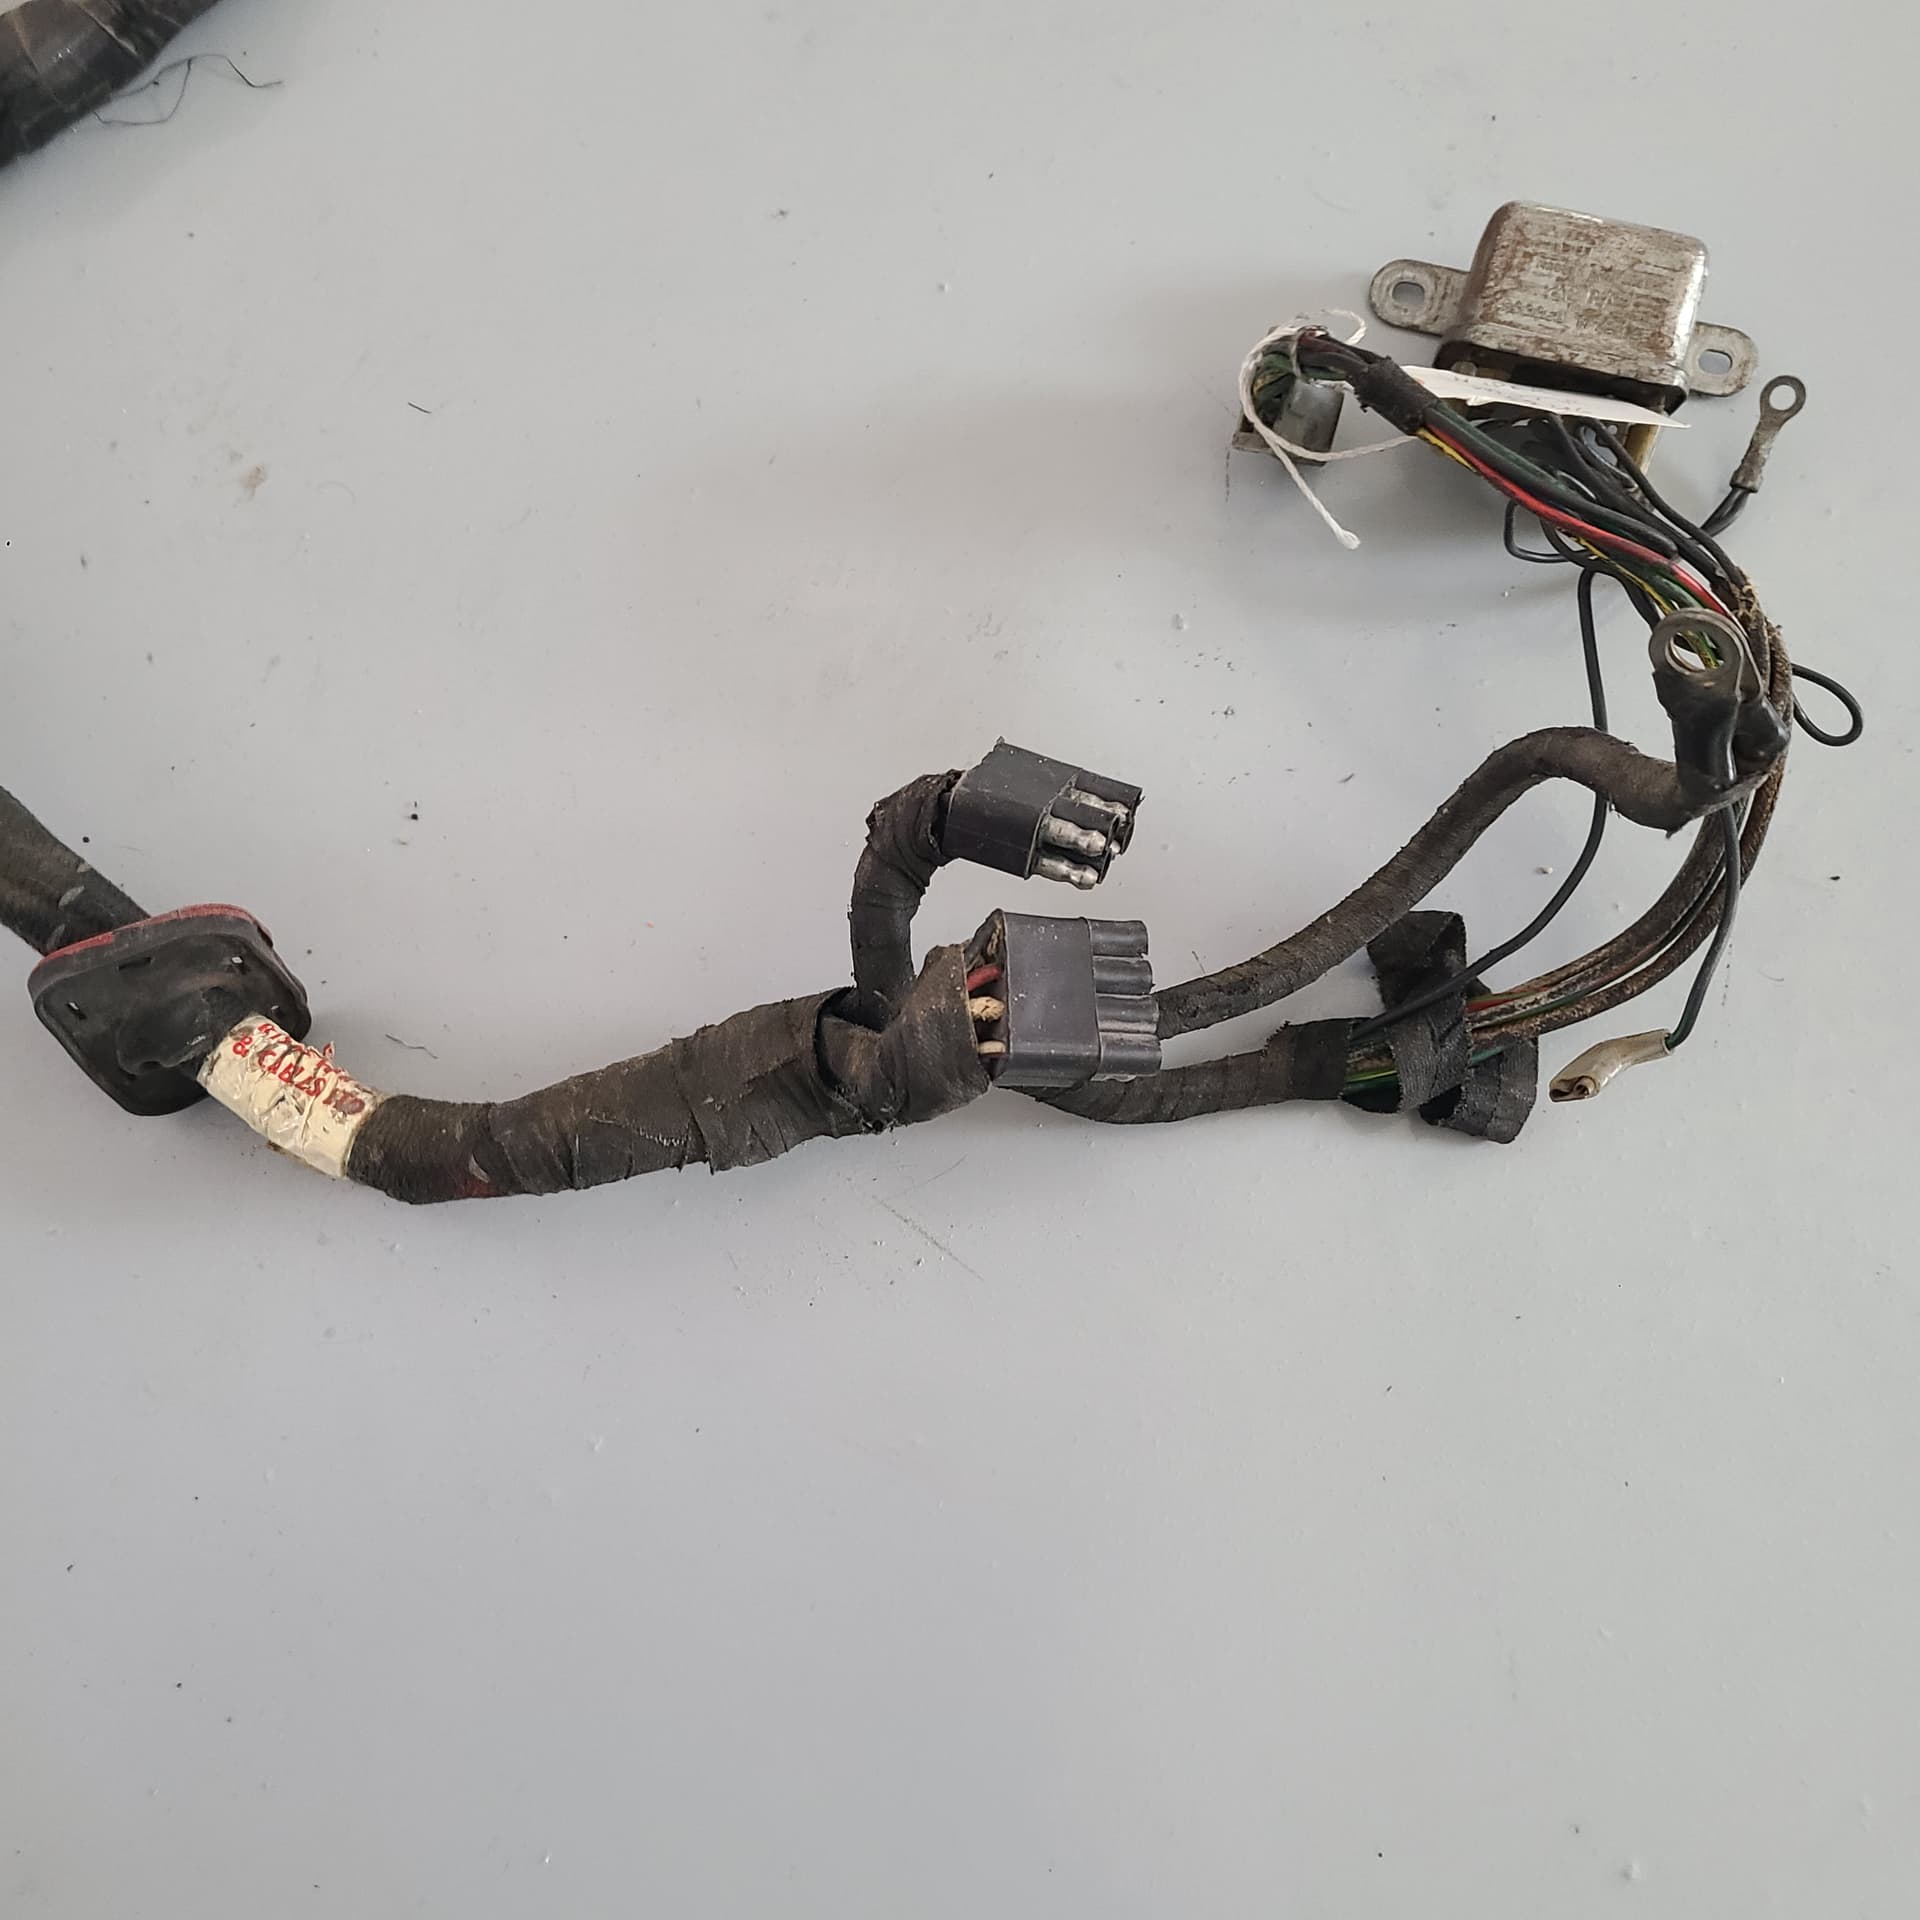
This close up also shows the size of the hole in the grommet compared to the 2c connector blocks
You can see in my previous efforts to paint the engine bay, I didn’t remove this harness (red paint around fringe of grommet). I taped the harness and draped it over the windshield. I did the same with other harnesses, choke cables, A/C hoses. etc. ALL those items are now stripped off my Jag.
I’ll just ask one question. Do you trust yourself to cut a molded connector in two more than you trust yourself to make a single cut in the grommet on one side only?
Edit: 2nd question: and if you messed up either, which would be worse
Now those are two extremely penetrating and excellent questions, Larry.
Economic reply
The grommet set is ~$100
The Bulkhead Harness is $550
Physical
A single cut on the grommet is the least daunting
Even if halved, I think it would be a challenge to get the connectors through the grommet. Maybe doable but would hate to bisect a connector only to learned it won’t fit.
I am actually hoping @Dick_Wells chimes in. He is the one who ID’ed part number (C30670) for me (it does not show on SNG Barratt’s SIII sites) so he may have insight(s) on installation of it.
A single cut through the short side of the grommet does it no harm. You’d just twist it over the loom and the two other bits lock it back together anyway.
kind regards
Marek
1 Like
Craig, I would think there is a very good possibility you can stretch the grommet. I would try a tool like an external snap ring pliers.
If that does not work, it is very easy to remove the pins from the connector with the proper tool.
But if it were me, if stretching does not work, I would cut the grommet.
Tom
Tom
You maybe missed what I posted earlier:
Some others said to use a small screwdriver or pick to detach each wire from the block connector. As this slightly pixilated photo shows, the blocks are molded plastic with each wire embedded in the rubber:
I don’t know the 6-cylinder versions at all but believe the approach you are offering applies to earlier E-Types with open hard plastic connector that can be “picked”
Other photo’s above show the immensity of the stretch to get there from here. I may get one connector through the grommet with snap ring pliers widening the opening, but the other connector is ~right~ there.
I’ll take a close look at it in the next days and if it is feasible . Thanx
1 Like
Yes, i missed that they were molded.
Tom
Craig,
The Part number comes from “Jaguar XJ12 Parts Catalogue - Jun 73; Electrical Section, page 12.71”.
That’s the only “Jaguar” reference to the 3-piece harness grommet I’ve found. Why Jaguar didn’t include it with other manuals — will forever remain a mystery!!! There are other “like” items found in one parts manual but not in another model…
I’ve never tried to install a replacement on to an existing harness. It shows “Special Order” from both SNG and David Manners (UK) – but $$$$… If I were to do so it MAY be accomplished using a tool I found in my Military days - for Oxygen Masks. Again, I’ve never attempted to install one.
The tool is called an Elastrator. Widely used in the farming industry and numerous examples available on eBait! It was used to expand rubber components, allowing installation of wiring, etc. It works great with rubber grommets, etc. too.

Elastorator
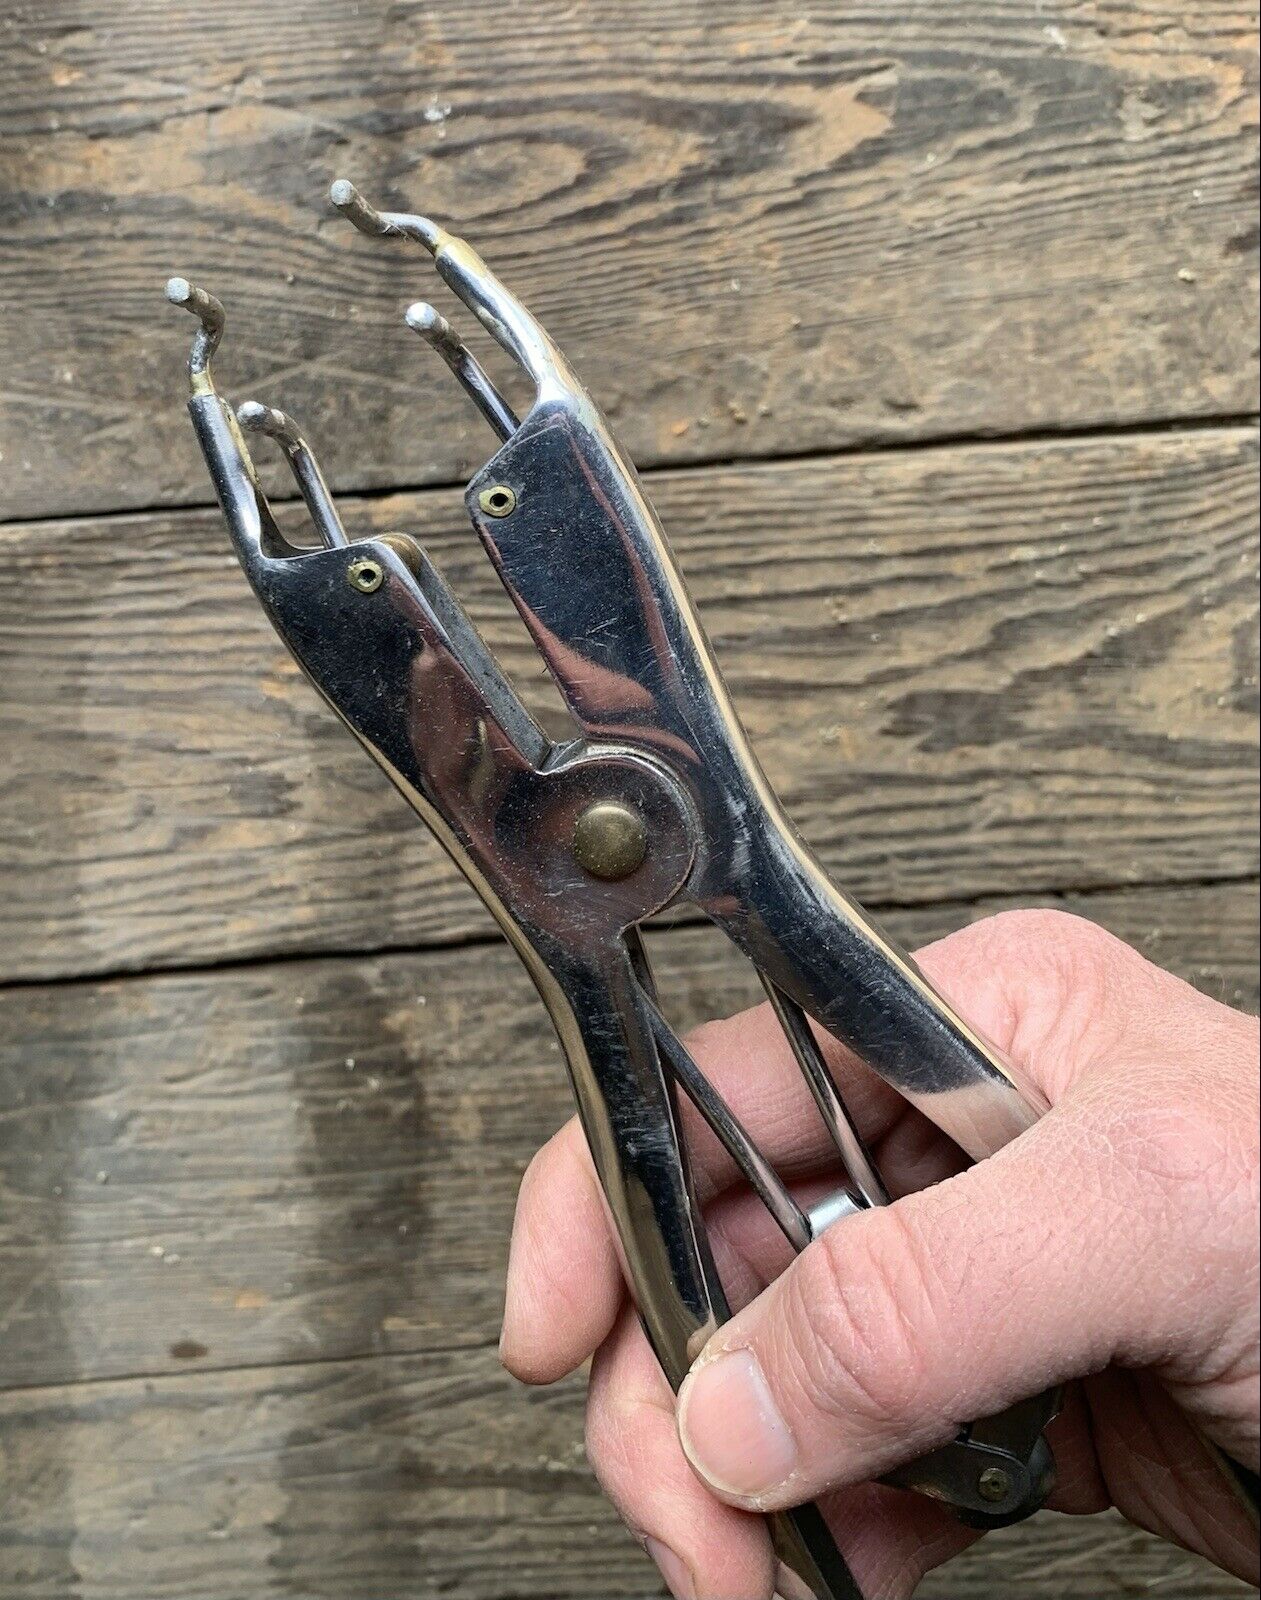
Elastrator - Expanded
Once the component (grommet, etc.) in fitted over the four prongs gently squeeze the handles which expands the prongs/grommet.
If I were to attempt to install a new Bulkhead Harness Grommet (C30670) I would first soften up the rubber by use of hot water. Next I’d apply a generous amount of lubricant (KY jelly) to the multi-pin wiring connector. When the grommet rubber is softened install on the Elastrator. Gently, very gently begin spreading the opening, just enough to force the grommet over the side of the connector. From there it’s just a matter of keep heating (in water) the grommet and continuing to slide it over the connector.
I would guess AutoSpark UK, the maker of most all E-type aftermarket wiring harnesses, installs the grommet before molding the connector. Just a guess…
Hope this give some insight on how it MAY be accomplished but, as I mentioned, I’ve never replaced one. The main consideration would be keeping the rubber pliable by heating in water (boiling). Just proceed R E A L S L O W…
Happy Trails,
Dick
Thanks, Dick! Added to my next Amazon order.
https://www.amazon.com/cart/smart-wagon?newItems=C06a2417b-ea52-431a-b991-cf685e5411ac,1
I can also use it if I want fresh mountain oysters.
![]()
1 Like
With that method they are not that fresh when they fall off!
1 Like
Dick - I knew you’d have a potential solution. Just to be clear - you’ve never done this yourself and this is just a recommendation. ![]()
Thanx – Amazon Prime is my best friend.
Nice way to side step the specific.
Most of the options on Amazon have this is the title: " CASTRATION BANDER". Most come with small, exceptionally stretchy rubber grommets. In a relaxed state, you’d be hard pressed to slide a knitting needle through it; expanded with the Elastrator, you could easily pass a good-sized walnut through it – or two. nod-nod wink-wink
Thanx again – I’ll report back on the success of my efforts
Craig
1 Like
Hi Craig,
Yes, I have not had the need to install a bulkhead grommet (C30670) on an existing harness. I have one or two aftermarket examples of the grommet set but located an OEM Bulkhead Harness - still in the plastic wrap.
As I found before when confronted with this problem there are two possible solutions (maybe more?).
First is the Elastrator. It MAY work.
The second is to cut the harness wiring at a point inside the bulkhead.

Possibly cut the harness wires where the cloth covering is worn or further towards the P-clamp
Slide the new rubber grommet on the harness then, one wire at a time, reconnect with shrink wrap over each wire. It will be time consuming to accomplish but is doable without risking a tear in the rubber grommet. If desired I believe Rhode Island wiring can recover the cloth covering.
Thanks for posting your progress. Following your every adventure…
Happy Trails,
Dick
Dick, ![]() this is me yelling “don’t cut the harness”
this is me yelling “don’t cut the harness”
I would slice through the grommet on the bottom and patch it with a bike tube patch. It’s JUST a grommet.
C.O.
3 Likes
Tom,
As I noted it was only a consideration. That would be a “Last Resort” type of situation to cut the harness. In either case something is going to be sacrificed and water entering a damaged grommet is really not good. Done correctly (to Aviation Standards) harness cutting and repair would probably yield the best results. On the other hand, if one doesn’t have a mastery of soldering, shrink wrap and such then the only other option is to “modify” the grommet and hope for the best! Damned if you do, damned if you don’t!
Thanks Tom,
Dick